A string of beads - is it so difficult? There are actually several ways to perform this masterpiece. Our article provides the most popular technique and a detailed description of the most popular type of weaving among craftsmen. Let's try to weave one like this?
What is needed to make a string of beads?
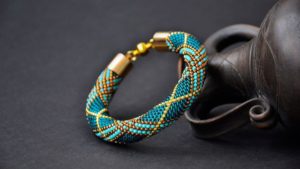 When working with beads, you need, of course, high-quality material. These should be even beads of equal weight. The only exceptions will be those models that must initially be made differently. You need a beaded thread for work, or fishing line. Needle (it should also be special for this type of needlework). When crocheting, accordingly, the hook is the right size.
What weaving methods are there?
There are many techniques with which you can weave strands of different thicknesses. The most popular were the following:
- crochet weaving;
- square weave;
- American technology;
- mosaic technique.
Below you will learn more about the mosaic technique for making a simple harness, as well as how to read the diagrams.
Choosing a bracelet weaving pattern
The bundles differ from each other not only in length, but also in width. You can make it, for example, 7 beads wide. Initially you need to decide on its width, then choose a print or pattern - depending on the selected parameter.
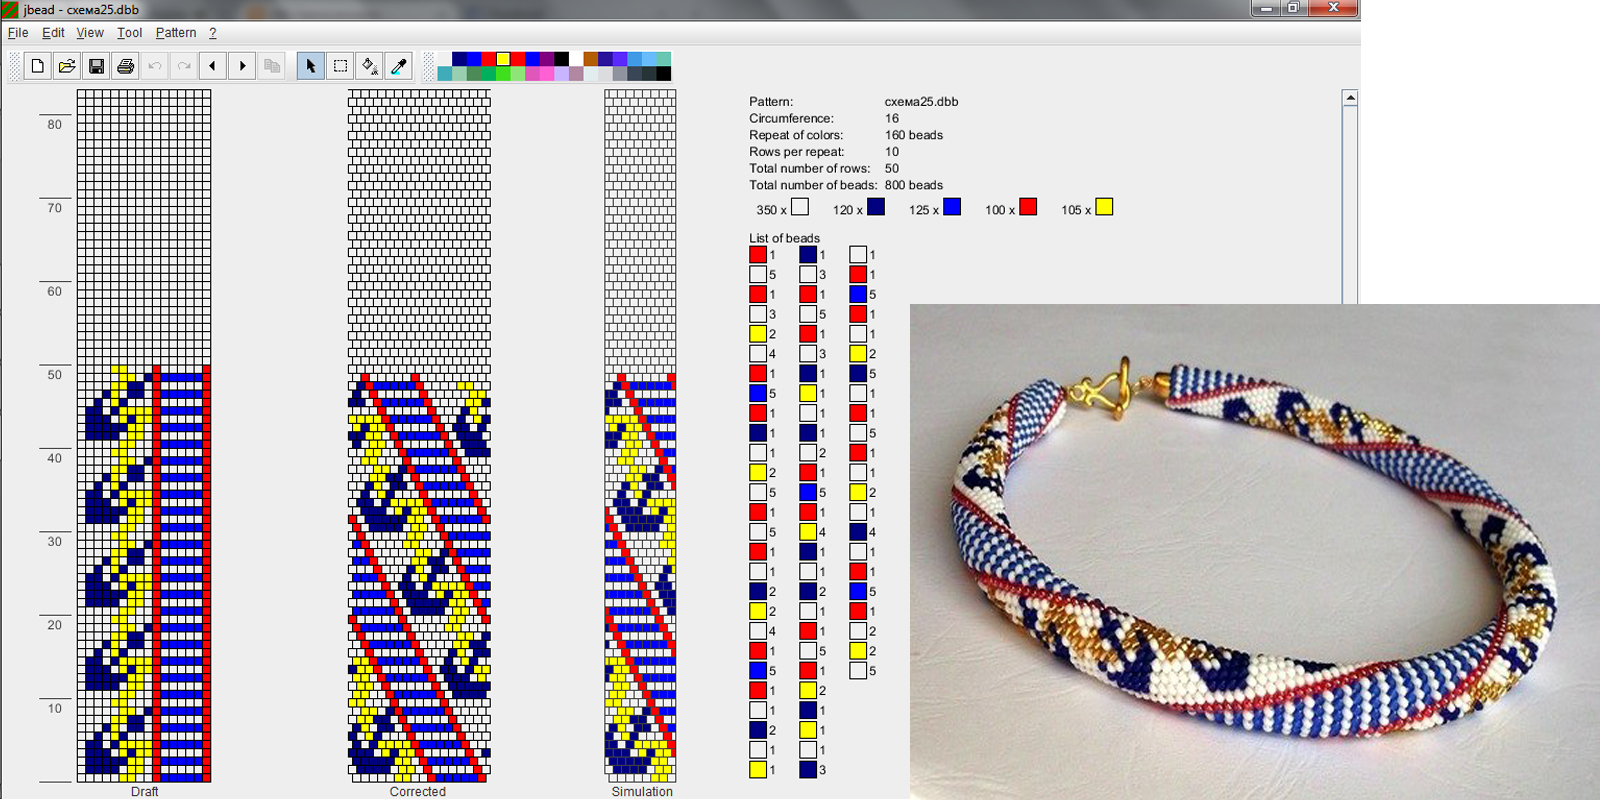
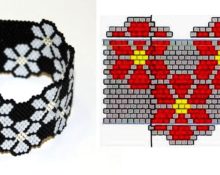
Here is a diagram for a rope 16 beads wide. It is also noted how many colored beads the rapport contains - there will be 160 of them. The repeat itself is equal to 10 rows.
How to read the diagram correctly?
 In the diagram at the very top, the line indicates the name of the resulting work. Reading the diagram is not that difficult. Each block in it has its own meaning. For example, the most “modest” number in the second line means the number of beads in a row. Or in simple words - the width of the harness.
The next two numbers display the repeat data: how many multi-colored beads it will contain and how many rows it will require. The first stripe indicates which pattern the artist chose, and it is displayed in a flat surface.
Next is the transformation for the spiral, and after that there is a part of the spiral that can be seen from one angle, without turning the canvas.
The most important ones will be thin columns of one square.. These are the colors of the beads and the sequence in which you will need to place them on the fishing line. There is a number next to each square - this means how much of that color is needed.
Weaving a bead bracelet step by step
Let's look in more detail at the pattern of weaving a rope using mosaic technique. 7 beads are taken for the width.
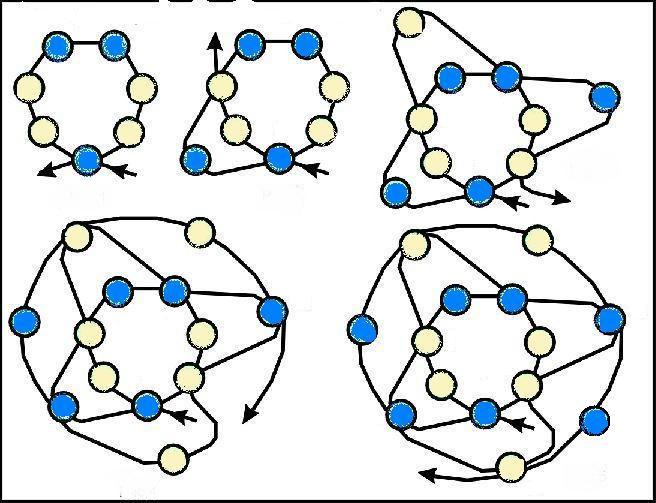
If someone is just learning this technique, then it is better to avoid confusion, mark the colors of the beads under the numbers on the piece of paper. For each of the 7 numbers in a row, it is better to choose a different color. You need to do this:
- Place 7 beads on a fishing line and connect them into a ring. Thread the fishing line into the last bead in the opposite direction of the ends.
- Fix one end, and one working part of the fishing line will be involved in the work.
- Insert one bead and thread the working end through number 3.
- Then again one bead and after 5.
- Again one and after 7. The circle is over and the next row will participate in the work.
- Further, the work is simplified by the fact that those beads through which you need to thread the fishing line will protrude slightly. They will be noticeable because they are the “owners” of the previous spiral row.
This continues weaving until the desired length. It is very convenient to place a round stick in the center of the bundle and tie it. This way the strip will be smooth and neat. For a novice master, in order not to get confused about colors, it is better to first try simple schemes or monochromatic models. Further, as you acquire skills, you can make diagrams in a special program, or simply draw them yourself.


 0
0