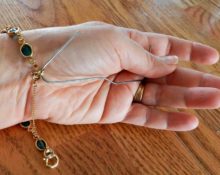
A beautifully made bracelet will highlight the thinness and shape of your wrist. Skillful work can be done by an ordinary woman at home. For an interesting product, you only need to purchase accessories with materials and carefully study the manufacturing recommendations.
Examples of what you can make a bracelet with your own hands
In addition to materials, you will need tools when working on a hand decoration. Most often, the need arises for a needle, thread, scissors, glue (work with a glue gun looks neater), a sewing machine and pliers. The latter must be very small, otherwise they will be useless at the stage of unbending the rings and forming loops from the wire.
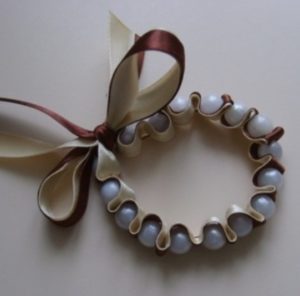
Made from ribbon and large beads
Required materials and tools:
 thread;
- ribbon;
- scissors;
- needle;
- beads.
Process of creation:
- fold the cut ribbon in half;
- insert a needle and thread into the bend (you need to go through both sides);
- use an accordion to string 3 folds of ribbon onto a needle and thread (to form folds, take the “snake” principle as a basis);
- insert a bead;
- alternate the previous 2 steps until the bracelet reaches the desired length (don't forget to check your wrist circumference);
- tie the edges of the ribbon with a bow.
Important! To make the idea a success, cut a very long piece of ribbon from the skein. Extra centimeters can always be removed, but the missing ones will have to be sewn on, which will ruin the appearance of the product.
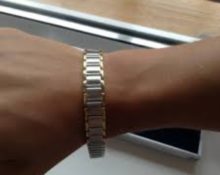
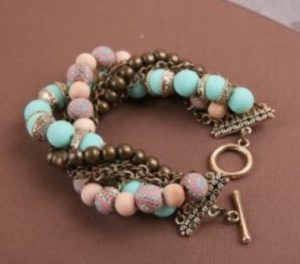
Made of metal bracelet and braid with beads
To make it you will need:
 thin metal bracelet;
- braid;
- glue gun;
- beads on a cord;
- scissors;
- thread (dense, better matching or contrasting in color with the shade of the beads).
The process itself boils down to gluing a cord with beads to a metal bracelet. After complete drying, the decoration is additionally tied with thread (give preference to complex weaving, this will turn out more impressive).
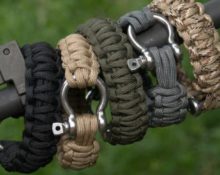
From beads and rope
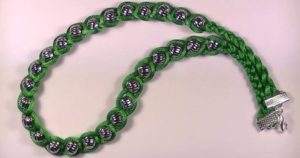 In addition to the above items, you will need a lighter and scissors. The rope of the required length is cut first, and the ends are singed second - after this they will not unravel. Then the beads are strung. They should alternate with knots tied on a rope. At the end of the work, a bow is formed from the free edges of the rope.
Another weaving option:
- fold a piece of rope in half;
- tie the second rope to the fold (at this stage there should be 3 laces coming from 1 point);
- start braiding;
- String a bead on every second rope in the circle.
Important! The bracelet shape requires round beads.
From pins with beads
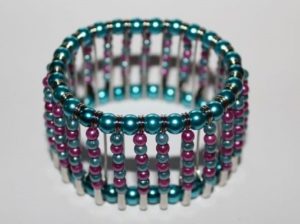 Buy a bag of beads (can be multi-colored), a package of pins (50–60 pieces) and a thin elastic band.Arm yourself with scissors and start stringing beads onto open pins. Once done, close the fasteners and cut off 2 elastic bands. Pass one through the top of all the pins, the second through the bottom hole. Tie the ends together and twist the pins so that the attachment points are hidden.
From lightning and rivets
Required items:
 rivets;
- zipper with large metal teeth (they just look more impressive);
- pliers;
- a thread;
- needle;
- rubber.
Algorithm of actions:
- use rivets to lay out the top and bottom sections of the zipper (after threading, the edges of the rivets are bent with pliers);
- sew the elastic to 1 free edge of the zipper;
- then sew to the second one.
The good thing about the resulting bracelet is that it can be worn with the zipper unzipped.. If the idea with rivets seems too crude, then they can be easily replaced with a thin chain. It is either sewn to the base of the decoration (by the links) or glued with a gun.
From iron lightning
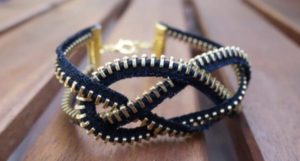
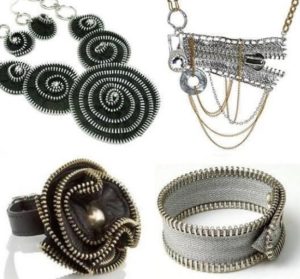 Divide the long zipper into 3 equal parts. The length of each cut should be such that you can wrap your wrist and still have a little left.. Select 1 piece and make it the base. Secure one edge of the base with a special fastener, which is sold in sewing accessories stores. Weave the remaining 2 pieces into a pattern (like a braid).
When the weaving is finished, the second end will also need to be secured with a clasp. If the fastener type requires a lock, accommodate it.
The same bracelet can be made differently. A long zipper is also used as a basis. It is first cut in half, and then 1 of the sides is again cut into 2 equal parts. To work you will need 1 short piece and 1 long piece. The short one will become the base, and the long one will need to be wrapped around the end of the short one.After this, you will get 3 ribbons of equal length. They are also braided and finally placed on a clamp.
Important! After wrapping the long piece around the short one, do not forget to secure the resulting structure. Otherwise, at an early stage of braiding, parts of the braid will move.
The resulting bracelet looks nice due to the shine of the metal teeth and the black-silver contrast. If the effect seems too boring, use rivets or some other silver fittings.
Out of the bag
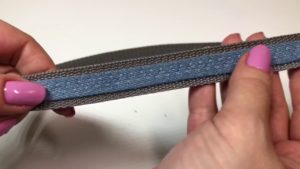 A beautiful bracelet can be made from the handle of a leather bag. Only do not take shabby things, the accessory and its part must not be worn out. Tears and abrasions simply will not allow you to create an attractive decoration for your hand.
In addition to the bag, you will need thick fabric. When choosing a material, keep in mind that it is used to wrap the handle, and it will become the front side of the decoration. Rings (slightly larger than the circumference of the handle) and any decorative elements you like will also be useful in your work.
Important! To make the bracelet harmonious and interesting, before starting to create it, draw a sketch on a piece of paper. Then you will know exactly what decorations you need and in what quantities.
Algorithm of actions:
- cut a piece of the required length from the handle (should cover the wrist);
- wrap the fabric around the handle, determine the required cut dimensions;
- add 1 cm to the obtained values;
- According to the measurement, cut a piece of fabric;
- sew the fabric, retreating 1 cm from the edge (the seam should be on the wrong side);
- turn right side out;
- insert the bag handle into the fabric part;
- string several rings onto the resulting structure (if you choose the right size, you won’t have to attach the rings - they themselves will sit tightly on the base of the bracelet);
- sew the ends of the structure (or attach a fastener with a lock);
- complete the decoration of the bracelet by placing various beads, rhinestones, stones and figures on the former handle of the bag.
Important! If you don’t have an interesting and suitable material at hand, but you have leather paint, then simply paint the workpiece in some cheerful and noble shade.
Made from elastic and buttons
To create, take:
 buttons;
- linen elastic;
- scissors;
- corner thread;
- measuring tape.
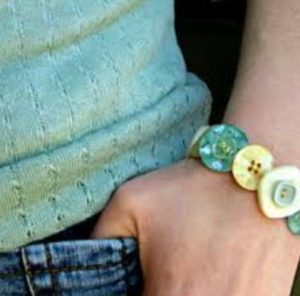
Manufacturing begins by measuring the circumference of the wrist. This step will help you decide how much you need to cut from a skein of elastic to form a bracelet. However, the number is not finite, since several centimeters are added to the resulting value. This increase subsequently goes to the closing seam.
Next, in accordance with the results, the required amount of elastic is cut off, and the free ends of the resulting workpiece are sewn together by overlapping. That's it, the preparation of the base of the decoration is completed. You can start decorating.
There are no secrets to successful placement of buttons, so you will have to be guided by your own taste. If this type of fittings seems unattractive, then dilute its monotony with tiny pendants.
From an old belt (without buckle)
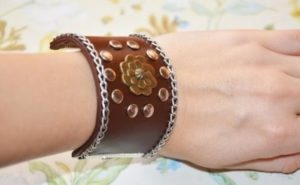 The fastening mechanism remains the same, and everything unnecessary is cut off from the base. Excess in this context is skin that is larger than the girth of the wrist. Petals are cut out from the unnecessary part - 5 pieces per 1 flower. Then, with the help of a needle and thread, the petals are collected into a bud, and the place of their connection - the core of the plant - is embroidered with beads.
Having made 1 flower, attach it to the base of the bracelet and determine the required number of buds. The decoration concept requires that the entire surface be covered with plants.
If the belt originally came with a pressed pattern, then you can do without cutting out flowers. Just paint the ornament with specialized paints. By the way, if you wish, you can create the design yourself, but this requires minimal leatherworking skills and a steady hand. Otherwise, the pattern will have different depths in different segments.
If you have the desire and time, decorate the top and bottom edges of the former belt with stitches. So that the machine can pierce the leather, use an awl to make holes in the former belt in advance, and then simply stitch these holes. If you are afraid of making a mistake with the length of the step, then before working with an awl, pass the workpiece through a sewing machine that is not threaded. There is no need to insert the needle deeply. It is enough to leave indentations visible to the eye.
From nuts
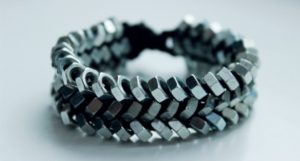 You will need a rope and a scattering of nuts. You need to cut a long piece from the skein, fold it in half and tie a second rope to the fold. As a result, you will get 3 laces approximately equal in length. They are braided into a braid, with a nut placed on each side rope. At the end, a knot is made or a fastener is attached.
Figure-of-eight bracelet made of leather and beads
Required tools and materials:
 pen-pencil);
- cardboard;
- leather;
- a thread;
- needle;
- beads;
- button;
- braid for loop;
- scissors.
Sequence of steps:
- draw a three-dimensional figure eight on cardboard;
- cut (here we get a template);
- draw several figure eights on the skin along the contour;
- cut out;
- fold “8” in half;
- insert another figure eight into it and so on in a circle until the bracelet blank reaches the required length;
- insert a needle and thread through one end of the woven decoration and pull them to the first inner hole of the former figure eight;
- string a bead (it should lie in the middle of hole “8”);
- repeat the previous 2 steps until all the holes go together with the beads;
- form a node;
- sew a button to one edge of the product;
- attach the braid to the second edge and form a loop;
- in this case, the button and the loop to it should cover the knots from the thread on which the beads are strung.
An even more durable option is obtained from a thin fishing line, but without the skills to handle it and leather, it is easy to ruin the bracelet. Therefore, stop with regular thread.


 thread;
 thin metal bracelet;
 rivets;
 buttons;
 pen-pencil);
 0
0