Working with silicone rubber bands has found a response in many hearts not only of children, but also of adults. There are craftsmen who even weave their own clothes. This type of needlework gained popularity due to the fact that it is quite an exciting activity. Absolutely anyone can learn it - both children and adults. To do this, you do not need to have any special professional skills.
When starting your work from scratch, be prepared for the fact that you will have to be patient and persevering. And, having already gained experience with simple products, you will be able to please yourself, your family and friends with masterly wicker things. In this article we will talk in detail about how to learn how to weave such bracelets if you have never done this before.
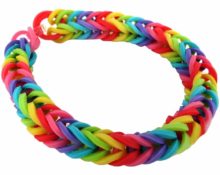
3 patterns for weaving fashionable bracelets from rubber bands.
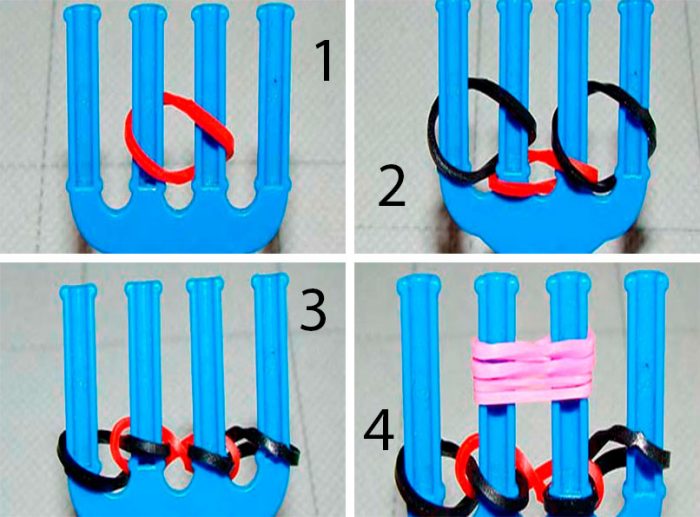
Simple braiding, for this you need to prepare two colors, a hook and a special slingshot.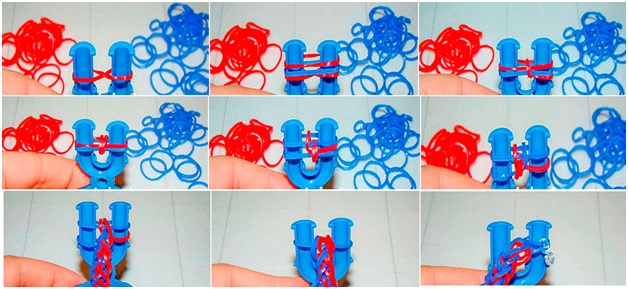
- Always hold the slingshot in your left hand when weaving.
- Then, having crossed with a figure eight, put the first elastic band on the posts, and then two more, but in a simple way.
- In this case, you must alternate colors.
- Hook the bottom one to your left and remove it from one half of the slingshot.
- Place it between the horns.
- Now do the same with the side to your right.
- Throw the next one in line, but of a different color, over these horns, then perform the previous operations, throwing them over and adding new ones, alternating colors.
- Continue knitting this way until your multi-colored braid reaches the desired length.
- After this, hook the hook so that the loops do not unravel, and tie the finished product on your hand.
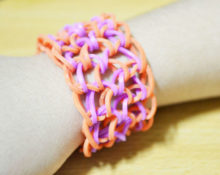
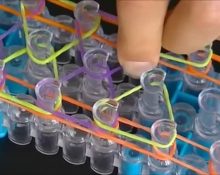
Diagram of the “Dragon Scales” bracelet on a three-row machine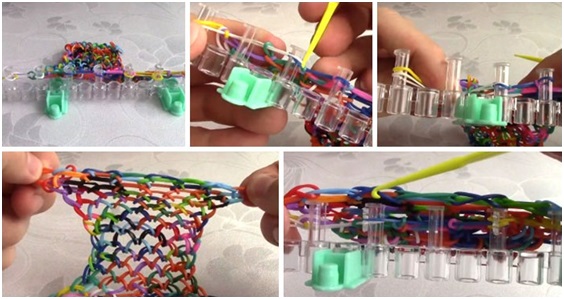
- To knit such a product you need to move one post.
- Next, you need to put two elastic bands on each protrusion, preferably of different colors.
- It is best to start weaving from the very bottom row, here you will start from the first stump, but in the second row you will start from the horn that you shifted to the left.
- Then place the silicone blank on the first post of the second row, on the third in the last row and on the middle one in the third.
- Thus, you need to ensure that the first two rows are filled.
- After this, turn your machine.
- Now place the elastic band twisted twice on the protrusion of the machine in the middle in the outer row, and remove the one from below from it.
- Now you need to throw it over the fastening post, but from the other side.
- Then you just need to repeat this removal and putting on until you get the desired length.
- To be able to put it on, secure the loops with special plastic hooks.
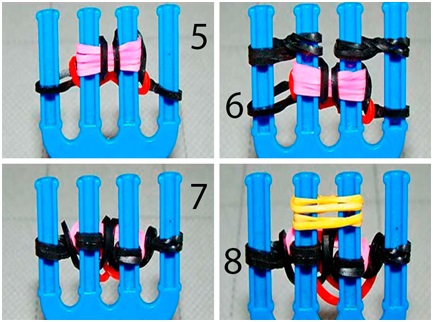
Double "Dragon Scale" on a slingshot
For this pattern you will need a four-arm slingshot, a hook, a fastener and patience.
- Place an elastic band twisted in a figure eight over the middle horns.
- Place two further ones of a different color in a figure eight on the outer posts, and tilt the first one back.
- Now put two more on the middle two horns and wrap them twice.
- Then you need to discard the previous ones.
- Twist the next folded one twice and put it on the posts on the right, and do the same actions with the left posts.
- Throw the bottom row over the horns.
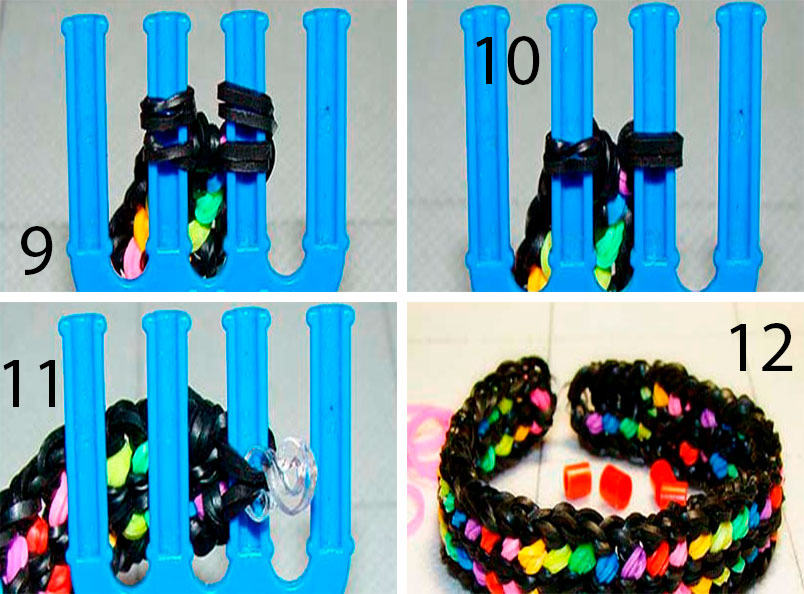
- Then, by analogy, continue weaving to the desired size.
- Once finished, attach the holders and fasteners.
- The work is ready, you can safely put it on.
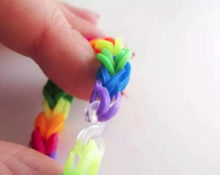
Step-by-step lesson on weaving bracelets from rubber bands for children
At the beginning of the lesson, take a slingshot and put a twisted silicone blank on it. Take the second one in a different color and dress it in the usual way. Place the third one as usual. Take the hook and hook the bottom elastic, pulling it a little. Then you simply throw it over the horns of the slingshot. And also do it on the opposite side.
Next, put on the next one of a different color in the usual way and cross the previous one with a hook. You need to continue these manipulations until you achieve the desired length. Once completed, secure the edges with plastic hooks, which will also serve as clasps for your decoration.
To finish the job, you just need to throw the last elastic bands towards each other and secure the hook.
Remember! That it is important not only to alternate colors, but also to choose them correctly, otherwise the end result may disappoint you. Black and white colors go well with all the others, but yellow doesn’t look great everywhere.
As you can already see, there is nothing complicated in making jewelry from silicone rubber bands.And having understood and mastered the skills, you will be able to create not just colorful things, but with a meaningful design. This technique is a bit like macrame, but much simpler. When doing such things, be sure to invite children to join you; this activity will help develop imagination, spatial thinking and instill a sense of perseverance.
 0
0