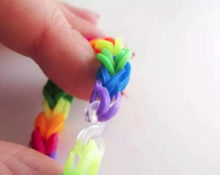
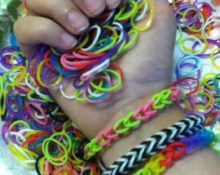
One of the most interesting and exciting creative options is weaving. It includes a huge number of species and subspecies, which differ from each other in different parameters, complexity and the resulting result. Currently, a type of weaving on a machine is gaining popularity. What is it and who is it suitable for? You will learn about all this in this article.
The principle of weaving on a machine
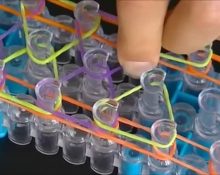
A special feature of weaving is the use of special additional equipment - a machine. Special elastic bands, hooks and fasteners are used with it. The complete set necessary for creativity can be purchased at any specialized store.
Important! Please note that many kits additionally contain easy circuits that can be used at the initial stage.
Machines are divided into professional and children's. Their difference is obvious: children's ones are smaller and less functional, so that little craftswomen can easily use them.
The principle of operation of this method is quite simple: small rubber bands are put on the machine using a hook, after which they are intertwined several times depending on the size of the finished product and its width etc.
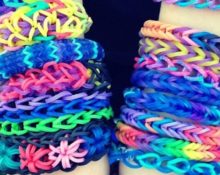
This entertainment has aroused wide interest among children and teenagers, and this is not surprising. The resulting bracelets can be combined with a huge number of looks. Let's look at some great ideas that can be easily implemented using a machine.
We choose the following machine:
A simple bracelet made from rubber bands on a machine
First, let's look at one of the simplest bracelets that anyone can weave - even if you have never done anything like this. This option is suitable for beginners and will be pleased with the result.
To work you will need:
- machine;
- S-clip for connection;
- hook;
- 26 rubber bands of any color.
Master Class:
 The first step is to position the machine so that its closed side is facing you, and its columns are staggered. If this is not the case, then correct the situation yourself by removing the fastenings on the sides. After this, prepare the elastic bands and arrange them in the correct order depending on the color combinations.
- Then put the first one on the posts of the first and second row (which is slightly extended in relation to you). The second one is put on diagonally from the first right column to the second central column. The third is also diagonal to the second one to the right from the central one. Thus it is necessary to position the rubber bands to the end of the machine. The elastic band is put on the last one in a figure eight fold. Now turn the machine around and take the hook.
- It is inserted into the middle of the column and grabs the bottom elastic band, which must subsequently be put on the column from which it was pulled. Thus, you need to perform actions with all the other rubber bands. After this, grab the end with a clip and use it to remove the elastic bands from the machine. Then straighten the loops so they don't get tangled. A simple bracelet is ready!
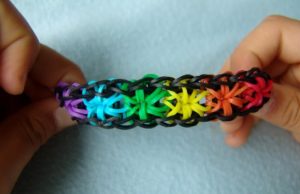
We weave a “Star” bracelet on a machine
Now let's look at another version of the bracelet, more complex. The materials you will need are exactly the same, but the color scheme of the rubber bands must have at least two colors.
 The first step is to position the machine so that the bulges of the posts are facing you. Then make sure the rows are staggered. After that, take an elastic band of the first color and put it on the first two columns of the left row and the one in the middle. The same must be done for the right row.
- Now we take a rubber band of a different color and place it in the same way, but on the following columns. Now put them on clockwise, forming a star. After this, you can make another one if it fits on the machine. On the last column of the middle row, put on an elastic band of the first color, folded in half and in a figure eight. The same ones need to be placed on the centers of the stars and on the opposite column of the central row.
- Now turn the machine around and take the hook. With its help, you need to process the stars - first put the base of one of them on the base of the second, and then stretch each elastic band to the column from which it was pulled. Now you also need to go through the rubber bands of the first color. This is exactly what you need to do with both outer rows to the end of the machine.
- After this, form a loop by pulling half of the elastic from the outermost column of the central row.Use it to remove the bracelet from the machine.
How to make a “Dragon Scale” bracelet on a machine
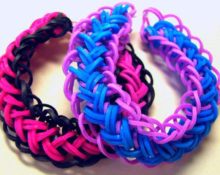
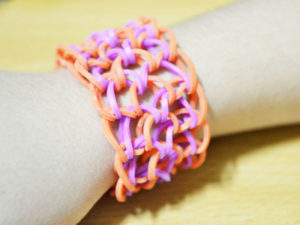
This bracelet differs from others not only in its original appearance, but also wider size. We perform the following actions:
 The first thing you need to do is put four rubber bands of the same color in a figure eight on the posts one after another (1 and 2, 3 and 4).
- Three more rubber bands of the same color are put on as if on top of the stretched ones. (2 and 3, 4 and 5, etc.).
- In those places where 2 elastic bands have formed, remove the bottom one using a hook.
- In the same way, rubber bands of a second color are put on the same posts.
- The lower ones are reset again.
- New 3 elastic bands of the first color are put on. Thus, it is necessary to weave the bracelet to the desired length.
- After this, all that remains is to complete the weaving, remove it from the loom and fasten the clasp. Dragon scales are ready!
How to knit a “Triple” bracelet on a machine
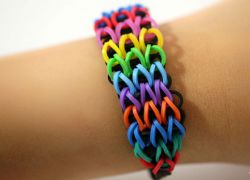
Another interesting bracelet option is “Triple”. Let's look at the instructions for weaving it.
 The machine is installed so that its posts face the arrow away from you. After this, you can put the first three elastic bands on the first two columns of each row. In the same way, put elastic bands of two other colors on the second and third posts, respectively.
- We take rubber bands of a different color, for example, black, and stretch it through the columns of all three rows so that a triangle emerges. note that first columns are skipped. In this way we work until the end of the machine.
- We turn it over to the other side towards us and begin weaving. Using a hook, grab the bottom edge of the first elastic band and pull it onto the post from where it was pulled.We perform the same actions with the remaining triangles until the end of the machine. Now we place three more elastic bands on one middle post, after which we pull them through the loop of the triangle elastic band.
- After this, all that remains is to remove the bracelet and add a clasp to it. The triple rubber band bracelet is ready!
The excellent result obtained as a result will delight not only the master himself, but also everyone who pays attention to the products. These bracelets are an excellent gift for any holiday for a loved one, as well as decoration for a home or apartment.


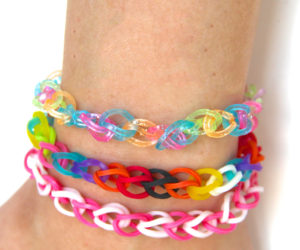
 0
0