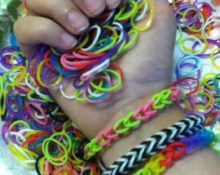
Are there people in the world who don't like cats? Every home has one or two pets, and sometimes more. Tenderness and grace are the full embodiment of these gentle purrs that give us warmth and are a real anti-stress. Therefore, we often depict them on clothes, accessories, and interior items. Girls especially love handbags in the shape of cats and bright jewelry with their imitation. We will tell you how to weave a bracelet with a cat for a child in this article.
Making a bracelet with a cat
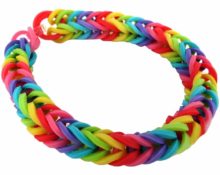
First you need to create the bracelet itself and the kitten separately. We will tell you about the simplest methods of weaving with improvised means in case you do not have a special machine or slingshot.
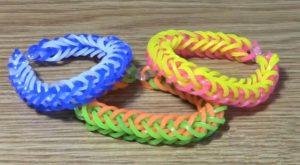
Making a bracelet from rubber bands
In the absence of a machine for weaving baubles you can tie them on your fingers or an ordinary table fork. We invite you to try both options. To do this, prepare elastic bands of available colors. We will name those that are used in our master class.
Method 1
 Take two yellow rubber bands and put them together.
- We twist it in a figure eight, put it on the middle and index fingers, and fix the plastic hook-clasp in the middle.
- We put two green ones on top of them and, hooking the yellow ones with a hook, remove them.
- The next step is the pink ones, and then crochet the green ones. And so on until the end, until the length of the weave is equal to the volume of the wrist.
- The last elastic band clings to the second part of the clip and you get an unusually cheerful bright bracelet.
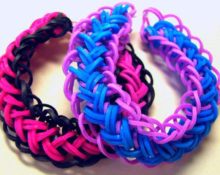
Method 2
Another version on a regular four-prong fork is also worthy of attention.
- Fold one rubber band of any color in half and pull it in a figure eight over two teeth located in the center.
- And we also twist the next two and place them on paired cloves along the left and right edges.
- We throw those in the middle over the upper teeth back.
- Now, without twisting the folded one, we again stretch it over the two central ones. And we throw those that are located under it back again.
- We do the same on the sides. And so on until the end, 2 rows of each color. You can use a toothpick, as your fingers quickly get tired from tension. The wider the color palette, the more original the product will look.
Weaving a cat from rubber bands
To make a funny sleeping kitten using the amigurumi technique, we will need a minimum of items:
- silicone rubber bands in orange and brown colors (can be replaced with other suitable ones);
- crochet hook No. 3;
- small black button;
- padding polyester or holofiber (in general, any filler).
We start weaving from the body and gradually do all the other parts of the body:
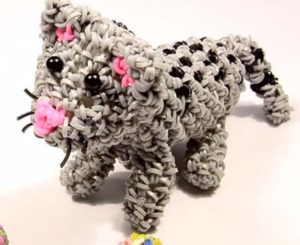
 Torso. We collect 6 loops from elastic bands. We connect it into a ring. In the second row we knit them with an additional elastic band through one, we get 12 loops.Next we weave 4 more rows with the same amount. We begin to decrease so that we get 6 loops again, connecting 2 at a time. We weave another row of 6 loops. We stuff the body with filler and give it an oblong shape. We connect everything and close the row.
- The head weave also opens with six elastic bands. On the second round we double them. We complete the third row through one loop, the fourth through 2. As a result, we got 24 loops. We continue to weave four rows without changes. To give it a spherical appearance, decrease in the reverse order - first every third elastic band, the next circle - every second. When 12 loops remain, fill the part with padding polyester. And again we reduce it to 6, and then close the circle. We make a nose from a button, and closed slits from two brown elastic bands.
- Now it's time for the ears. We assemble a ring of 4 loops, turn around and make two in the outer loop with an elastic band. We again insert one elastic band into the next edge loops. To secure it on the head, the ears are supplemented with another elastic band and secured with knots.
- We make a ring from 6 brown rubber bands. Orange we weave paws 5 rows. We connect them with each other and the body. We attach the head to the body so that it rests on the paws.
- Tail also starts with 6 loops, which double in size. First, the brown tip is woven, then 5 rows are used with orange elastic bands. We reduce it again to 6, tying 2 elastic bands into one, and close the part by attaching it to the back of the cat.
I must say that the cat will not be small at all. If the craft is intended for children, then, accordingly, you will have to reduce the number of rubber bands. But first, try the described option.It can be used as a keychain or backpack pendant.
Methods for connecting a figurine to a bracelet
To complete the work, you need to connect the finished bracelet and figurine. This can be done in the following ways:
- weave a short braid or fragment from rubber bands, similar to the pattern of a bracelet, and hang a cat on it;
- buy a ready-made carabiner for jewelry, which is sold in stores selling handicrafts;
- fix with superglue.
Thus, using available items, we will create a cute, original decoration that will delight your little princess. And the work process itself will be pleasant and interesting. Happy crafting!


 Take two yellow rubber bands and put them together.
 Torso. We collect 6 loops from elastic bands. We connect it into a ring. In the second row we knit them with an additional elastic band through one, we get 12 loops.Next we weave 4 more rows with the same amount. We begin to decrease so that we get 6 loops again, connecting 2 at a time. We weave another row of 6 loops. We stuff the body with filler and give it an oblong shape. We connect everything and close the row.
 0
0