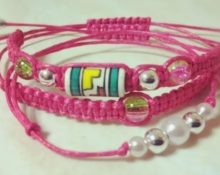
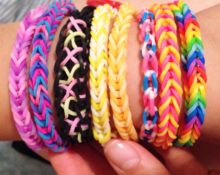
Very bright and original wicker bracelets have become quite popular recently among both children and adults. A variety of weaving methods and colors allow you to create an elegant item with the addition of decor in the form of beads, seed beads, and various pendants. And the pleasure received from the work process will lift your spirits for the whole day. In addition, handmade crafts carry positive energy.
If you have a desire to create this colorful accessory, read the article below. It offers several patterns for weaving jewelry for men, women and children.
Features of weaving cord bracelets for beginners
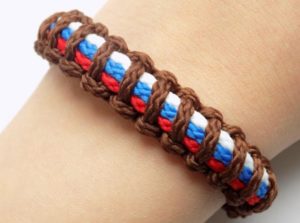 Baubles from this material are made in plain and colored ones. Materials can be purchased at stores selling haberdashery, accessories and fabrics. There are leather, velvet, satin, nylon and twisted waxed threads. The founder of this type of needlework is the macrame weaving technique..
For those who have never created such bracelets, We recommend starting with the simplest models. They are no less attractive than complex weaving. Even a child can cope with them. Simple nodes are used in the work. Such as flat square or “Turkish head”. The work will take a minimum of time when using the most ordinary base, but the result will exceed expectations.
You can start learning from hand-twisted floss threads, and then purchase more practical materials.
Knots we use for weaving
Now let's look at existing weaving patterns that can be used in the creative process.
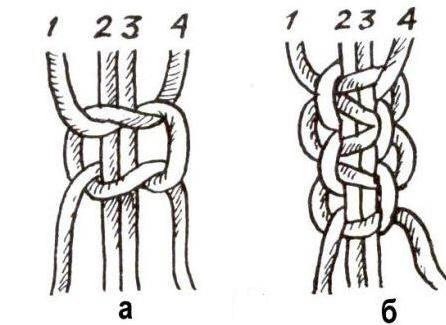
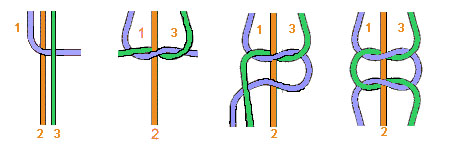
Double flat
The most widespread type of weaving. It also has other names - square, encircling and double half-knot.
Important! You must first measure your wrist circumference for a loose or tight fit. Do not forget that the measurement is taken taking into account the width of the fastener.
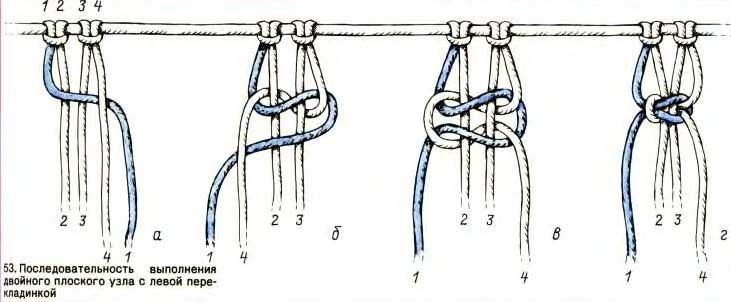
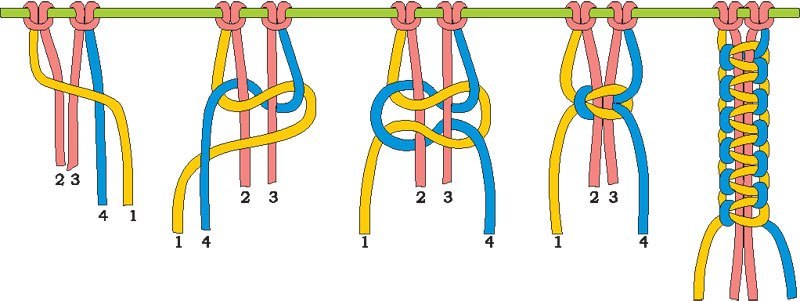
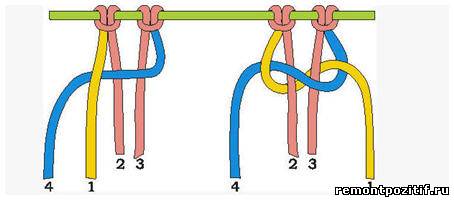
- On some ledge or hook, fasten two threads one meter long with a knot. In this case, one end should be 80 cm, and the other 20. The short ends will serve as the base, which is braided with side threads.
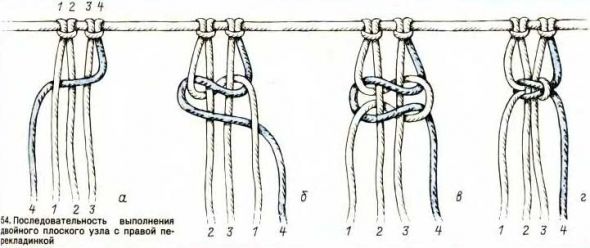
- Weaving begins on the left side, when the thread is laid on top, and then the right one braids it. In this case, it is passed under the short ends, and comes out between the left short and long.
- Tighten the knot.
- On the right side, the same is done in a mirror image.
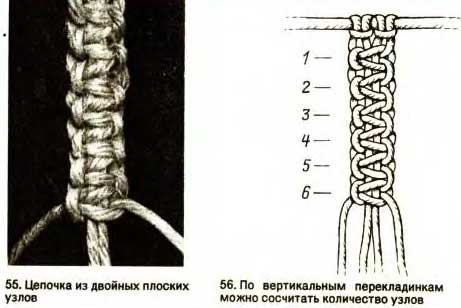
- The knots are placed tightly to each other, then the chain is smooth and strong.
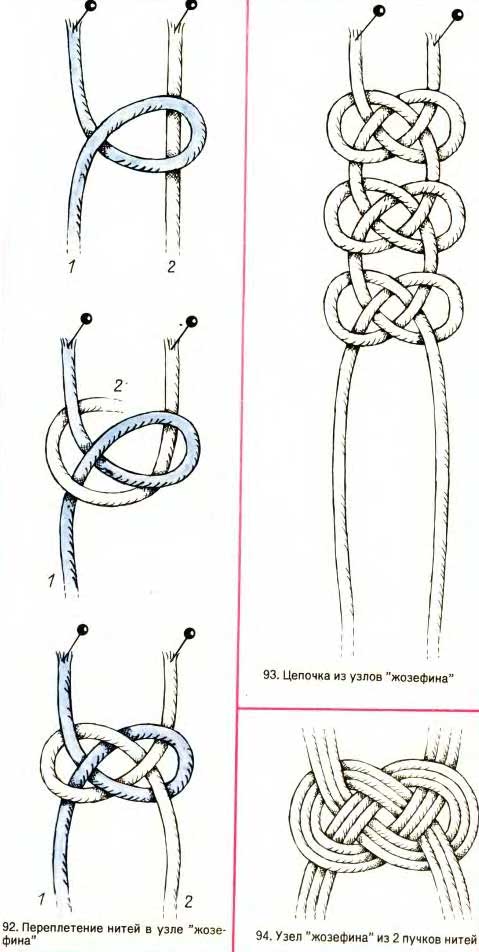
Josephine
It is also called a “bow knot”. It looks more gentle and elegant.It is made of thick and rigid rounded cords, so the finished product looks very neat. Usually used in individual fragments of a pattern. The number of threads is taken equal to multiples of. The more there are, the wider the craft will be.
It is more difficult to weave than the previous one due to the instability of the pattern; therefore, when tightening the loops, it is advisable to ensure that they do not move. To begin with, you should learn on some tight rope.
- One of the ends is folded into a loop and placed on the other.
- Now place the second one on top of the first one, and then go under it.
- Lower the second end into the right loop, passing under it, and placing it again under this loop. We get a left loop.
- We pull both out to align the pattern.
- We continue knitting knots until the end of the chain.
Tatting
An example of this is shuttle lace.
- Air loops braid the main threads along the entire length. Depending on the direction in which the fastening occurs, it can be left or right.
- Fasten the thread to a clasp with two ends - short and long.
- While pulling the short thread with your hand, make a knot with the other, wrapping it around it from bottom to top and passing it forward.
- The next knot is made behind the main thread, wrapping it from the bottom up and coming out from under the working thread.
Attention! In this method, the auxiliary thread should be 8–10 times shorter than the working thread.

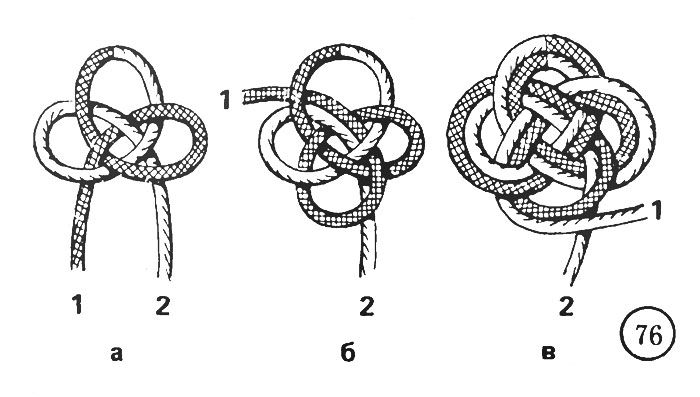
Turkish
One of the types of sea knots that are used in decorative needlework. The peculiarity of this weaving is that it is performed using the Josephine knot.
- We make the first loop and fasten it to something.
- We tie a Josephine knot under it and we get three loops.
- Using the end of the thread, add another one and use it to braid all four loops in the second circle.
Attention! You can weave a women's or men's bracelet in the round from plastic laces without a fastener, using any cylindrical piece equal to the volume of the wrist.
Celtic
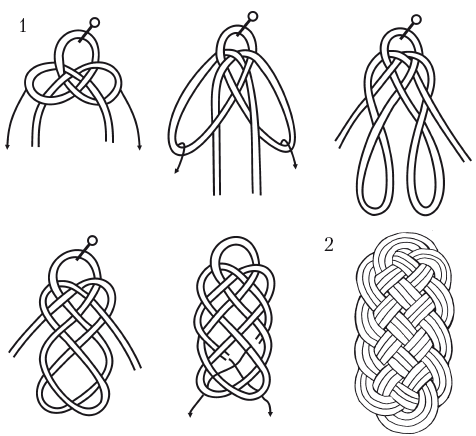
Quite famous for its use in Christian manuscripts and monuments. For example, it was used in the ornaments of the manuscripts of the Holy Gospel and the Book of Kells.
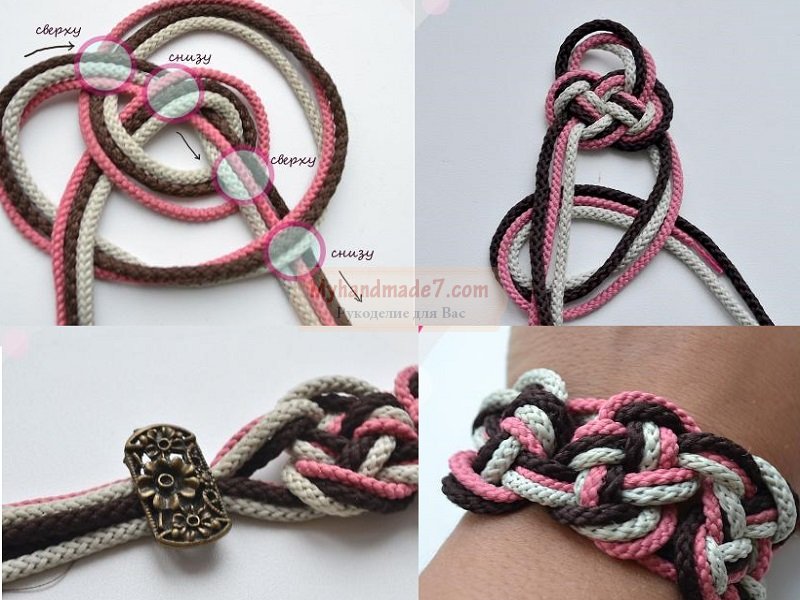
You can make only one openwork element and tie the ends of the cord on your hand. It is woven in the form of figures of various shapes - round, square, triangular. It is made both from one color and multi-colored in several folds.
- We create a loop at one end and pass the other through it. The result is a shape like a heart.
- Using the same elongated edge, we go one by one inside all the rounded parts.
- We make the same turns on the reverse side until the entire internal space is filled.
How to weave a bracelet?
We have described the basic weaving techniques used in making jewelry. They are used in various accessories that have both a classic, strict look and a formal, elegant look.
Cobra
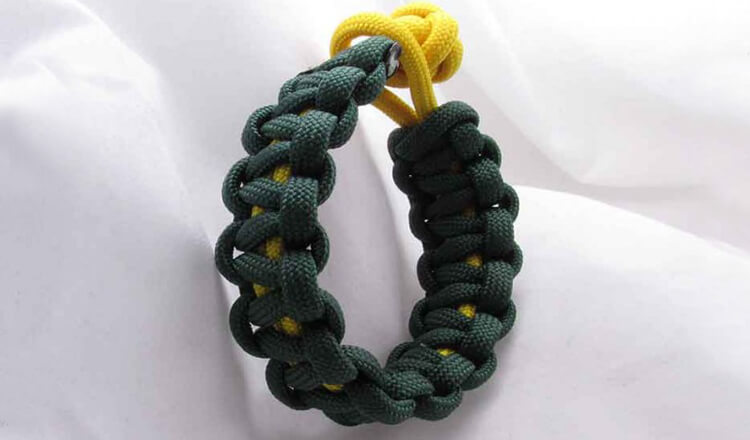
We will need paracord - a lightweight nylon cord in two neon colors. AND the brighter it is, the more interesting the thing looks. For example, these will be green and purple.
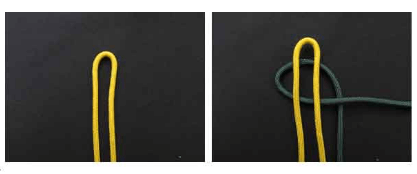
- Fold the green one in half.
- We have a loop formed on top. This is a fragment of the future fastener. You can make it in the form of ties or attach a metal one.
- We wrap it with purple cord so that both ends are on the left.
- We wrap the top half around the bottom, bringing the end of the rope to the right. It turns out that the knot wrapped around the green cord, while being located on the left side.
- And then the actions are repeated exactly so that purple nodes were located on one side and then on the other alternately.
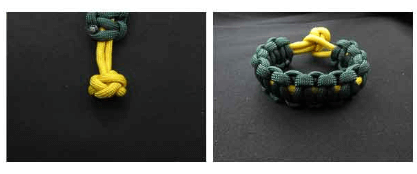
- At the end we make a thick knot, which is inserted into the loop made at the beginning of the work.


With beads
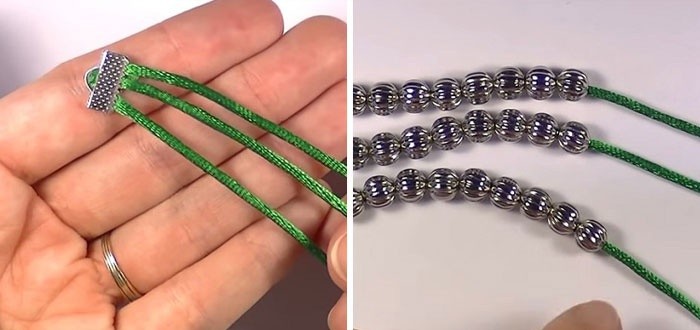
For this you will need:
- carabiner for fastening;
- three meter lengths of satin cord;
- round beads;
- 2 limit switches;
- 2 connecting rings;
- Super glue;
- pliers and round nose pliers.
We do this:
- Apply glue to the inside of one of the end caps.
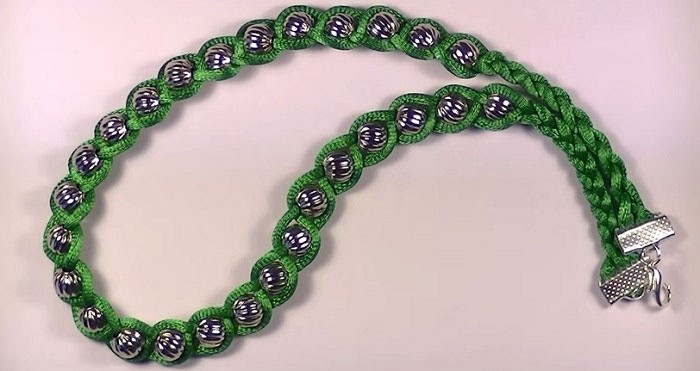
- We insert all three threads into it at the same time and clamp it with pliers. On the other hand, we thread the beads into the left cord, securing them with a knot at the end.
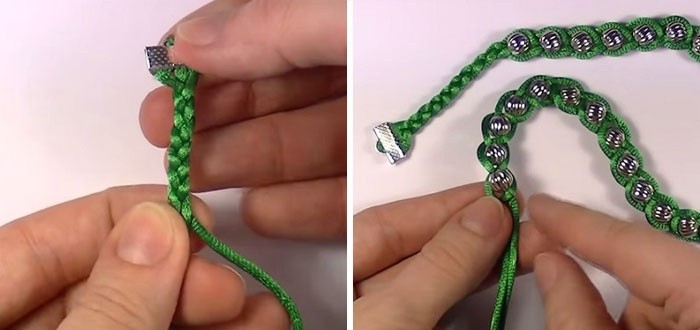
- From the fastener side we braid a regular braid 5–6 cm long.
- We insert a bead from the left extreme segment, bending it around with the right lace. We continue until they run out.
- Next we braid the braid again. We cut off the edge and glue it to the second end.
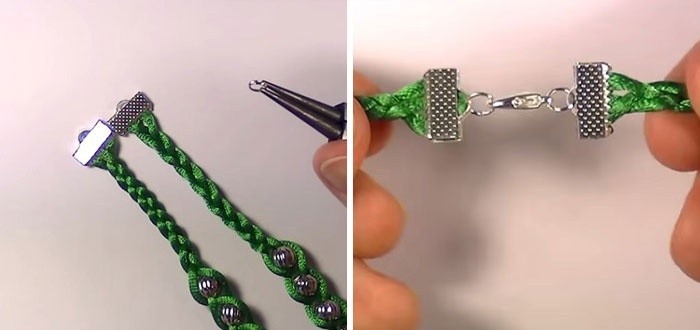
- We open the connecting rings and thread them through the carabiner loop.
- We string them onto the end switches and close them. You can wear the bracelet in several layers, using beads and cords of different colors.
For a man
This look is done voluminous and multi-layered. Let's prepare two types of laces: blue and black, four wrist sizes. We make a loop on the green one, bending it in half. Typically, bracelets are made of natural, artificial leather, waxed cord of one color or two colors. For work we will need:
- two cords;
- large metal bead for clasp;
- scissors.
Work process:
 We put the cords together, bending them in half.
- At the bend we create a loop, on top of which we fold another. There is space between them.
- We bring both edges of the left cords under the right ones, insert them inside the loop, bring them out to the middle and insert them into the left loop from above.
- Tighten, carefully straightening the cords with your fingers.
- Again we fold the left cord, placing the right one on top.
- We repeat the previous steps until we reach the end.
- Tighten the knot, gather all 4 ends together and thread them into the bead.
- After dropping a drop of glue, insert the knot into the hole of the bead. Protruding ends can be trimmed or left for decoration..
Bracelet - braid
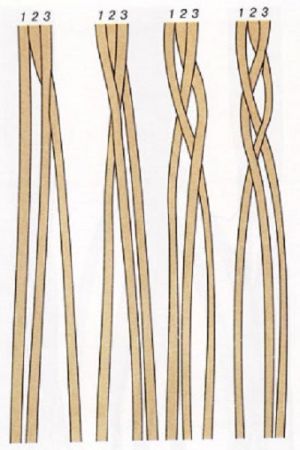
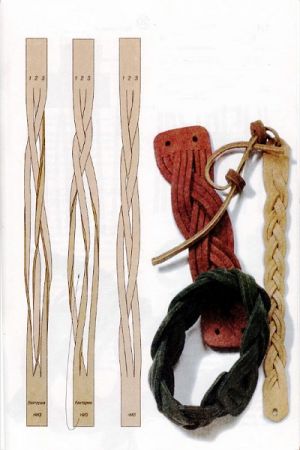
You will need three beautiful laces from any material, approximately 2.5 wrist widths:
- Place the ends together and secure with a paper clip or tie in a knot.
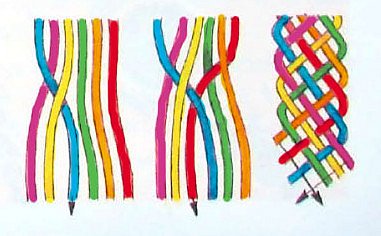
- We fix them with some kind of hook or protrusion. And we braid a regular braid.
- If you want a more voluminous bracelet, do not weave it very tightly. Leave tassels at the ends.
From three laces
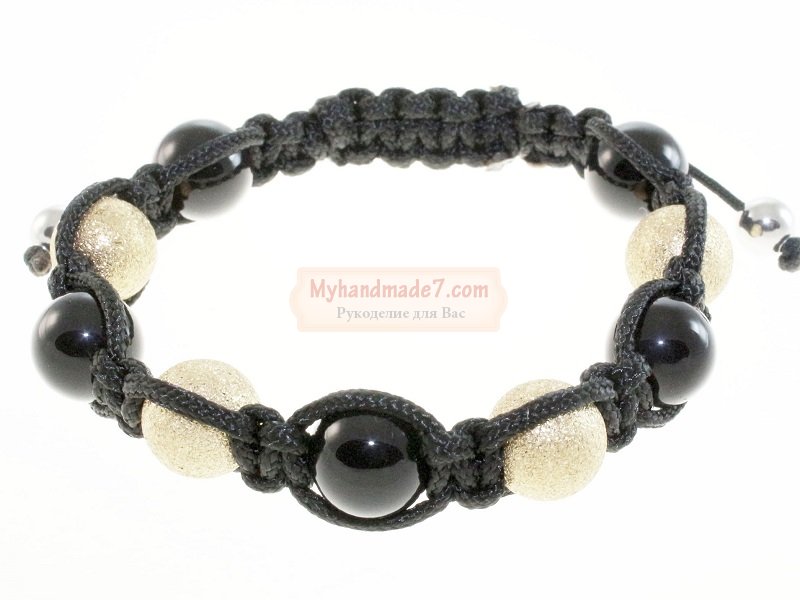
This bracelet can be made in the form of a braid or created with a more complex pattern. Decorate it with 9 large beads and two smaller ones. The cord is taken 4 times larger than the volume of the wrist. The accessory is made with a double flat knot.
- The cord is divided into three parts. One of them is the size of the product with an allowance for a loose fit and fastening, the other two are the same.
- We make two flat knots around a short segment.
- Then we put a bead on it, crimp it with two outer cords and again tie two knots.
- We finish the work with two small beads located on both sides.
From many laces
This type of weaving can be done in any way by adding two other colors to a piece of cord of the same color and laid in several layers. Which looks quite interesting and exclusive.
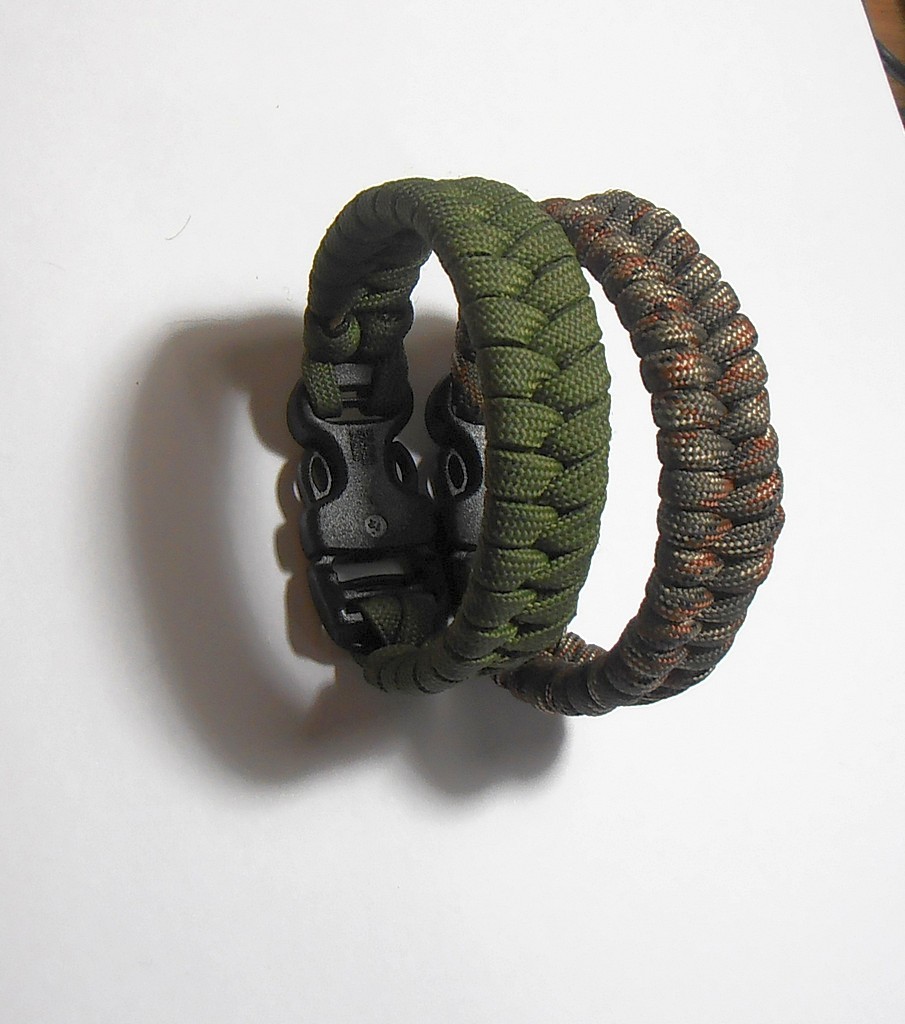
Snake
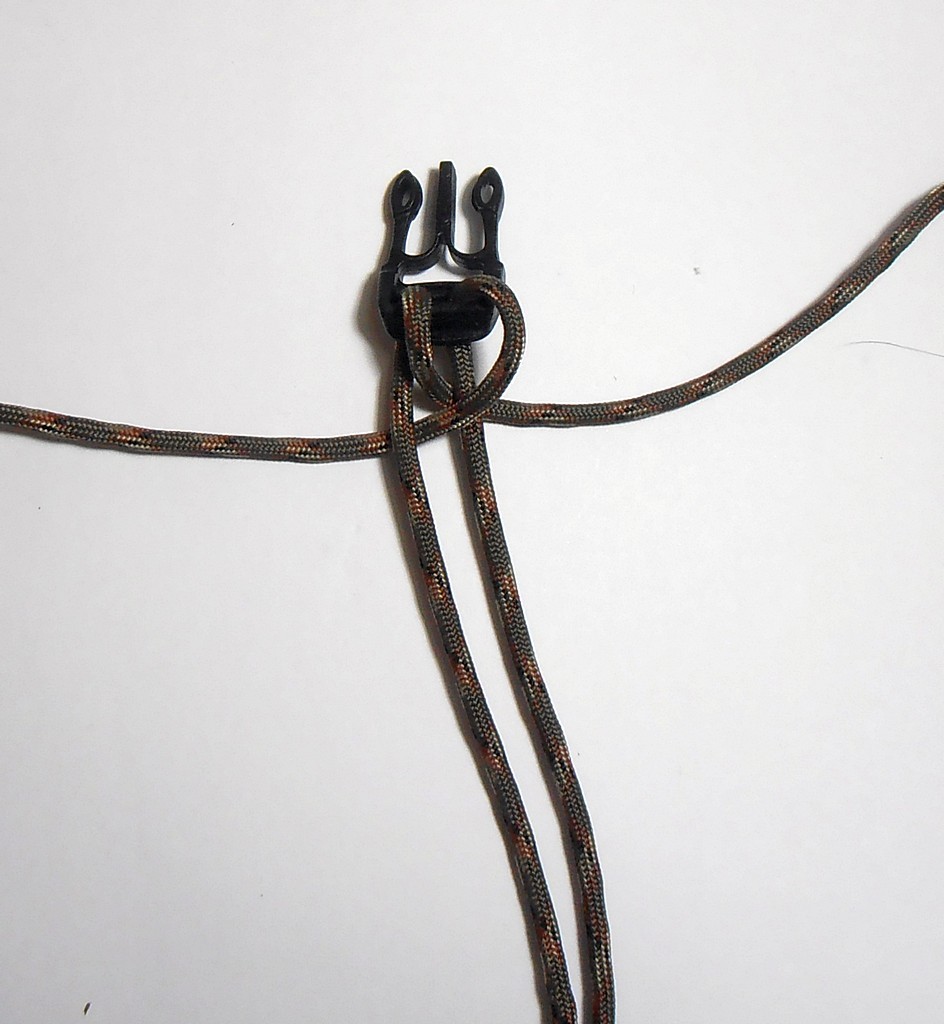
It is usually woven from paracord or leather. Having measured the circumference of your wrist, multiply this length by the number 12. This amount will be used for the entire product.
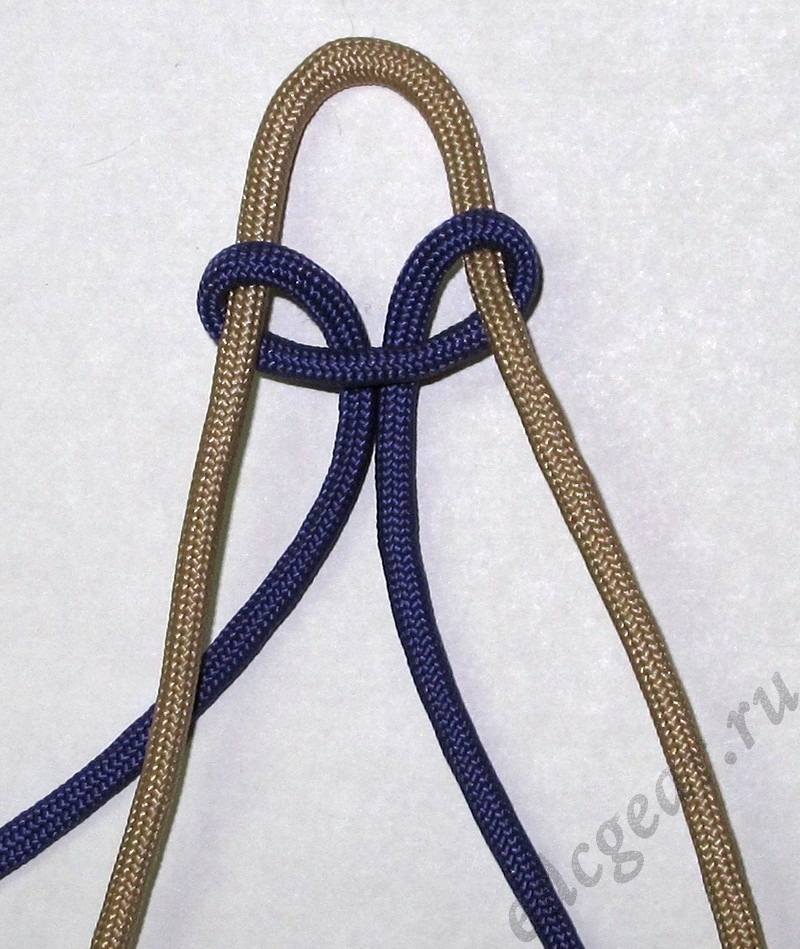
- Fold the cord in half. We take it in our hands so that the loop faces in your direction.
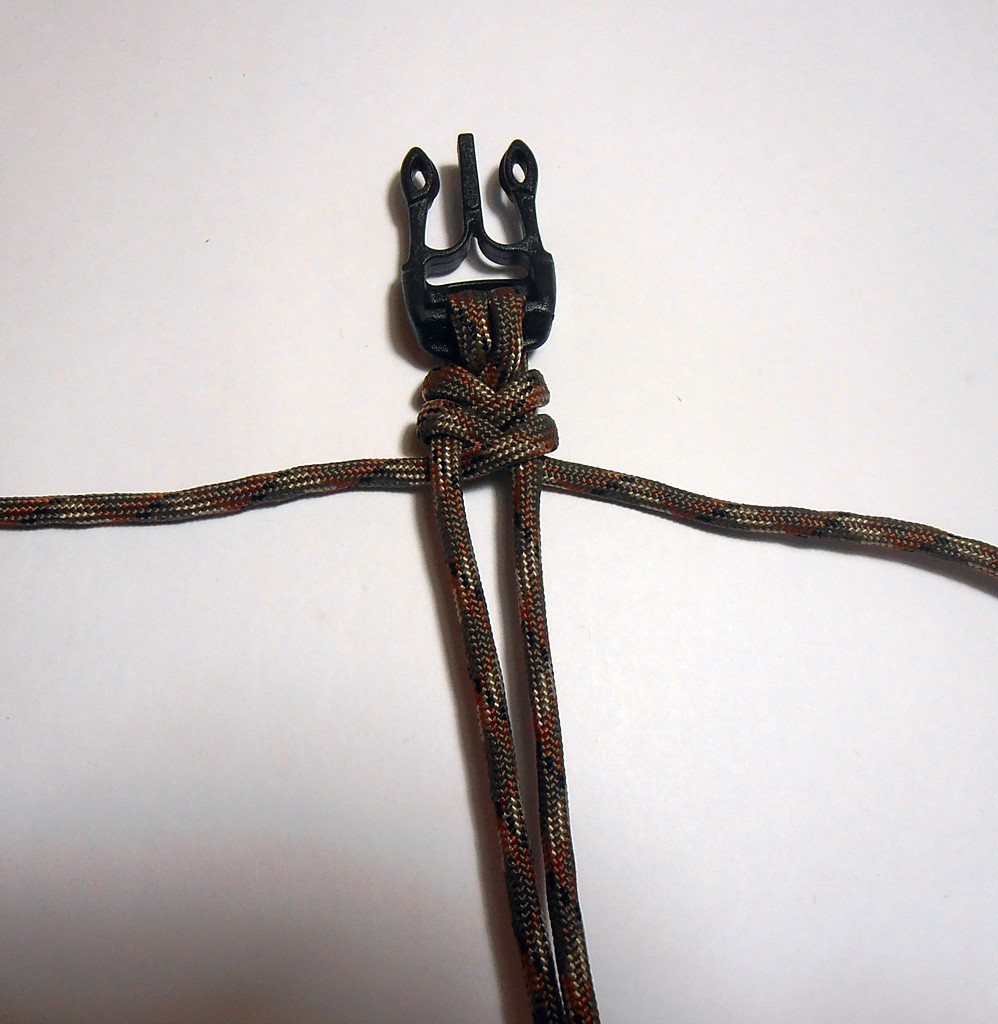
- We slightly separate the ends to the sides, throw the right one over the left one, bring it out under it and carry out the same actions with the left one.
- Insert the right tip into the left loop and thread it through, tightening at the same time. We still have a loop at the end for the fastener.
- Then we throw the right lace on top of the left one.
- Place the left end under the right and insert it into the right loop.
- Alternating these movements, we finish our bracelet.
Multi-colored for children
 Bracelets for children can be woven from brightly colored material using any of the above methods. If desired, complement it with fun fittings made in the form of animal figures or hanging metal elements. Also Beads and small multi-colored buttons will look good. By making this craft together with your child, you will accelerate the development of his fine motor skills and aesthetic taste.
To emphasize your individuality, choose a material of any texture and palette. And the schemes proposed above will help you create unique masterpieces that will highlight the originality and artistic style of the owner of this jewelry.


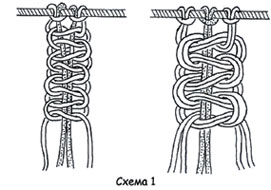 We put the cords together, bending them in half.
 0
0