Ten years ago, a type of handicraft such as weaving bracelets and baubles from rubber bands came into fashion. Initially, it reached a children's audience due to its simplicity and brightness. Later, adults also became interested in this activity. In such a short period of time, many different patterns and weaving options have appeared. Such bracelets are perfect for the spring-summer period, and a large selection of colors and combinations makes each one original.
How and what to weave with?
You can weave bracelets from rubber bands using:
 “rainbow” machine;
- slingshots;
- forks;
- hook;
- fingers.
 “rainbow” machine;
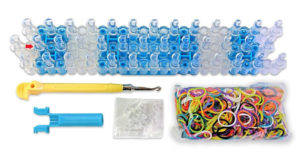
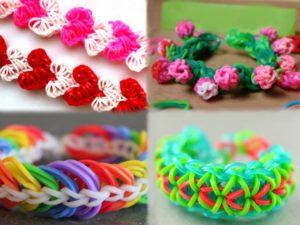 For a beginner in this business, a special kit is suitable, which includes material, various devices and connecting hooks. You should start studying this type of creativity with simple machine diagrams and gradually complicate the task.
Before you start you should decide on the colors of the product. You can choose one or several colors.As they gain experience, they begin to make bracelets from hearts and with decorative elements. Using a thin hook, beads, pendants, ribbons, flowers, stars and bows are woven into them.
Important! Rubber bands can be used in different shades, but they must be the same thickness and density.
A child who is interested in such creativity not only receives pleasure from the process and the result, but also develops fine motor skills.
We make bracelets from rubber bands
The selection of tools depends on experience and weaving patterns, many of which can be weaved using various devices. Having studied simple methods, it will become clear that everything is not as complicated as it looks.
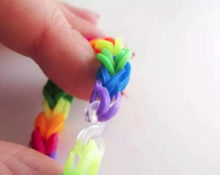
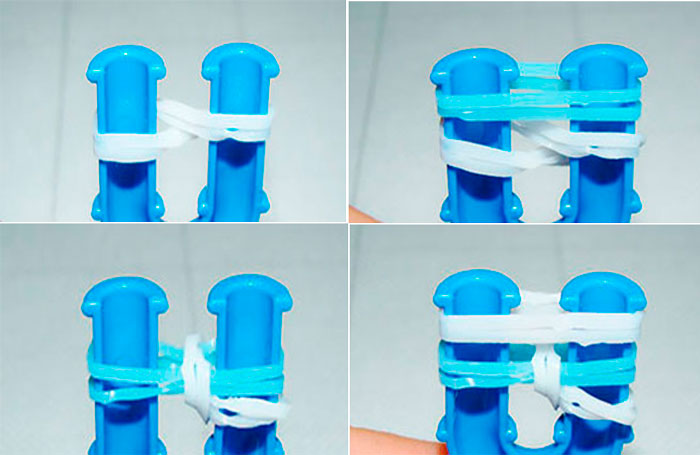
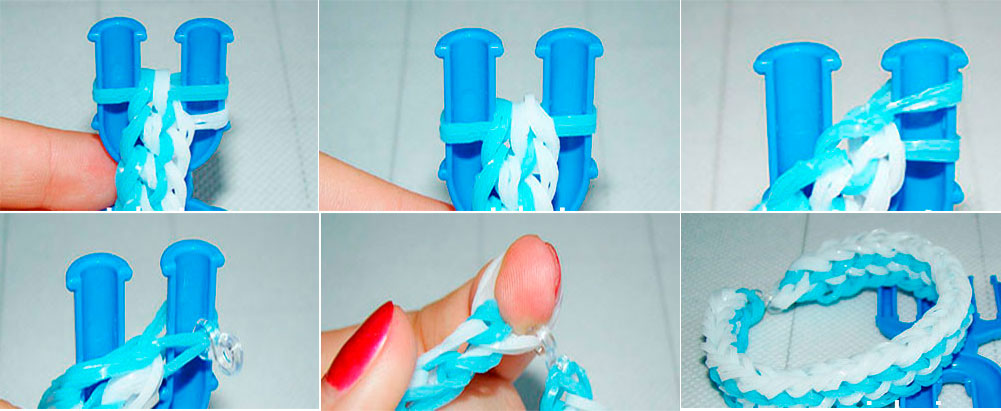
Fishtail pattern
This is the simplest technique to start learning with. You can perform a fishtail using your hands, a slingshot, a machine, or even pencils. For this you will need:
- a set of multi-colored rubber bands;
- transparent clip;
- skillful hands.
Work process:
- put a green elastic band on your index and middle fingers, twisting it crosswise;
- On top, in the usual way, place two more rubber bands, pink and blue, respectively;
- with the second hand, remove the lower ring, from both sides, to the center;
- Next, alternate colors and put on rings without twisting them;
- put on a pink elastic band and throw the red one at the bottom in the center;
- continue until the desired length is reached;
- when finishing work, remove the edges of the bottom elastic band so that only one remains on your fingers;
- move the ring from the index finger to the middle finger;
- remove them from your hand and secure them with a clip.
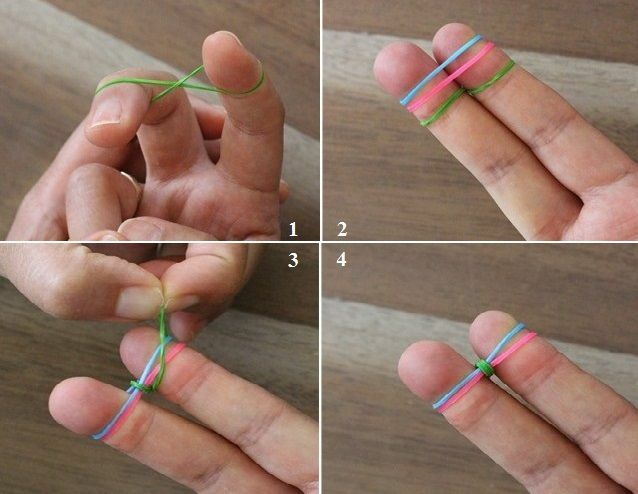

Fenechka is ready!
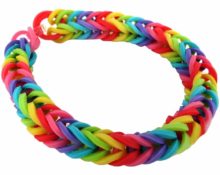
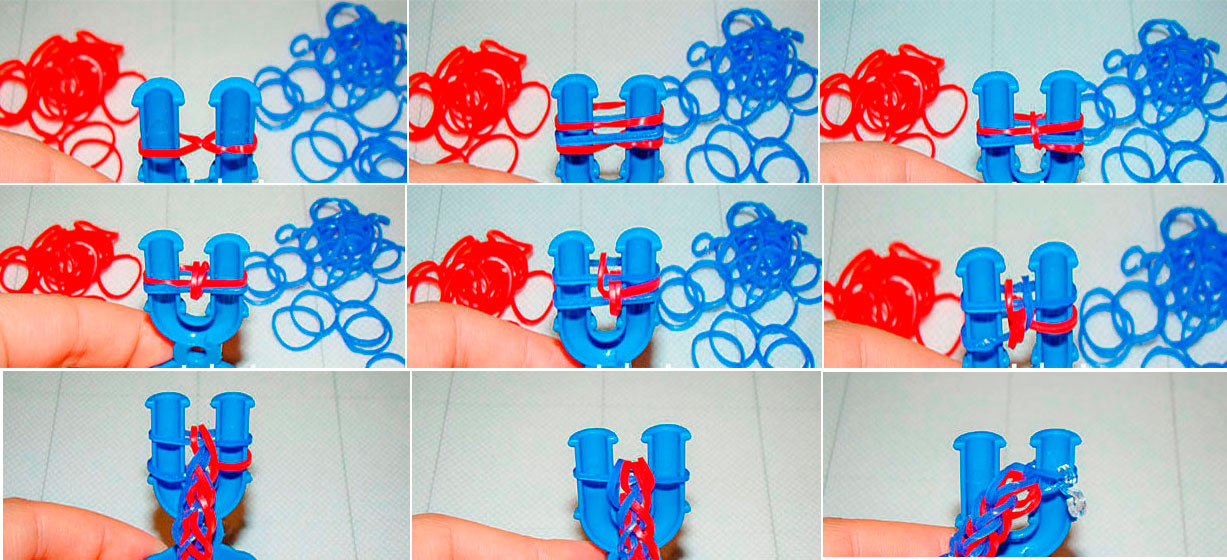
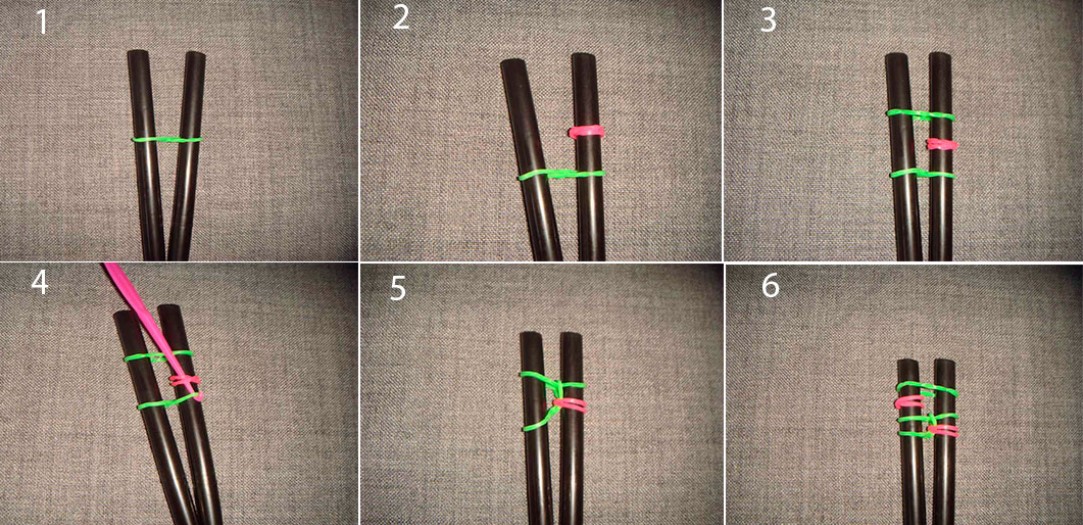
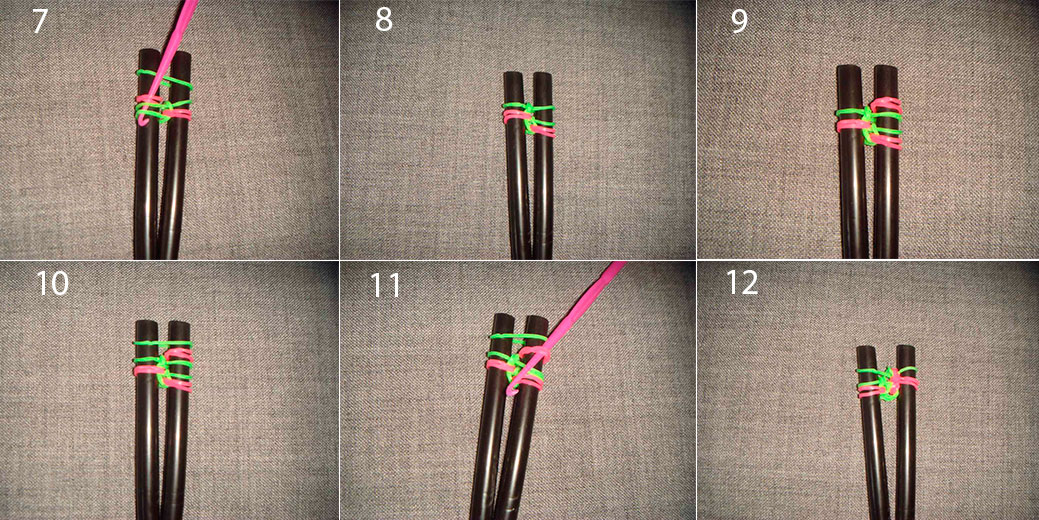
French braid pattern
A bracelet woven according to this pattern looks beautiful and unusual. It is best to use two colors, this will emphasize the weaving pattern. Before you start, you should prepare:
- rubber rings of two colors;
- special slingshot;
- hook;
- hook clasp.
Step-by-step instruction:
- be the first to put on the red rubber band in a figure eight;
- then blue and red, without twisting;
- hook the bottom ring on both sides and throw it between the horns;
- Next, you should put on rubber bands, without twisting, and in different colors in turn;
- remove the red one from the left column, located between the blue ones;
- remove the blue one from the right;
- put another red ring on top and, picking up the blue one on the right, throw it into the middle;
- use a crochet hook to remove the elastic band located on the bottom left side;
- continue in the same spirit;
- when the bracelet is woven of the desired size, remove the first rubber band from the bottom on the right and left;
- when there is one left on both sides, transfer the ring from the right horn to the left, secure them with a clasp.
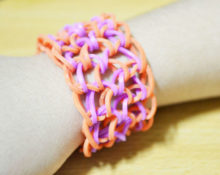
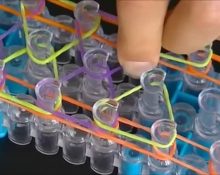
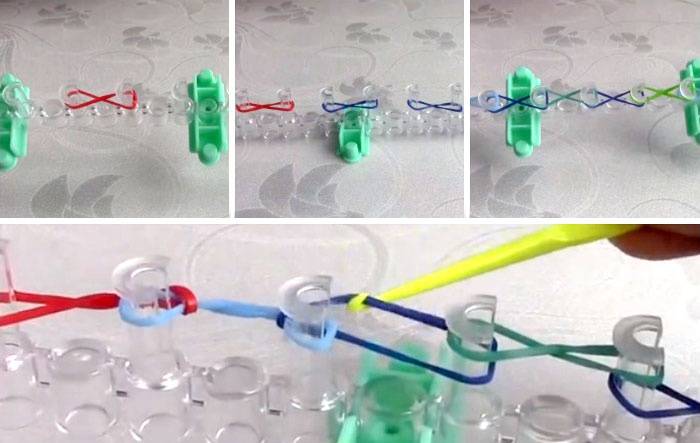
Scheme “Scales”
The result of working according to this scheme resembles chain mail. The bracelet is wide and looks interesting. In order to weave it, you need:
- eight-post machine;
- colored elastic bands;
- 4 connecting elements in S shape.
Weaving technique:
The machine is positioned with the open side of the posts facing you, two rows of elastic bands are put on it, according to the following scheme:
- throw the first row on 1-2, 3-4, 5-6, 7-8;
- second row on 2-3, 4-5, 6-7.
- in the first row, put rubber bands on the columns, twisting them in a figure eight - three away from you, and the fourth towards you;
- Throw on the next row and twist all the rings away from you;
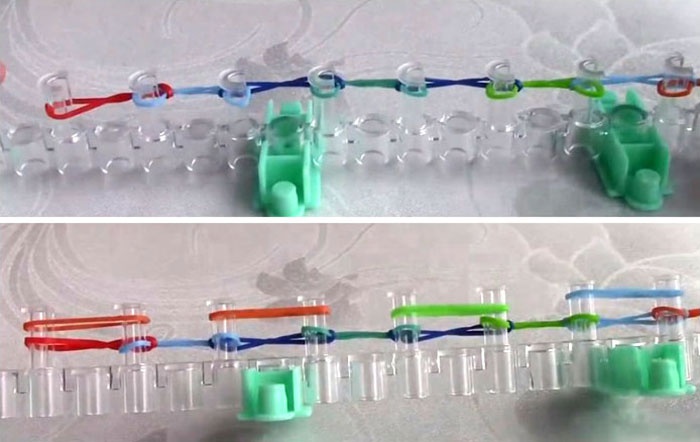
- from all the columns where there are two rubber bands, remove the bottom one;
- further, the elastic bands should be put on without twisting, put on 1-2, 3-4, 5-6, 7-8 bases, and removed from those with more than one;
- then you need to throw it on pairs of columns of the second row, and throw it off in the same way;
- It’s worth attaching the fasteners right away so as not to get confused;
- The entire bracelet is woven using this principle, usually every two blocks are made of the same color;
- Having completed 5-6 rows, a cute pattern resembling dragon scales will begin to appear;
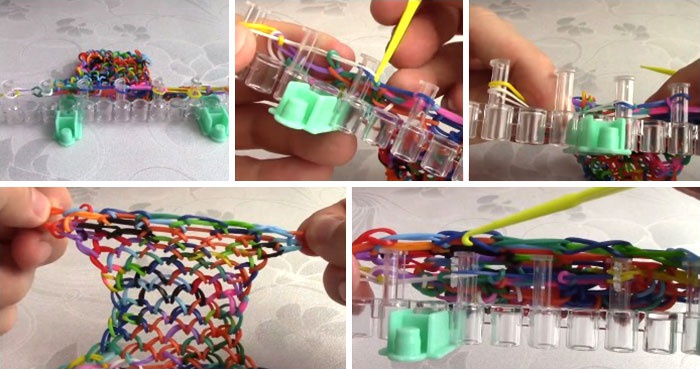
- Having finished the work, you should throw the rubber bands onto the previous column so that four pieces after one remain occupied;
- The last thing to do is to carefully remove the bauble from the machine and secure it with clasps.
Scheme “Sidewalk”
To make a bracelet using this technique you need to prepare:
- ring-shaped rubber bands in white and light blue;
- plastic slingshot;
- connecting hook.
Step-by-step description of the process:
- put two white rings together on a slingshot, twisting them with an infinity sign;
- to the top - two blue rubber bands in the usual way;
- pick up the two bottom rings on the left with a hook and throw them to the center;
- move the entire structure down and throw on two more white ones, without twisting;
- remove the four lower rings from the right horn and throw them into the middle;
- put on a pair of blue rings and remove the two pairs of lower ones on the left;
- continue in this manner until the desired length is achieved. Connect the edges with a clip.

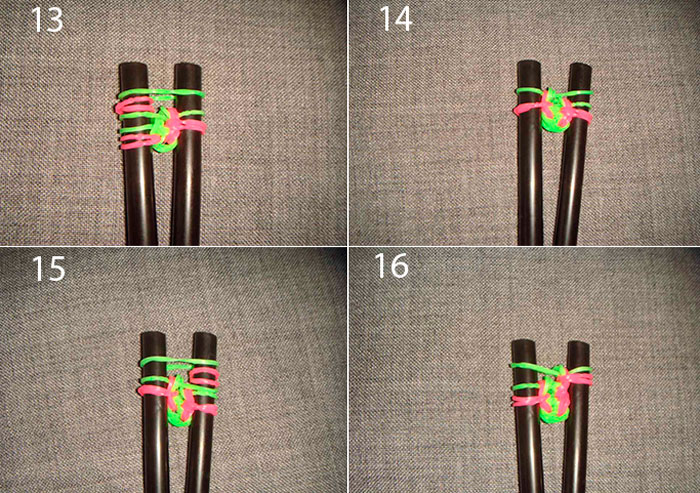
Scheme “Mermaid Braid”
This option looks beautiful and original; you can start weaving it by learning simpler methods. In order not to be distracted during the process, you should immediately prepare:
- two colors of elastic bands;
- plastic hook;
- folded straw.
Procedure:
- put the light green elastic band on both ends in a figure eight, and the pink one only on the right, twisting it in half;
- another green one on top;
- having threaded the hook through the pink one, pick up the bottom one, pull it through and throw it off, place the loop in the center;
- put the pink one on the left side in the same way;
- another light green one for both parts;
- just like for the first time, stretch the two bottom ones through the double pink one and throw them in the middle;
- then put on a couple more rings of different colors in the same way, but pull the four lower loops through this double one;
- throughout the rest of the weaving, you should remove the four lower elastic bands through the pink double loop, alternating the left and right horns;
- Place a clasp on both ends of the baubles.
 0
0