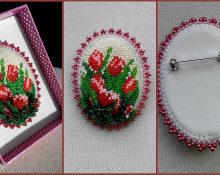
By definition, a brooch is a piece of jewelry that is attached to clothing, hats, or bags using a clasp. Most often, brooches are made of precious (gold, silver) and semi-precious metal, and decorated with enamel elements or natural precious stones.
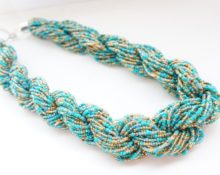
Today in jewelry stores you can find brooches made from semi-precious materials inlaid with artificial, but no less beautiful and shiny stones. A special category is occupied by bead products, which, if they are made of good and high-quality material, can compete with gold and emeralds.
Important! Brooches can perform both decorative and utilitarian functions as clothing fasteners.
Tools and materials needed for work
Those who have never worked with such a material as beads before, and the brooch made with it will become a “pilot version”, need to make a little acquaintance with the technique itself.The diagrams show the easiest way to embroider fabric with beads.
Despite the fact that brooches are considered one of the easiest accessories to make, there are also some nuances in the process of making them. First, you need to try your hand at working on simple products that do not require embroidery of small details. An excellent option would be simple images of flowers, geometric shapes, images of animals, etc.
Important! It is better for beginners not to take on voluminous brooches.
The tools you will need to work on beaded brooches include:
- White paper. A stencil with clear contours, according to which the brooch will be embroidered, can be drawn on a landscape or notebook sheet of paper.
- Fastenings for the finished product. The base or pin is chosen according to its final size.
- Glue. For starters, you can try working with “Crystal” from “Moment”. Further, if the results of the work are satisfactory, the range of necessary tools and materials can be replenished with a gun that heats silicate glue. You can also use special adhesives for working with felt.
- Needles. There are individual needles that are much thinner than conventional sewing tools. When working on creating a brooch, it is necessary to take into account that, in addition, the needle must pass freely through small holes in the beads; it must also pierce a dense base - felt, fabric or leather.
- Threads.
During the embroidery process, it is necessary to use special types of threads:
- Natural threads, distinguished by a wide color palette, are soft and pleasant to the touch (disadvantages include the fact that they quickly tear and rot when wet);
- Strong, durable and resistant to environmental factors, synthetic threads (can cause allergies in the person who works with them);
- Braided with a second layer of reinforced threads are very strong and wear-resistant (very expensive, allergy-causing materials).
Important! It is necessary to take into account the composition, color and thickness of the thread. Too thick ones can be replaced with monofilament and fishing line.
- Scissors. It is convenient to cut off the remaining threads with scissors with long and thin ends.
- Felt. The basis for embroidering brooches in most cases is felt.
It is divided into several types:
- durable, easy to color and very expensive felt made from natural wool;
- half-woolen felt unsuitable for embroidering brooches;
- non-elastic, shape-retaining and washable artificial eco-felt (acrylic);
- hard and durable felt with viscose.
- Natural leather. Needed to make the back side of the brooch.
- Decorative elements. Ribbons, stones, beads, rhinestones and feathers are useful for decoration.
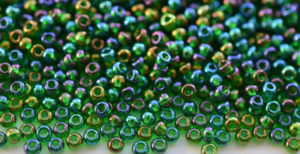
Which beads are better to take?
In most cases, standard round beads are used to make brooches, however, sometimes for decoration, beads of other types can be added to the overall picture. Types of beads are divided among themselves depending on the manufacturer:
- Chinese. Beads made in China are considered the most unsuitable for embroidering brooches and other similar products. It is very small and uneven, many beads are missing holes, which indicates its low quality.
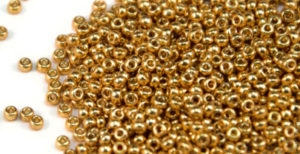
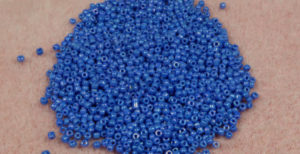
- Czech. The most popular type of beads used by most needlewomen. Even and smooth, it is distinguished by a huge color palette and the absence of defective elements.
- Japanese. The highest quality and most expensive material.
- Indian and Taiwanese. Very brittle and heterogeneous appearance with unstable color and poor color palette.
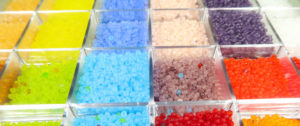
Important! Beads are also distinguished by shape. It can be round, cylindrical (cutting) or elongated (bugle beads).
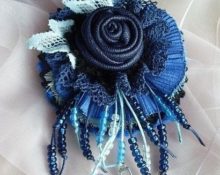
In addition to choosing the right beads, when working on a brooch you should also think about what to combine it with. The most successful options for arrangement of different materials are considered:
- Combinations of beads and beads. Beads are used as the basis of such products; the beads only decorate them. They use special half beads that are easy to sew on.
- Combination of beads and stones. Products made from matte beads and shiny stones look impressive and beautiful. The technique of framing large semi-precious stones with a border of small beads is called cabochon.
- Combinations of beads and feathers. Original designer brooches look especially interesting with feathers or down. Such decorations can be pinned onto evening dresses and hats.
The result of the work depends on the choice of materials and their combination with each other. It will not be possible to make a durable and beautiful brooch from low-quality and cheap beads.
DIY bead brooch master class
Creating a brooch includes several successive steps:
- transferring the prepared drawing onto a felt base;
- securing beads;
- removing excess thread fragments;
- attaching a pin.
Before you begin, you need to prepare the following materials:
- beads, rhinestones and other glass surfaces must be thoroughly treated with antiseptic solutions;
- fabrics and threads are treated with steam (from an iron or boiling water).
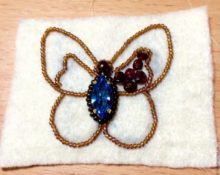
For beginners in working with beads, you can try to make a brooch in the shape of a moth with spread wings. To work on this product you will need:
- a small piece of felt;
- a piece of leather;
- scissors (manicure, sewing);
- sheet of cardboard;
- beads of several shades;
- bugles;
- rhinestones, beads, bicone;
- nylon threads;
- wire;
- needles;
- glue gun;
- pencil and marker.
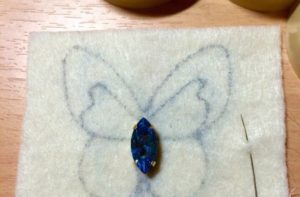
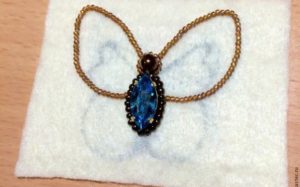
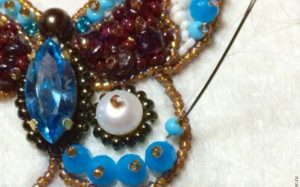
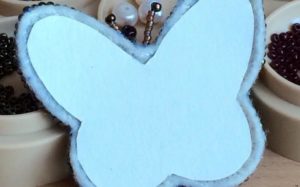
To make a brooch, you need to print and cut out the template. After this, the figure can be transferred to the base. After this you need to start creating the body. To do this you need:
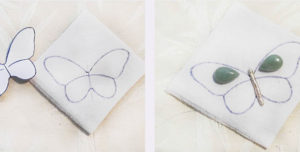
- glue rhinestones in the form of drops to the wings (in the center);
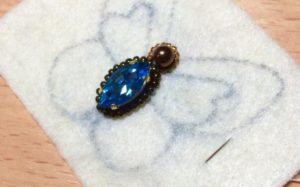
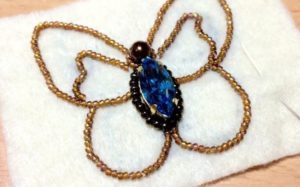
- trim the brooch with beads along its outer contour;
- separate the wings with beads of a different color;
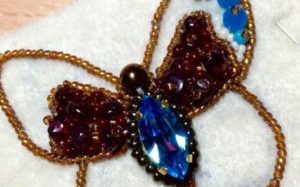
- embroider the inner edges and remaining free spaces with glass beads;
- form the head by sewing a large bead to the last of the beads lining the outline of the brooch.
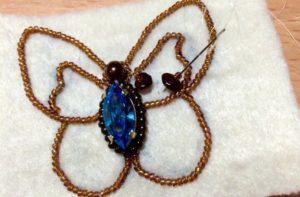
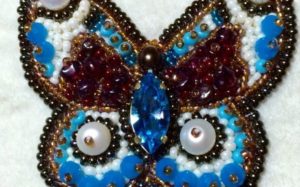
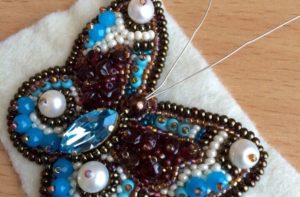
The finished butterfly is cut out along the edges so as not to cut the thread with which the outline was sewn. To make the moth more realistic, antennae can be made from wire. The antennae will complement the outline and head of the butterfly, to make them:
- a small piece of wire needs to be threaded into the last element of the body and head and the wire should be pulled down;
- put a large bead on the wire and again bring it under the first element located on the other side;
- Having determined the appropriate length, cut off the excess;
- put a bicone on each antennae and wrap it with wire;
- fix the fastening on the other side by wrapping it with black thread and additionally gluing it.
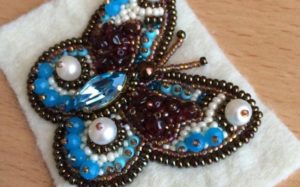
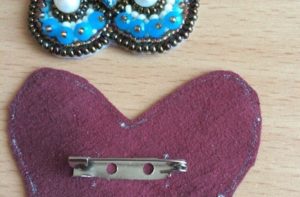
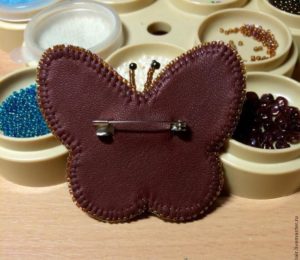
The final stage of work is attaching the moth to the workpiece. For this:
- cardboard is glued to the wrong side of the embroidered butterfly;
- the outline of a brooch is cut out of leather;
- Use a black marker to make marks on the leather for attaching the fastener;
- make cuts with scissors and insert the clasp;
- the leather with the clasp is glued to the embroidery;
- the edges can be trimmed with beads, glass beads or beads.
Important! To prevent the beads from fading in the sun, the finished product can be lightly sprayed with hairspray.
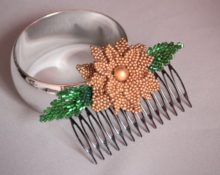
Having mastered the technique of creating brooches with your own hands, you can make entire sets consisting of brooches, earrings and necklaces, which can also be embroidered from beads and attached to a dense base. With a little imagination and perseverance, unique and inimitable designer products will be ready.
 0
0