 In order to diversify your creative leisure time, and maybe even captivate your child, you can try making paper beads. The process of creating them is extremely simple, but on the other hand, it will require certain dexterity and skills.
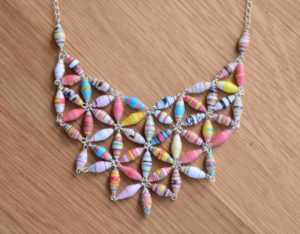
Beautiful ideas for paper beads
Original ideas for paper decorations:
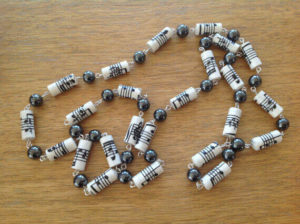
- If you take paper with a certain ornament, design or even text, you can get a stylish decoration. For example, beads with images of notes.
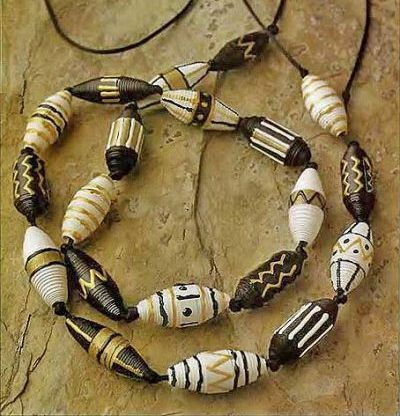
- Another interesting option would be African paper beads. They are also made from strips of cut paper. But you should choose sheets of paper from the traditional colors of African ethnicity, for example, white and brown. And after gluing one skein, a strip of paper is applied on top of it, on top of which a design is drawn. It can be done with special fabric paints - they will provide a textured surface. To prevent the pattern from being erased, it must be secured on top with varnish.
- This decoration can be made in any ethnic style.It is enough to simply choose colors or patterns characteristic of a particular people - and the result will definitely be unlike anything else.
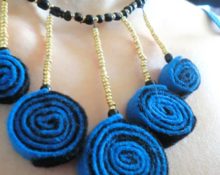
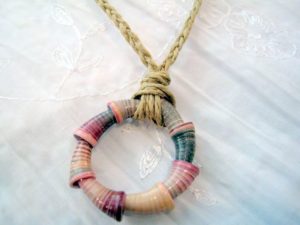
- It is worth considering that neck jewelry does not necessarily have to have cylindrical elements. You can make them original in their shape, thereby giving the decoration an unusual look. So, for example, paper can be wound not on a cylindrical rod, but on a flat part. In this case, the bead will be flattened. But you can also give a strip of paper a completely original shape.
- Beads can not be strung easily on a straight line, but various combinations can be used. You can make several threads or intertwine elements together, creating more complex configurations.
- More originality can be achieved by using inserts made of chains, crystals, glass and wooden beads, and bead weaving.
Materials and tools
In order to start working on a paper product, you should prepare:
- Colored paper or pages from a magazine. It will be better if you take double-sided paper.
- Scissors.
- Ruler.
- A thread or fishing line on which everything will be strung.
- PVA glue.
- Glue for working on decoupage.
- You can take a regular brush, or you can use a decoupage brush.
- Transparent varnish that secures the structure on top.
- Thin metal knitting needles - they can be replaced with long wooden skewers.
- A thick needle, called “gypsy”, must have a wide eye.
- For beads (ties, locks).
- Additional decorative elements (beads, glass beads, chains, various plastic inserts).
Step-by-step master class: DIY paper beads
Before you start work, you should decide on the length of the finished product.Then decide what size beads will form the product. Based on this, calculate the number of paper beads included in the decoration. To do this, the total length of the product should be divided by the length of one bead. The resulting number will indicate the number of parts that will be included in the decoration. If necessary, if the result is not a whole number, round up.
Important! This is only if they fit tightly to one another and there are no inserts made of other materials between them.
It is necessary to determine the shape of the beads. It depends on the template that will subsequently be cut out of paper. You can cut the paper using one of the methods presented below and obtain the appropriate shape of the part. If you decide which option to choose, you first need to make a template from cardboard. And then you should put it on a sheet of colored paper or a magazine page and circle it. This method will ensure that all parts are identical.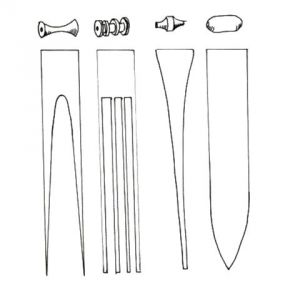
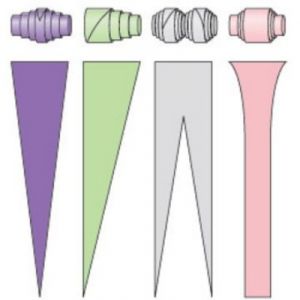
When the required number of blanks has been cut, take a metal knitting needle or a thin wooden skewer and carefully begin to wind the cut blank onto it, starting from the wide part.
Important! You should wind it tightly and make sure that the paper does not move to one side. This way the video will turn out neat.
At the end of winding, coat the remaining end of the paper with glue and gently press it to the surface, thereby fixing it. Then cover with one layer of decoupage glue. Allow to dry, then apply a second layer of glue if necessary.
Important! Apply this glue in small quantities so that it forms a thin film without sagging.
After the decoupage glue has dried, apply varnish to the surface of the bead. It should also be applied in a thin layer.First, once, after drying, if the desired effect, for example, gloss, is not achieved, you can repeat the varnish coating. If desired, glitter can be applied between layers of varnish. Let the bead dry. Then carefully remove it from the skewer.
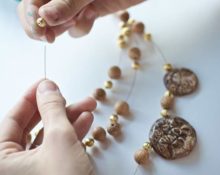
Place all dried elements in a container. Then string them on a thread, alternating with each other in a certain color sequence or interspersing with beads, rhinestones, and other decorative elements in accordance with the chosen scheme. If necessary, attach a lock to the ends of the thread.
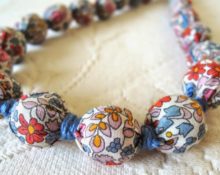
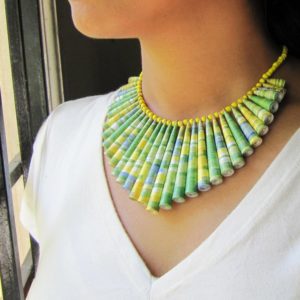
Depending on the paper used or newspaper and magazine pages, you can get completely different products, ranging from simple straight beads to a variety of necklaces.
 0
0