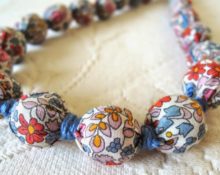
Polymer clay is a modern plastic material that hardens when baked (dried). Using this material you can create a variety of products, from necklaces, pendants to beads. The latter can be sculpted in any shape - round, elongated, flat, in the form of roses and even hollow.
Features of working with polymer clay
 Polymer clay is sold in different types - regular and self-hardening. In the first case, there are no requirements for storing the clay; it is baked in the oven at a temperature of 100 to 140 °C. In addition to baking, you can boil the beads in water for about 10-15 minutes. After which the material becomes hard, it can either be painted in the case of a colorless surface, or coated with varnish for shine. If you choose clay that hardens itself, it should always be stored wrapped in plastic. It hardens on contact with air. The operating principle is otherwise similar.
Working with plastic involves using a variety of techniques.There are many techniques for combining materials of different colors and obtaining a part with a certain pattern. There is an option for products treated with salt before baking. Using the salt technique, an interesting volcanic lava effect is obtained. It is better not to coat such jewelry with acrylic varnish, since the main effect is the matte finish.
Important! In order not to lose inspiration to work with polymer clay, it is better to start with the simplest techniques. If you start with complex ones right away, many questions will arise, something will not work out, and you will give up on learning the art of working with this material.
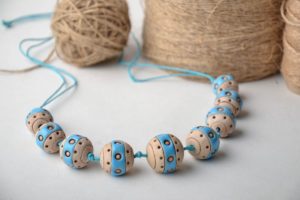
The technology for creating clay beads is no different from the standard one. You can string it on a thread, cord, or put it on a pin and then connect it together using rings. Let's look at an example of making simple multi-colored beads with rhinestones.
How to make beads from polymer clay with your own hands
 To work you will need:
- sharp knife;
- modeling board;
- coating varnish;
- glass beads;
- rhinestones;
- dense thread or cord;
- ruler.
Before you start working with polymer clay, you need to lightly knead it in your hands. The warmth of your hands will make it a little softer and more comfortable to work with. First, take pink clay and roll it with your hands into a thin sausage. Then it should be cut into small portions. To ensure that all the pieces are the same, you should use a ruler. Each piece needs to be formed into a ball.
After this, perform similar actions with the purple color of the clay. While the clay is still plastic, you need to insert a couple of rhinestones into it. As a result, the beads will turn out shiny and shimmer beautifully in the evening light.
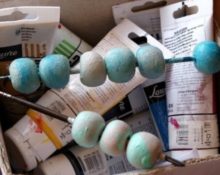
Now the beads can be baked in the oven.The packaging with plastic always indicates the baking mode and duration.
Important! You can bake on a regular baking sheet, but place the beads on a toothpick one at a time and secure them in crumpled foil. The foil base must be stable. There should be no strong odors during baking; the oven should be washed after use if you plan to cook food in it in the future.
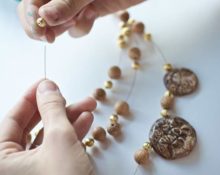
When the beads are baked, you need to take them out, let them cool completely and cover them with a special varnish. It is convenient to apply varnish while holding a toothpick with a bead in your hand, then secure it again in the foil base, and so on, one by one. When the varnish has dried, you can form the product by stringing it on a cord, alternating polymer with ordinary glass. At the end you need to make a clasp so that the jewelry can be easily put on and taken off. That's all, the fun beads with rhinestones are ready!
 0
0