Decoration can be made from anything! For example, from salt dough, available to any beginning jewelry maker. Read on to learn how to make beautiful beads with your own hands from flour and salt.
How to make salt dough for quality crafts?
 Pour a glass of flour into a bowl (saucepan), add a glass of fine salt, mix. Pour the resulting mass with half a glass of cold water and knead until it reaches the consistency of plasticine. Make a hole in the resulting mass and pour in a tablespoon of PVA glue. Having kneaded it properly, wrap the finished dough in a bag and “forget” for half an hour. Now the material for crafts is ready.
What is needed to make beads?
In addition to the test, we will need:
- a device for piercing holes - a cocktail tube, a wooden stick or a knitting needle;
- stationery knife;
- ribbon, thick fishing line or lace;
- clasp (optional if the beads are supposed to be short);
- paints – gouache or acrylic;
- tassels;
- colorless water-based varnish.
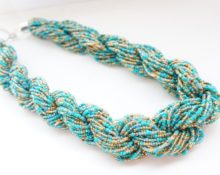
You can show your imagination by adding ribbons, ready-made beads, beads to the composition - the design of the product depends only on the wishes of its creator!
Step-by-step process for making salt dough beads
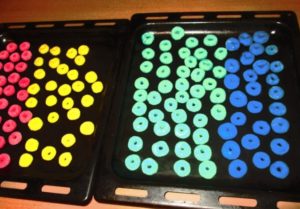
First, make blanks for future beads: sausages are rolled out from the dough, which are then cut with a stationery knife into pieces of approximately the same size. You can give the workpiece the appearance of a bar - then you will get square beads.
Advice! Several blanks of different thicknesses or shapes will allow you to make beads that differ in shape or size - you will get a stylish decoration.
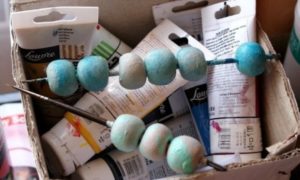
 We pierce each bead, creating holes for stringing to create a bunch, and leave to dry. An oven with a minimum temperature setting will help speed up the process.
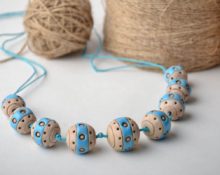
- Then comes the stage of painting in the desired colors. For example, you can first make a dark background, and on top draw zigzags, dots, and stripes in lighter colors. It’s time to remember all your existing artistic skills!
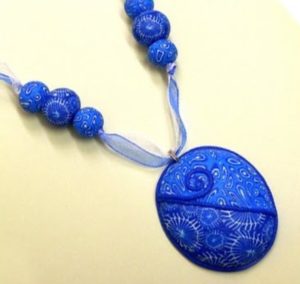
- Having applied all the necessary layers of paint, we leave the beads to dry, after which we coat them with varnish: in addition to shine, this will help protect the clothes from contamination with paints.
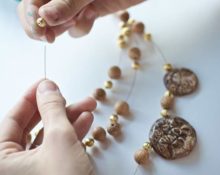
- All that remains is to collect the beads. If a fastener is intended, we start by fixing one part of it on the fishing line (lace). Then we string the beads (if desired, interspersed with beads or sequins, tying colored ribbons between the beads).
 We pierce each bead, creating holes for stringing to create a bunch, and leave to dry. An oven with a minimum temperature setting will help speed up the process.
Advice! Bracelets can be easily assembled using a similar technique. And the purchased blanks for earrings will allow you to create a whole set of original jewelry.
Tips for working with the dough
A well-kneaded dough has its secrets. Having mastered them, you won’t have to worry about the quality of products made from it. “Raw materials” turned out to be of high quality if:
 there is no excess moisture - by slightly changing the proportions towards more water, you risk disrupting the whole process;
- Over-drying is also harmful to the dough - it cannot be stored without a bag;
- long-term storage (more than three to four days) can spoil the material;
- Slightly exceeding the oven temperature when trying to dry the products quickly will result in cracks - it is better to be patient and dry at room temperature.
 there is no excess moisture - by slightly changing the proportions towards more water, you risk disrupting the whole process;
Advice! Has the material become sticky due to long storage? Try air drying it without adding anything. However, it is unlikely to work for small items. If the dough has been stored for a long time and has become sticky, air dry it without any additives. This dough is best used in large quantities.
A sign of a high-quality kneaded dough is considered to be clean hands and the table at the end of kneading: if nothing sticks, it means that the procedure for preparing the “raw materials” was a success!
 0
0