Not so long ago, a technique for creating jewelry from wire, called Wire work, came into fashion. The art of twisting jewelry itself existed in the Middle Ages. This type of needlework is popular among many craftsmen who work with alloys of silver, aluminum, copper and even steel. We suggest that beginners master this type of creativity with the softest metals, such as aluminum and copper.
What does it take to create a ring?
To carry out this work, a minimum of effort and time will be required. In addition to aluminum wire, you need to prepare:
 ruler;
- metal scissors, if you don’t have them, can be replaced with pedicure and manicure clippers;
- round or narrow nose pliers;
- pedicure file or medium-fine sandpaper;
- glass bead with a diameter of at least 8 mm with a hole equal to the gauge of the wire. Choose the shape and color at your discretion.
The wire should be natural silver color, 1 mm thick. This is the best option, which is comfortable for inexperienced handicraft lovers to work with. It is quite plastic, light and inexpensive.
How to determine the right size?
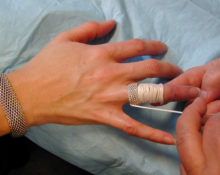
First, it is advisable to find out what size the ring should be. This can be done in several ways:
- directly with the material itself, wrapping it around your finger, after which it straightens perfectly and takes on its previous appearance;
- measuring tape;
- crossbar, its role can be played by a marker, lipstick case or other cylindrical object, the size of which is equal to the volume of your finger;
- thread, its length can then be measured using a ruler.
Important! Don’t forget to add ½ the diameter of the bead to the result obtained. If you have size 18, then the thread rate will be 18.4 mm. Round this number up so as not to make a mistake with the length of the wire when creating the structure.
Making a wire ring with your own hands
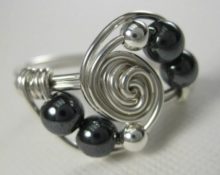
Let's start with the simplest model. The ring will have 2.5 turns around your finger. Of these, spirals, which are the base, are 2/6 parts, arcs framing the bead are 1/6. For size 18 we need to take 21 cm of wire.
 We pass a bead through it and place it in the middle. We wrap both ends at the same time around the form, crossing them. We try the blank on our finger, fixing the bead on top.
- We tilt the ends of the wire located on different sides downwards, bending around the bead at a distance of a couple of millimeters.
- We lower both sides at right angles. And we make additional turns around the main ones, located parallel to each other.
- We bring the sharp edges to the outside so as not to injure the skin. We bite off the remaining excess and smooth it with a file. Then press firmly to the rim of the ring.
- We carry out the same manipulations from the other end. Because the material is quite pliable, you can straighten it with your hands, giving it a smooth, neat look.
- For a more expressive effect, we create light strokes in the form of small indentations on the arcs surrounding the bead. This is done by gently compressing the surfaces with round or narrow nose pliers at a distance of 2 mm. Thanks to this technique, you can add decorativeness to any decoration made of soft metal that can be easily molded.
This simple thing, made of cheap, affordable material, is unique in that it has anti-corrosion properties. You can wash dishes, shower and swim in it without compromising its appearance. Is it true, it is subject to deformation even with slight pressure. Remember this and your decoration will delight you for quite a long time.. And the production of several such products with different beads will allow you to diversify your look, combining them with everyday outfits. And the girls will be simply delighted to help their mother create such cute jewelry.


 ruler;
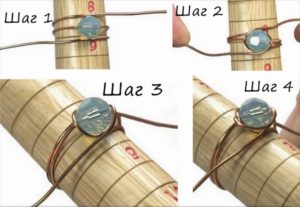 We pass a bead through it and place it in the middle. We wrap both ends at the same time around the form, crossing them. We try the blank on our finger, fixing the bead on top.
 0
0