creativecommons.org
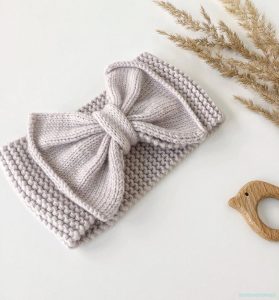
A stylish bow headband with knitting needles is done quite quickly. This hair accessory will look great on a walk, a holiday party or at a children's party. The bow on the headband can be crocheted separately from the main part of the product. Afterwards, the parts are combined to form an elegant decoration. This is a great option for cool weather; the knitted product covers your ears from the wind. A headband with a bow looks amazing on little princesses. The accessory is worn by the youngest children without worrying about safety. After all, it is made with your own hands, from environmentally friendly materials. There are several methods by which the popular bow headband is made. Below are some of them.
Knitted headband with a bow - master class
Not only children wear this stylish accessory. It is perfect for schoolgirls and students, giving the image a special tenderness and femininity.The headband with a bow is knitted using 50 g/140 m thread. The work is done with circular knitting needles number four or five. Additionally, you should prepare scissors, a ruler, and a needle. Step-by-step instruction:
- Let's start making a bow. We cast on 28 loops. Add a couple of edge loops. Knitting technique - stockinette stitch. The number of rows is 26. The required size of the knitted fabric should be ten centimeters wide and the same length. The parameters of the bow depend on the size of the square. The larger the size of the canvas, the larger the bow.
- The headband is knitted based on the volume of the head. The required number of loops depends on this parameter. Use circular knitting needles to cast on stitches. The whole fabric is knitted around the circumference. For the first two rows - 1x1 elastic band. After moving to the front surface. We continue to work in satin stitch until the desired width of the product is achieved. The end of the decoration is done with an elastic band, two rows 1x1.
- Compound. When both elements are ready: headband, bow are combined. A narrow strip of four loops is knitted separately. The stockinette stitch is used. The long edge of the strip is stitched. Yarn is threaded into it - one thread. The headband and bow are fastened with hidden stitches. The decoration can be placed in the middle or slightly to the side.
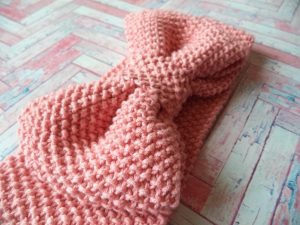
Knitted headband with a bow - pearl pattern
The second option for creating a fashion accessory. A stylish bow headband with knitting needles number three is made from 50 g/115 m yarn. A needle with a wide eye is required as an auxiliary tool. The bow bandage will consist of the following rows:
- Alternate knit and purl stitches. The row begins with the front loop.
- Purl and knit stitches alternate. The row begins with a purl loop.
- Each odd row is knitted according to the principle of the first row.
- Each even row is based on the principle of the second line.
A knitted headband with a bow is quite simple to make. After twenty-two stitches have been cast on, the pearl pattern described above is used. Work continues until the desired length of the product is reached. According to the standard, it is the sum of the head circumference and a few centimeters of freedom of fit. It is important to remember that there is no need for edge loops in the pearl pattern. Knitting starts with purl or knit stitches. After completing the process, the loops should be closed and the edges should be sewn using a mattress stitch.
The bow is an elongated rectangle. It is done using the same technique. Twenty-two stitches are cast on the knitting needles. The size of the decoration can be varied by reducing or increasing the number of loops. When the rectangle is the desired size, the loops are closed, and the item is sewn along the smaller edges. The end of the thread must be left. The desired length of the ponytail is 25 centimeters. To get a bow, squeeze the fabric in the center. Using the end of the thread, tighten the product.
We knit a third fabric to create the middle. It is recommended to use a tighter knit than on other parts. You need to cast on eight loops. During operation, constant verification with the product is required. All that remains is to collect all the elements. The bow is fixed at the seam location on the bandage. A jumper is placed over it. All parts are corrected and stitched with a needle. The seams remain on the wrong side.
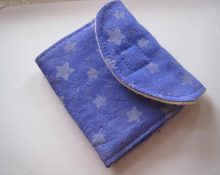
Soft headband - bow
creativecommons.org
Today, almost every fashionable set of home clothes, which includes a robe, slippers, and pajamas, includes a soft headband. This accessory allows you to remove hair from your face while washing or applying makeup.You can take the soft bandage with you to the sauna, bathhouse, or spa salon. It's more comfortable than a headband. Does not put pressure on the head, is made of soft fabric. You can sew the accessory yourself. For this you will need:
- Twenty centimeters of terry cloth one and a half meters wide.
- Two meters of linen elastic. If the head circumference exceeds 56 centimeters, two and a half meters.
- Threads, scissors, needles for machine and hand sewing, several safety and tailor's pins.
To sew a headband, follow the instructions:
- Cut out the pattern from the material. We sweep the terry around the edges with a zigzag, otherwise it will fray a lot. We fold the strip of material into a tube and sew it together.
- We turn the product inside out and cut it into sections. The seam is in the center of the bandage.
- We sew the element together with a sewing machine, making the seam halfway so that there is an unsewn gap. Using pins, we assemble a circular middle seam. Using this mark we sew the product with a machine.
- We again divide the resulting distance into two parts in the upper and lower areas. We make two seams. We receive a bandage, stitched three times through three seams, in parallel.
- We divide two meters of elastic into half-meter segments. We pierce the beginning of each elastic band with a safety pin in order to thread it into each resulting passage on the bandage. We repeat the action four times.
- The ends of the elastic band are sewn together by machine. Then the gap in the bandage is sewn together with a needle.
- Let's move on to the bow. We fold a fabric square with edges of twenty centimeters in half and sew it up along the edges. Five centimeters - leave a gap. Align the bow, the line should be in the center. We sew the two remaining edges.
- We turn the bow over the face through a five-centimeter gap and sew up this gap.
- We make a jumper. Cut out a square with edges of fourteen centimeters. Sew the edges together to create a tube.Turn it inside out and wrap it around the bow. Sew up the ends and secure them to a bandage.
 0
0