If your son, while studying in the taekwondo section, has achieved certain success and is certified for the next level - 9th gyp, then this should be reflected in his costume. There should be a notch on the white belt - a thin yellow stripe. How to sew it on yourself and why it is important, read on.
Principles of belt certification in taekwondo
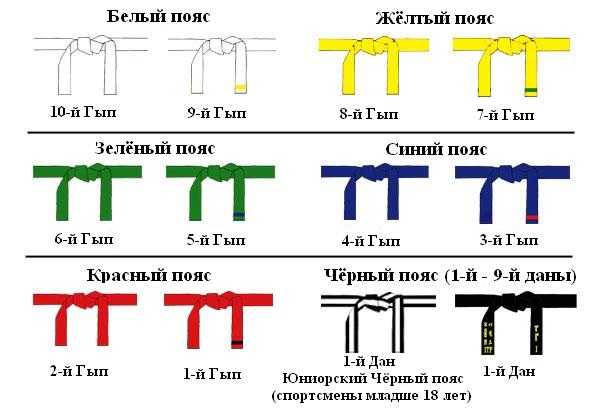
 In this type of martial arts, a belt system is used as a distinctive sign of the athlete’s level of training. She implies that The student must go through a certain number of steps in mastering the skill - 10 gyps and 9 dans.
The initial level is 10 gyp. It means that the student has just begun to study martial art, he still has little knowledge and skills, he is pure, “like white snow.” The suit comes with a white belt. The next level is 9th gyp. The athlete acquires certain skills, he has achieved his first successes and mastered the basics of technology. A student who has moved to this level is awarded the insignia of a white belt - a narrow yellow stripe at the end.
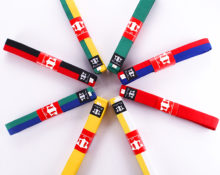
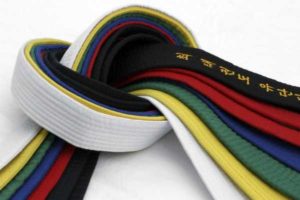
Next, athletes are certified with belts of the following colors:
- students of the 8th Gyup wear a yellow belt, 6th - green, 4th - blue, 2nd - red;
- each odd-numbered gyp retains the color of the previous level with the following stripe: 7 gyp - yellow sash with a green notch, 5 - green with a blue stripe, 3 - blue with red, 1 gyp - red with black;
- after the 1st episode, skill levels are assigned in dans from 1 to 9.
Important! For masters who have reached 1st dan, the distinctive sign is a black belt with a narrow yellow stripe.
What do you need to sew a stripe?
First of all, you will need the belt itself and yellow cotton fabric. In addition, for sewing you need to prepare the following tools and devices:
- yellow threads;
- scissors;
- iron;
- pins;
- a needle;
- ruler;
- pencil;
- sewing machine
What is this yellow patch and how to sew it on correctly?
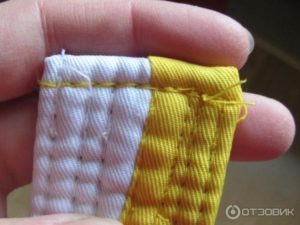 If your child is assigned the next level after the initial one, the 9th gyp, or the young person has mastered the art of taekwondo so much that he has been awarded the 1st dan, then on the white belt in the first case and on the black belt in the second, you need to place a yellow stripe. It should be strictly in its place: 5 cm from one of the ends of the belt, which also has a width of 5 cm.
The strip is very narrow - 0.5 cm, but it should go around the belt on all sides, so you need to take twice as much colored fabric with a margin for the thickness of the part and a slight overlap of the joining edges. Let's try to calculate more precisely: we take 5 cm for the height of the sash on both sides and another 1 cm for the width, as well as 1 cm for the overlap and hem of the edge, it turns out 5+5+1+1+1=13 cm. This is the length of the strip with the required in stock.
Its width consists of 0.5 cm of fabric on the visible part of the strip and a hem on both sides. Since the notch itself is narrow, the hems should correspond to it. They should not be visible from under the colored strip, so in total you can take from 0.5 to 0.8 cm. The width of the strip with allowances will be 1-1.3 cm.
Important! For the patch, choose a dense, but not thick fabric. Determine its resistance to shedding in advance so that there are no unpleasant “surprises” in the form of yellow spots on a white suit after washing.
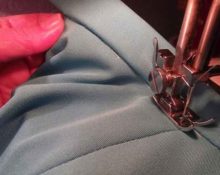
Now let's start sewing the notch onto the belt:
 cut a rectangle from yellow fabric with dimensions 13 x 1.3 cm;
- On one of the edges of the belt we mark a place to place the strip: we step back strictly 5 cm from the edge and, using a pencil and ruler, draw a line beyond which the notch should not protrude. After 0.5 cm we draw a second similar line. The borders of the patch are indicated;
- then you need to bend the cut fabric on both sides so that its central part was 0.5 cm wide along its entire length, and immediately iron it;
- attach the notch to the belt along the marked lines, pin it with a pin or secure it with a basting;
- in the place where the ends of the strip meet, place them on top of each other, bend the upper end and pull it to the edge of the belt along the width;
- check the result to ensure that all lines match;
- If everything turned out exactly right, then you can sew it on. It is better to do this using a sewing machine.
 cut a rectangle from yellow fabric with dimensions 13 x 1.3 cm;
 0
0