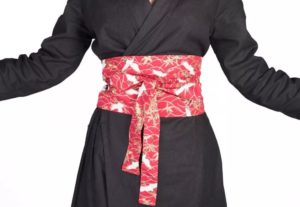
 Fashion is changeable and fickle. And many things that were on her Olympus just yesterday are no longer worn today. But over time, another round passes, and they return from oblivion. This is what happened with the wide belt that came to us from the Land of the Rising Sun. The obi belt is suitable for women of any age and any body type.. It allows you to emphasize the waist and hides some figure flaws. This accessory, tied in a certain way, Can be combined with various outfits: dress, skirt or trousers. Of course, such an item can be purchased at a retail outlet. But it’s much more interesting to create it yourself. After all, such a thing will not only add grace to your appearance, but will also allow you to stand out from the crowd.
What you need to sew an obi belt
To ensure that no unpleasant problems arise during the creation process, and that the final result pleases you with its quality and appearance, you need to be properly prepared. To do this you need to do the following.
- Choose a model.
- Take measurements and create a pattern.
- Purchase suitable material.
For the traditional version, you will need two types of fabric: the main one for the wide part and a combining one for the narrow ties. Wherein the product does not have a reverse side, so it can be used from any side. The belt can also be made in a single color variation.
Reference! Models made in a double-sided version or decorated with decorative elements: embroidery, appliqué, look impressive.
How to sew an obi belt
After preparation, you can proceed to production. Let's look at this process using a detailed example.

To realize you you will need thick floral fabric for the wide part and drapery fabric for the ties.
The working process
- Make the pattern. To do this, you can adjust the basic pattern to your size.

- Place the pattern pieces on the fabric. It needs to be spread on a flat surface.
Attention! The material is placed inside out.
- Transfer the contours of the details onto the fabric using a tailor's chalk or a bar of soap.
- Carefully reveal the parts. At the same time, add a margin for seam allowances (usually it is 1–2 cm.
- Strengthen the main parts with dublerin.
- Connect the central parts and ties.
- Place the inside and outside of the waistband with the right sides facing each other.
- Sew the workpiece on all sides except one narrow edge.
- Turn the product right side out through the hole left.
- Carefully smooth out all wrinkles and iron the workpiece.
- Tuck the open edge in and stitch the edge of the waistband. At the same time, stitch up the hole left open.
Sewing is completed, the belt is ready for use.
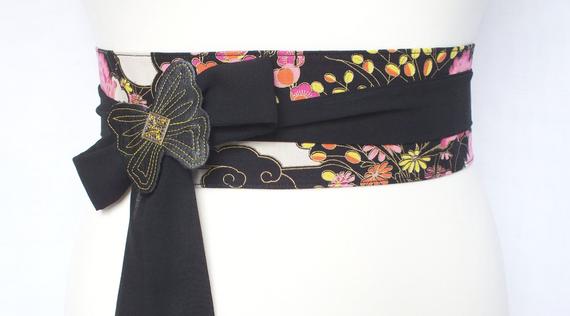
Reference! In the example, the product is tied with a beautiful bow and decorated with a butterfly decor, which gives it an elegant and unusual look.Other decorative techniques (beading, applique) can be used in the same way.
By creating various accessories with her own hands, the craftswoman not only gives her appearance brightness, originality and declares herself as a creative person, but also fills the surrounding reality with warmth and beauty.


 0
0


I really liked the site, I found a lot of interesting and accessible information