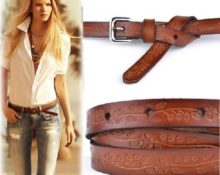
A leather belt is one of the most sought-after accessories. Always fashionable and stylish, it not only performs practical functions, but also adds completeness to the image.
Is it possible to sew a leather belt with your own hands?
A high-quality leather belt is designed for a decent service life, is comfortable to wear and retains a presentable appearance for a long time. It is quite possible to make it yourself. A handmade product has many advantages:
- originality of execution. You will be sure that no one else has such a thing as you (this is especially true for the fair sex);
- full compliance with expectations. For your creation, you can choose the material, color and finish to your liking;
- significant financial savings, since labor is always included in the cost of the purchased item.
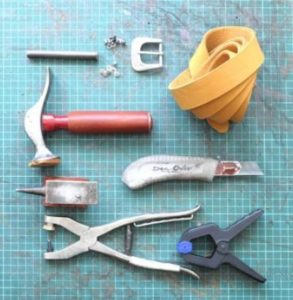
Tools, materials, accessories - which ones to choose and how?
You will definitely need:
 leather;
- knife;
- awl;
- punches;
- hammer;
- centimeter;
- metal ruler (preferably a square).
 leather;
It is advisable to also have:
- press for working with rivets;
- tools for making grooves and sanding leather edges;
- a piece of thick rubber as a backing;
- special device for cutting leather;
- igloo;
- waxed threads;
- sewing machine;
- beeswax;
- impregnation (polishing);
- napkin, foam sponge, wool sock.
Be careful when purchasing material. The leather of different animals has both pros and cons and is suitable for certain types of belts:
 pork is the cheapest. The new one looks good, but as soon as it gets wet, it starts to warp. Often goes to the inner surface of two or three-layer belts;
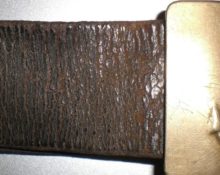
- ox (bull, buffalo) – rough, heavy, super strong. It's hard to work with, but the price is good. Used for brutal options with patterns, embossing, carvings;
- calf - the best option: strong and durable, soft and smooth, does not crack or form creases;
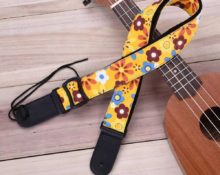
- goat, sheep - durable, flexible, but thin. Useful for elegant ladies' belts;
- crocodile, snake - soft, elastic, with an interesting structure, but very expensive.
 pork is the cheapest. The new one looks good, but as soon as it gets wet, it starts to warp. Often goes to the inner surface of two or three-layer belts;
You can purchase a suitable leather blank of the required color and size or a solid piece of leather, but you will have to tinker with it.
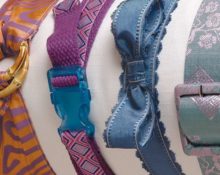
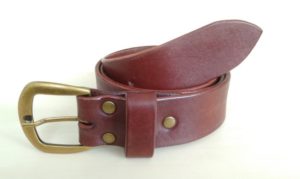
To secure the belt you need a buckle:
- a classic or massive frame in the shape of a rectangle, the letter O or D;
- badge;
- automatic buckle or lock.
Important! The buckle should not only be in harmony with the skin, but also match the width of the belt. Rivets, preferably galvanized, are also useful for accessories. Not only the cap, but also all its other parts should be stainless.
How to cut and make holes?
 Cutting and perforating leather is very difficult, especially when making a thick men's belt.
You need a stationery or construction knife with a thick, well-sharpened, rigid blade. Guide it perpendicular to the surface of the skin, tightly placing its edge against a metal ruler (straight cut on one end) or a curved pattern (rounded on the other).
Strap cutter (belt cutter) – a tool for cutting strips of leather of the required width (for the base and belt loops).
Punch - a device for making holes. It is installed vertically on a point marked on the canvas, and a blow is applied from above with a hammer or a wooden block. The pointed edge of the nozzle (they vary in shape and diameter) cuts into the material and creates a hole:
- for rivets – small circle – 2 mm;
- for holes for the peg – larger diameter – 5 mm;
- under the buckle there is an elongated strip.
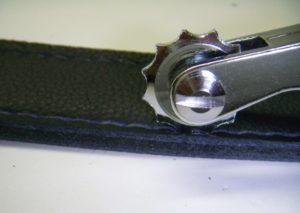
Torzbil (edge cutter) – a tool for processing (rounding) the edges of a belt. With its help, a chamfer is removed along the front and back edges along the entire length of the belt.
Important! Tools must be very sharp and made of durable metals.
Step-by-step instructions on how to make a belt
 First of all, decide on the sizes. The standard width of a classic men's belt is 3 or 3.5 cm. The minimum length of the product will be calculated as follows: add 20 cm to the waist circumference (it is better to measure over trousers, threading a centimeter into the belt loops).
- Using a metal square, trim one edge of the leather piece at a right angle. Then cut or scrape off half of the 10-12 cm layer of leather from the wrong side so that the belt is not too thick where the double layer is located.
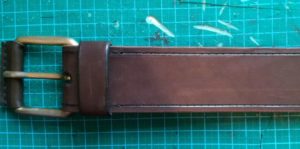
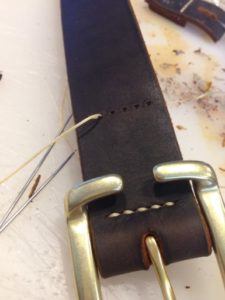
- Fold the finished end, mark a point on the fold exactly in the center. Make an elongated hole 2*20 mm for the free entrance of the pin (tongue) of the buckle using an appropriate punch.
- Try on the buckle, mark the location of the rivets: two closer to the fold, the third further in the center, punch them. Measure the length of the belt circumference from the edge of the buckle - there will be a central hole in this place (usually there are five of them in total). On the sides of it at a distance of 2.5-3 cm, measure and punch two more holes. Set aside 15 cm from the end and cut off the second end. It should be rounded, so it is better to use a special punch or knife with a pattern.
- Finish the edges of the belt with an edge cutter. To prevent the end from linting, smooth the nap in the desired direction and treat with waterproof PVA glue. Once dry, polish gently.
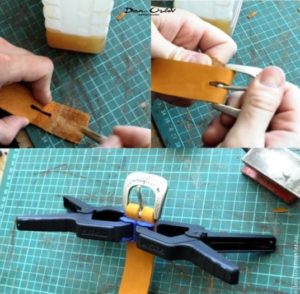
- Cut a strip for the trench coat (belt belt). Measure the length: wrap it around a belt folded in half, add 1 cm and cut it. There can be one or two trench coats (fixed at the buckle and movable at the belt).
- Place the buckle and the two rivets closest to it in place. Rivet the belt loop, put it on the belt, slide it to the buckle between the thin folded strips, and place the outer rivet.
- If desired, the belt can be painted, polished, or decorated.
 First of all, decide on the sizes. The standard width of a classic men's belt is 3 or 3.5 cm. The minimum length of the product will be calculated as follows: add 20 cm to the waist circumference (it is better to measure over trousers, threading a centimeter into the belt loops).
Options for decorating a leather belt
With the help of decor, you can create a unique masterpiece from an ordinary belt. Methods:
 firmware. It can be simple or form an ornate pattern;
- embossing – a pattern is applied to a moistened surface using a stencil and trimmed with a special undercut knife. Using a mallet (wooden hammer) and a stamp, a three-dimensional pattern is created, then the belt is dried;
- carving (engraving) – the image is applied in the same way as with embossing, then the cut out contours of the image are “achieved” with a sharp one, and volume is added with a beveler;
- decoration with metal fittings of various sizes and shapes, rhinestones, stones;
- combination of materials.
 firmware. It can be simple or form an ornate pattern;
Belt for a dress or trousers - features
The trouser belt is inserted into the belt loops of the clothes, matches their width, and fits snugly to the waist. It performs a practical rather than an aesthetic function, therefore it is made of durable material that holds its shape.
Another thing is the dress strap. It is a decoration for women's toilets, can be worn at the waist and hips, and have different widths. Its strength and elasticity are not so important.
Tips for a needlewoman
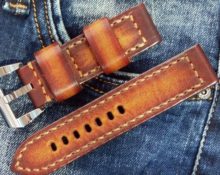
 To give the belt greater strength and strength, it can be stitched by stepping back 3-4 mm from the edge manually or using a special sewing machine. This must be done before installing the rivets, or you can even replace them with firmware.
- When polishing the edges with beeswax, try not to stain the front part - streaks may remain.
- Make the pattern from durable material. Do not make stencils for decoration from paper. If it gets on wet skin, it can get wet and the pattern will “float”.
 To give the belt greater strength and strength, it can be stitched by stepping back 3-4 mm from the edge manually or using a special sewing machine. This must be done before installing the rivets, or you can even replace them with firmware.
Making a leather belt is not easy, painstaking work, but very interesting. In addition to a wonderful thing, you can acquire a useful hobby, which can subsequently become a source of additional income.
 0
0