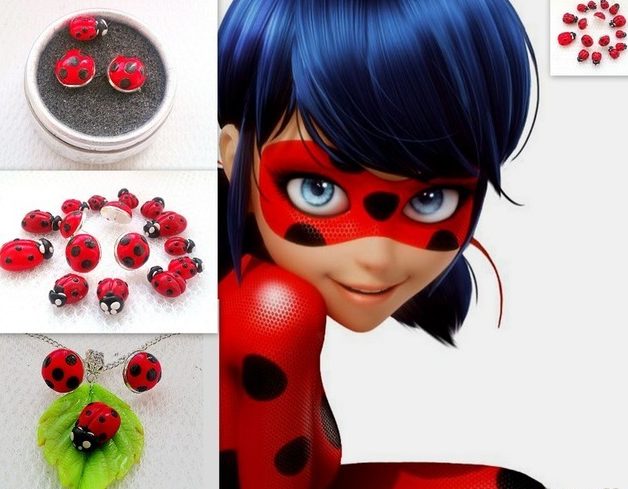
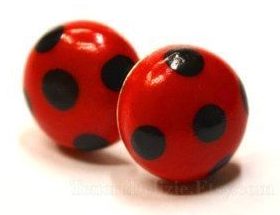
Less than 4 years have passed since the release of the first episode, and the French animated series “Lady Bug” has won the attention of millions of children around the world. Girls want to be like the main character, choose New Year's costumes in this theme and make accessories with their own hands. Red color with black peas has become a symbol of the famous fighter against evil - Lady Bug.
Earrings like Lady Bug have become a desirable attribute for many girls. But you don't have to buy them. You can make them at home from inexpensive materials. Hand-made earrings will turn out to be unique, you will put your soul into them, which means this is no longer just a decoration - it is a real talisman. In addition, it will cost pennies, because you already have many of the materials at home.
Model features
Lady Bug earrings are made using studs or studs. English, French or Italian fasteners are not suitable for them. The earring should fit snugly to the ear, and in the listed clasps it will be below the earlobe.
What materials will you need?
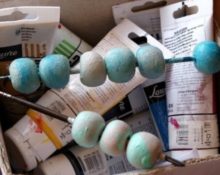
The most affordable and easiest way to make such an accessory is salt dough.It is easy to work with, and when completely dry and properly processed, salt dough products become strong, unbreakable and durable.
ADVICE! If you don't have pierced ears, use a clip base. You can buy it at any craft store. You will simply glue the dough onto this base, and not onto cardboard.
You will need:
- premium wheat flour;
- extra salt;
- water;
- paints – gouache or acrylic;
- clear nail polish;
- old stud earrings or purchased earrings;
- dish sponge;
- paint brush;
- cotton buds;
- cardboard;
- scissors;
- PVA glue;
IMPORTANT! For a homogeneous dough, only fine extra salt is suitable. Ordinary kitchen solution is not suitable, it will not dissolve and crystals will protrude to the surface.
Instructions
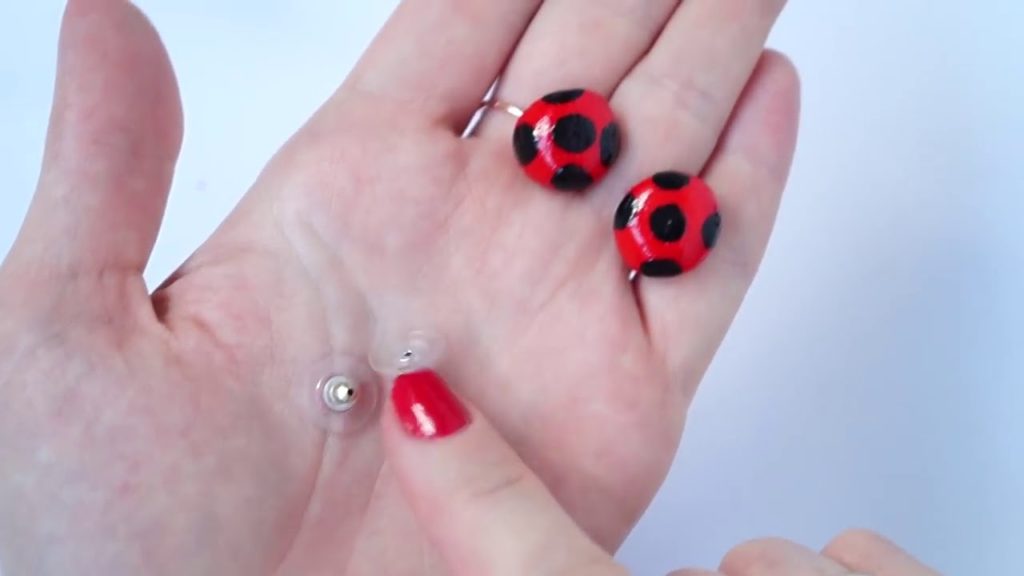
Making earrings takes place in several stages. First, prepare a stud base if the earrings are old. Trim the pendants, but if there is only one stone on the earring, there is no need to remove it. There is no need to prepare a purchased hook; it already has a place for attaching the dough.
Now make the dough:
- mix salt and water in a container in a 1:1 ratio, 1 tablespoon each;
- add 1 tablespoon of flour and knead the dough;
- sprinkle some flour on the table and knead the dough until smooth. It should not stick to your hands or spring back. Press it with your finger - the imprint of the finished dough remains clear;
- Wrap in cling film or a plastic bag and place in the refrigerator for 15 minutes.

Now let's start making earrings:
- On a piece of cardboard, draw 2 even circles, 1-1.5 cm in diameter. You can use a compass or circle an ointment or toothpaste cap if it is narrow. Use scissors to cut out circles - this is the basis for the earrings.
- Remove the dough from the refrigerator and pinch off a small piece.Make a ball out of it, the same diameter as cardboard circles or a little smaller. Roll the resulting ball of the desired diameter into a sausage, divide into 2 equal parts. Make a ball out of each piece.
IMPORTANT! Working with one ball, place the other in a bag and close tightly so that it does not dry out.
- Slide the cardboard base all the way onto the nails, just like you would a fastener. Lubricate it with glue. Place the ball on the circle and flatten it slightly. Level the karaya so that you get a smooth, rounded surface. Do this step with the second piece and leave them to dry at room temperature for a day.
IMPORTANT! You can speed up the drying process. Place the earrings in an oven preheated to 80 degrees Celsius. Leave for 40-50 minutes with the door open. If you close it, the dough will begin to rise and crack.
When the workpieces are completely dry, you can sand down any irregularities with sandpaper. Start painting:
- First paint the back of the base red. Leave to dry for 20-25 minutes. Then stick the earrings into a dish sponge and paint the top. Paint both the back and the front in 2 layers - while the first is drying, paint the second and vice versa.
- Leave for 25-30 minutes until completely dry and proceed to black paint. Soak a cotton swab in black paint and place 5 circles - 1 in the middle and 4 on the sides. If the stick starts to fluff, take another one. Leave for another half hour until the paint is completely dry.
- Apply clear varnish to the back first and wait until it dries. Then the front one - put a large drop of varnish on the brush, place it in the center of the earring and stretch it to the edges. You may need more than 1 drop.
- Hold the finished jewelry in your hands until the varnish dries. Then lay them down until completely dry.
IMPORTANT! When painting and varnishing an earring, try not to catch the stud or pin itself. If this happens with paint, soak a cotton swab in water and gently wipe the pin. If it's stained with nail polish, dip the stick in nail polish remover.
Well, that’s all, Lady Bug’s earrings are ready. They turned out bright and unusual. And such an accessory is suitable not only for young needlewomen. They can also take root in a young woman’s wardrobe. Perfect for a walk or going out of town. Just don’t need to bathe with them, although they are varnished, they are still dough that needs to be protected from excess moisture.
 0
0