creativecommons.org
Finding keys in a bag is often a problem. You have to unload all your things, get nervous and waste extra time. The key holder helps to avoid such situations. A convenient organizer allows you to organize and store all your keys in one place. Door openers for offices, cars, apartments, and garages will find a place here. It is difficult to choose a finished product that will meet all wishes and requirements. Sometimes the key is a non-standard size. I don’t like the color or shape, and the snake seems flimsy and not very reliable. In this case, it is better to make a key case yourself.
To sew a key holder with your own hands, you do not need to be a professional seamstress or designer. This is a fairly simple process that is accessible to everyone. It won't take much time to work. If you have questions, you can always find the necessary information on the Internet.
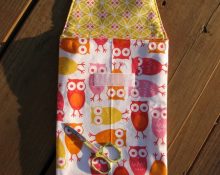
How to sew a key holder - do-it-yourself key holder from fabric
To sew a fabric product you need to prepare:
- Several magnetic buttons.
- Threads, carabiners.
- Lace, decorative elements, a special pendant for decoration.
- Key ring.
- Braid - two pieces.
- Hard dublerin – one rectangular piece.
- Fabric to choose from - two rectangles.
The tools you should prepare are a needle, scissors, and a sewing machine. Fabric rectangles can be of any size - it depends on the size of the bundle that you plan to carry with you. We present the approximate parameters of the product and sketch it on paper. Triple each side, add about a centimeter to all edges for the seams. The size of the last spread may be smaller than the width of the other two sides.
Hard dublerin is one centimeter smaller than fabric rectangles. DIY key holder - a pocket bag for keys that will look like a small wallet. The example shows standard sizes. Step-by-step instruction:
- Cut out one rectangle from each type of material. Size – 15x31 centimeters.
- From dublerin we cut out a slightly smaller figure - the sides will be 13x29 centimeters.
- The face blank is compacted using dublerin. Iron it with an iron.
- On the front side we sew key holders, several magnetic buttons, all the necessary fasteners and fasteners for small items.
- We connect two figures along one side.
- We fix two magnetic buttons on the inner panel - the second parts from the buttons installed on the front side. We make stripes.
- Place the two pieces with right sides facing each other and stitch along the contours. We do not close the seam, leaving a gap to turn the product inside out.
- All that remains is to turn the key holder inside out; to sew up the pass we use a hidden seam.
- Stitching is done on the inside, and the product is decorated with a lace ribbon along the bottom side.
The pattern is a simple rectangle.You can fill the product to your liking. For example, rubber bands are often used, into which lipstick, a pen, a perfume sampler and other small things are inserted. But then the size should be larger. The design issue is also open. The craftswoman herself decides which appliqués or stripes to use. If you need a classic key holder with your own hands, we use plain fabrics. For the children's version, you can choose bright materials and stripes of your favorite cartoon characters.
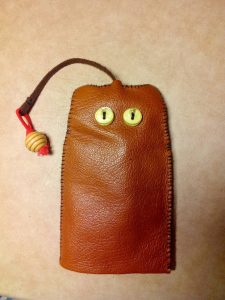
Do-it-yourself key holder made of leather - types of leather key holders
Leather products are recognized as the most durable and reliable. They are preferred by many connoisseurs of sophistication and beauty. Sewing a leather key holder with your own hands is not difficult; it is important to choose the right material and technique. Main types of products:
- Extended case. Visually it is difficult to distinguish it from a standard wallet. Suitable for owners of non-standard, excessively long keys. A snake or rivet is used for fastening.
- Purse. This option attracts respectable people, as it looks expensive and stylish. It is compact, convenient, and every owner will appreciate the benefits. The capacity of the wallet is not limited to keys. There are special slots where cards and business cards are inserted. Some models allow you to put a small notepad.
- Products with lacing. This is an excellent option for a child or an elderly person. This cover is convenient to use and can be easily unfastened. Externally, the model does not look particularly presentable.
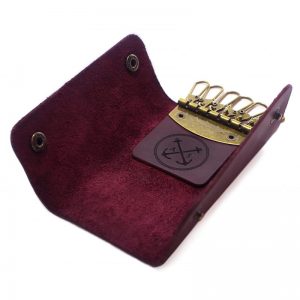
- Case. A type of key holder that has much in common with a regular glasses case. The structure itself contains special fasteners that secure the keys.
- Keychain. The most common option today.The model is equipped with a special ring. It can be attached to any item - jeans, backpack, handbag or briefcase. It looks modern and fastens with a zipper. Sometimes a small button is used as a clasp.
How to sew a key holder with your own hands - a leather key holder with your own hands
creativecommons.org
Before you start making a key case with your own hands from leather, you should create a pattern. It is not important to use new material for the work. If you have an old jacket, leather pants or bag at home, you can use them. Before use, thoroughly clean the skin. Measurements of the future product:
- Length. We measure the longest key, add two centimeters for the allowance and one and a half centimeters so that the key holder is free.
- Width. We collect all the keys together and measure the width. Add one and a half centimeters as spare, two centimeters for the allowance. We multiply the resulting amount by two.
Draw a rectangle on the skin according to the obtained parameters. To make a leather case you will need:
- A snake ten centimeters long.
- Scissors, carabiner, special needle for leather products.
- Sewing machine, reinforced thread, several pins.
- A little satin or cotton for the lining.
- Decorative elements of the artist's choice.
Having prepared everything necessary, we move on to the work process. You must proceed in the following sequence:
- Cut a rectangle from the lining fabric according to the measurements obtained earlier. It must be identical to the leather blank.
- Place the leather flap face up. Then we place the two sides of the snake with the front parts facing each other. Cover with lining material. Place the lining face down.
- We fix all the details with pins. Can be swept in places of cuts.It is necessary to make a protrusion of the lining material by one centimeter on both sides.
- We sew the product, carefully controlling their position. Layers should not move or shift.
- Similarly, we sew the snake on the second part of the key holder. Turn the sewn product inside out. Make two snake-length seams along the front layer. We retreat from the edge about a centimeter.
- You need to turn the key holder inside out again. Lay it out so that the snake is in the center, sew the side parts. If there are any excess snake tails left, cut them off.
- Zigzag the seams, turn the product inside out, straighten the corners.


 0
0
