creativecommons.org
Beautiful gift packaging always attracts attention. There are different options for presenting jewelry - a box, a transparent tube, or placing it in a bag. Creating a bag for rings and earrings will not take much time. A pleasant and interesting process during which you can show your imagination and skill. Craftswomen create real masterpieces for sale, others sew handbags for themselves. It is very convenient to store jewelry. Products are always sorted, do not get confused, and finding the right thing is much easier. The advantage of bags is that they take up less space than a box. They can even be put in a small box; the boxes can get lost on the shelf.
DIY jewelry bag - tips
Important points to consider when creating a jewelry bag:
- Before the holidays, you often have to give gifts to several people. You need to manage sewing a large number of bags for jewelry, just like when creating custom-made items.It will be faster to simultaneously work with the required number of products in stages. One paper pattern of the desired shape is made. Then we cut out the required number of parts, baste them one by one, iron them, stitch them, and so on. This will speed up the work significantly.
- The most beautiful bags are made from organza. Working with this material is more difficult than with synthetics or linen. She floats and crumbles. Each seam must be initially basted and then ironed. After this, you can work with the material on a sewing machine. To process the edges, you need an overlocker or zigzag, as the bag will be transparent.
- It is easier to make a product from cotton. There are tons of beautiful colors that are perfect for gift wrapping. It will be less elegant compared to organza, but it will take less time to work.
- Patterns for most products are rectangles of different sizes. There are round bags, but they require a lot of effort.
How to sew a round bag for jewelry
Let's try to make a complex, round bag for jewelry with our own hands. To do this you will need to prepare:
- Sewing set of scissors, threads, needles.
- A piece of non-woven fabric.
- Rope, braid, ribbon.
- Chintz for decoration and inner layer.
- Linen material - for the outer part.
Linen bags are in fashion now, so this packaging will certainly be appreciated. The work will take some time, but the second product will require less effort. Sewing order:
- On linen and chintz material we cut out two large circles and two slightly smaller ones. We cut out an even smaller circle on the non-woven fabric.
- Glue the interlining in the middle of the linen circle. This is a blank for the bottom of the bag.
- We sew together large and small circles, pin the next small circle in the center of the large one and stitch along the interlining.
- We sew two lines along the contour of the smaller part; there will be a drawstring here.
- We make several cross stitches, forming several small compartments. They are ideal for storing earrings and pendants.
- Insert the tie and assemble the bag.
As a result, we get a linen product with a chintz lining. The same chintz can be used to make a rose or other outdoor decoration.
How to make jewelry bags - a simple technique
creativecommons.org
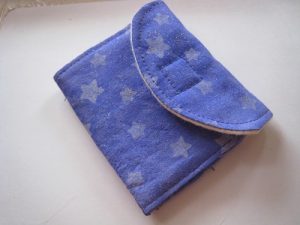
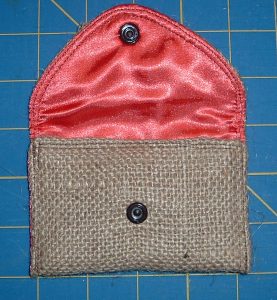
There is another way to easily and quickly sew beautiful bags. You need beautiful material, ribbon or lace, pins, scissors, and a machine. You can make products by hand, but the results will be slower. Instructions for sewing a single-layer, simple bag in half an hour:
- We take a paper rectangle and cut it out on the material in duplicate.
- Manually or by machine we sew it along three evenly folded edges. The seam should not go along the very edge, but two centimeters from it.
- All four sides need to be sewn with a zigzag stitch. On long edges, the stitching ends three centimeters before the end of the fabric.
- We bend the remaining three centimeters of material to the wrong side, making a seam two centimeters from the edge.
- Use a pin to insert the ribbon or braid into the hole. You can make lace, fabric, leather or grosgrain ties. The jewelry bag is ready.


 0
0