creativecommons.org
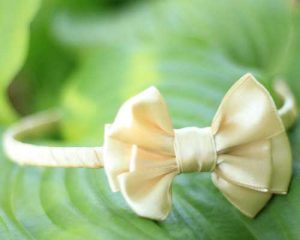
A headband with a bow looks cute on every girl. Today, such accessories are in demand among fashion designers. Famous fashion designers complement intricate outfits from the latest collections with them. Such a headband with a bow can cost as much as a good dress, just for the name of its creator. Hoops aren't just for fashionistas. Little princesses also quite often wear a popular item on their heads. At matinees in the kindergarten, a headband with a large bow is an indispensable element of a doll’s or Malvina’s costume. Hair decorations are worn by girls and women of all ages. Therefore, the question often arises, how to make a headband with a bow yourself? I want to have an exclusive item that will captivate the eye. To do this, just buy a suitable headband; you can create a bow for it yourself. A beautiful bow is sewn from various fabrics:
- Cotton, stitching, silk.
- Linen, velvet, chiffon.
- Various ribbons and lace.
- Chiffon, cambric and even jeans.
How to make a headband with a bow with your own hands
Any individually tailored product looks original. Modern hoops do not always meet the requirements of fashionistas. We invite you to familiarize yourself with the technique of creating an accessory with a fish model bow. To make a simple headband with a bow with your own hands, you will need:
- Choose a suitable fabric. Silk or satin looks good. Depending on the size of the hoop, calculate the required amount of material.
- Cut out a rectangle according to the required parameters, taking into account allowances of one centimeter on all sides. The size of the bow directly depends on the size of the rectangle.
- Fold the fabric in half. The front side is inside. Sew the edges without joining the seam all the way, so that in future you can turn the element inside out.
- Unscrew the bow, close the gap using a hidden seam and fold the product like an accordion. Sew in the center to secure the garment.
- Cut out a strip of identical material in two copies. Place the pieces face to face. Sew along the edge, not reaching the end of the seam.
- Turn the strip inside out, sew up the gap and tie a bow at the seam. Use a glue gun to secure the ends of the strip at the bottom of the bow. Glue the other side to the hoop. The fashion accessory is ready.
The product is perfect for a walk, going out or going to a party. It’s easy to make a headband with a bow yourself – it will take no more than an hour. It is better to choose a fabric that has an ornament or patterns. Fabrics decorated with large flowers look great.
How to make a bow on a headband - interesting ideas
creativecommons.org
Hoops with bows made from two or more materials look original. An interesting option is a DIY flower bow for the headband. To make it we will need:
- A small piece of green satin ribbon.
- Needle, thread, scissors.
- A little yellow tulle.
- Decoration for the middle of the flower.
- Hoop.
Step-by-step instructions on how to make a headband:
- Lay the tulle on a flat surface. Draw a circle with a diameter of six centimeters on paper and cut it out. Cut out six pieces of tulle parts.
- Fold one element in half, string it on a thread with simple stitches. Also string the remaining parts.
- Straighten the parts of the bow, tighten the thread as tightly as possible, and sew the outer elements.
- Place a flower decoration in the middle - a large stone, button or other decor. It is good to fix it on the other side of the product.
- Fold the ribbon in half and sew a bow in the center.
- Wrap the hoop with green tape, securing it at the ends with a glue gun.
- Secure the decoration to the hoop with glue.
The second interesting idea will help create a romantic, feminine image. Initially, you should purchase a white or peach hoop; the bow will be made in delicate colors:
- Take a lace ribbon twenty centimeters long. The width of the tape is about five centimeters. We place it in the middle of a peach fabric ribbon with openwork edges. We place the wrong side of the lace on the outer part of the fabric.
- Fold the material with the lace side inward. On open cuts, a centimeter from the edge, we make a seam with a needle. We iron along the seams.
- Turn the product inside out. We mark a seam across and tighten it. We wrap the thread three times and fix it.
- Cover the fixation area with a strip of fabric tape.
Headband with a large bow for doll dancing
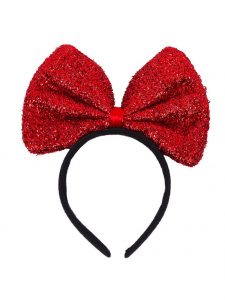
A headband with a large red bow is an indispensable element of many costumes at matinees. The decoration can be of a different color, the main thing is that the girl looks like a doll. Finding such a hoop on sale can be difficult.It takes a long time to wait for a product ordered online. In this case, you have to look for alternative solutions. For example, make a headband yourself. You can implement the idea in two ways - create a beautiful bow from ordinary fabric or from tulle. How to make hoops with a fabric bow:
- When choosing a material, it is recommended to give preference to gabardine or satin.
- We cut out a square with sides of twenty-five centimeters on two types of material - glossy and matte. We put them together and fasten them with pins at the corners.
- The front side is glossy. Fold the square in half and round the corners. To do this, draw an arc at each corner of the figure. Then we sew the product around the perimeter, leaving room for turning the fabric inside out.
- The corners of the rectangle became round. We turn the figure inside out and get a blank for decoration. We collect it on a thread in the center and tighten it - the bow will form. We secure and set aside this part.
- We make the second bow using a similar system, but it will be smaller. We fasten the two products so that the smaller model is in the center of the larger decoration. You can decorate the material with pebbles or rhinestones, securing them with a glue gun.
- Fix the resulting product on the rim with glue.
The second option is to make a hoop with a tulle bow. To do this you will need a little transparent glue, tulle, a satin ribbon no wider than three centimeters and thread. The bow has three layers: two tulle, one satin. What you need to make a tulle bow:
- First we make the bottom part. It is necessary to cut a rectangular figure from tulle with dimensions of 15x35 centimeters. Sweep it through the center and along, tighten the thread. A jumper will appear on the bow. Fasten the thread, but do not cut it.
- Let's move on to the second layer. It is made from satin ribbon. Let's wrap it in a ring three times.Now you need to crush the wound tape so that its beginning is in the center of the crushed circle. We attach the ribbon to the tulle bow with a thread. Again, do not cut the thread. Straighten the satin bow carefully so that it does not fall apart. We tighten the thread more tightly and fix the desired position.
- Let's make the third part. You will need a tulle rectangle with sides 8x12 centimeters. By analogy with the first part, we collect it into a bow and attach it to two other elements.
- The free part of the tape must be bent in half and wrapped around the entire product. We get a single decoration, secure it with a thread, then cut off the thread and the rest of the ribbon.
You can secure the product to a fabric hoop with a safety pin or hairpin. If the base is made of plastic, proceed as follows:
- We wrap the tape around the plastic at the point where the decoration is located and seal its ends with a glue gun.
- We glue the product onto the tape.
We decorate the bow with pebbles, placing them on drops of glue.


 0
0
