creativecommons.org
Recently, more and more women are using a fan in the heat. This accessory has become not only indispensable on summer days, but also fashionable. A girl with a fan looks graceful and elegant. Today, this industry is not yet very developed, so the choice of fans in stores is small. However, you can always make a fan with your own hands; a master class on special websites, a fashion magazine and advice on forums will help you cope with the task. Some craftswomen have long mastered the trend and sell their products on the Internet. But why overpay if you can create your own exclusive masterpiece.
The question often arises - what are fans with fabric called? These are the most popular models today. They are commonly called Veela. When making Veils, several features of the work should be taken into account:
- If the product does not become a decorative decoration, it will be used in hot weather, it is necessary to make a comfortable handle. Many Veelas do not have a good holder, so wearing them is not always comfortable.
- The base for the fan is made of wood or wicker. You can take frames from ready-made veils - this is a simplified version.
- Products with painted bases are in great demand. Even the simplest patterns look beautiful.
- Veils are considered better than paper and other variations. Even if they are made of simple non-woven fabric.
How to make a round fan - a fan for dancing with your own hands
A beautiful round fan is often used as a decorative element in the home. It hangs on the walls, giving a special atmosphere. The product will definitely save you from the heat. But dance fans look different. They attract attention and fascinate due to the fluttering fabric. This original accessory is used not only by professional dancers. Fans are often purchased by dance schools or parents for their children’s performances in a school concert. The master class will tell you in detail how to make a fan.
First you need to prepare materials and some tools:
- We take the base from a standard folding fan. Fabric models are better suited.
- We buy fabric - silk, satin or other.
- We select glue that glues woven surfaces and a small brush for applying it.
Before making a fabric fan, we carefully measure all the parameters. To determine the required fabric width:
- Open the fan and measure its width.
- Transfer it to the material using a centimeter and place marks on each edge.
- Add two to five centimeters to the left and right.
The most comfortable length of fabric is one hundred centimeters, but this depends on the number. In some productions the length reaches three hundred centimeters. Next we proceed step by step:
- Using a brush, apply glue to the frame, where there is material.Therefore, we glue only the solid part of the structure. Do not apply glue to the woven spaces between the ribs and areas where there is no attached fabric.
- We straighten the material on a flat, hard surface so that there are no folds or bends.
- We place the weil on which the glue was applied onto the fabric slowly, one edge at a time. It is important that the fabric is not stretched between the ribs and remains level during subsequent openings.
- We cut off part of the material at the base to the line of the beginning of the fabric. Due to the absence of glue in this area, this is easy to do. A stationery knife will help you cut the material carefully.
How to make a fan with your own hands from fabric, master class - fan at home

creativecommons.org
A fan with fabric is a standard size fan. It does not look like a dance version and is used everywhere. In some dances it is also an indispensable attribute, but it can also be used while walking, in transport or in a restaurant. If you don’t want to use a standard product with a distinctive design, you can easily make a fabric fan yourself. The master class below will tell you all the details.
To work you will need:
- Non-woven meter.
- Meter of material for the canvas.
- Ruler, scissors.
- Pencil, needle, compass.
- Wooden stick, from ten to twenty pieces - depending on the size of the product.
- Glue gun, glue.
- A small piece of wire.
Now you can proceed directly to making the fan:
- On each wooden stick we measure three centimeters with a ruler and put a mark with a pencil.
- A stationery needle is used to create holes in place of the marks.
- We combine the holes from the needle, folding the sticks, thread the wire through them and secure with a loop on each side.We get a ready-made base for the fan.
- We measure a rectangle on the non-woven fabric, attaching the base. Its size should be twice the size of the frame. We find the middle of the rectangle, set a step of five to ten centimeters on the compass, put it in the middle and draw it in a semicircle. This is a blank for fabric.
- We put the non-woven fabric on the table. Open the base and apply it to the rectangle. Before doing this, you need to check if all the sticks are in place. We mark on the fabric where each wooden piece is located and where it ends.
- We carefully apply glue to all wooden elements on one side. It is better to do this with a special brush. Glue the parts of the base to the marked places in the rectangle. At the top, we cut off the material remaining from the sticks at a distance of more than five centimeters. Similarly, we adjust the canvas on all sides.
- To prepare the canvas we use the same approach.
- Cut out a semicircular piece at the base.
- Lubricate the second side of the wooden elements with glue and fix them on the fabric.
- We cut off the excess interlining and the remaining material in the upper part close to the ends of the frame. Leave half a centimeter.
- We bend the remaining material at the edges and glue it to the sticks with a gun.
The product is ready, but to make it convenient to use, the handle should be secured. A cord made of braid or in the form of a bracelet is suitable. It is attached to a wire.
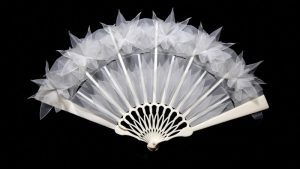
DIY fan - master class made from fabric and lace
The concept of making fans from various materials is the same - fabric or paper is fixed on a base of sticks. A lace fan is created in a similar way. There are two options for fabric that will look delicate and delicate - fabric or knitted.
Knitted options are beautifully made from mercerized cotton yarns. To make such a lace fan, you don’t have to read literature or study complex knitting principles. It is enough to take yarn, hooks numbered two and five. The principle of operation is simple if you have knitting skills:
- We start knitting from the bottom. We add loops, moving upward. Find a knitting pattern on the Internet or in a magazine.
- After finishing the work, thoroughly moisten the canvas with water and straighten it on a flat surface. This will allow the loops to take the correct, even position.
- Starch the canvas with glue or sugar syrup.
- We open the frame and put the openwork part of the fan on it.
- Let it dry for several hours. A delightful fan for a girl is ready.
The second way to make a lace fan is to use lace fabric. You can use ready-made vail as a basis. The frame must be carefully separated from the material. In most factory products it is plastic. We lightly gather the lace, apply it to the open base and secure it with threads. Let's start working from the top. Care must be taken when joining the plastic to the lace. The material may tear. After finishing work on the first layer, we move on to the second level.
We apply another lace and attach it to the base using a glue gun. Decorating should begin when the glue is completely dry. Rhinestones and lace roses are used for decoration. A ribbon stretched at the bottom of the product between the bases and tied with a bow looks beautiful.
How to make a beautiful fan with your own hands from paper
Paper fans are the easiest to make. To make it you need to prepare:
- Three multi-colored sheets of paper.
- Tape, scissors.
- Glue stick or regular glue.
- Hole puncher.
The product is created in five stages:
- We reduce the sheet of paper by cutting off a strip. The width of the strip is three centimeters.
- From the next sheet we remove a strip of six centimeters.
- We leave one sheet as standard.
- In the smallest sheet, we make holes with a hole punch along the canvas so that the product turns out to be openwork.
- We cut medium-sized paper along the edges with scissors and make a fringe.
- We do not touch the large sheet.
- We stack all the sheets and make an accordion.
- Find the center point and tie the ribbon.
- Glue along the central stripes.
- We straighten the sheets and correct them. The tape stays down.
The option is suitable for children's matinees and school holidays. The three-layer design looks openwork, reminiscent of lace.
 0
0