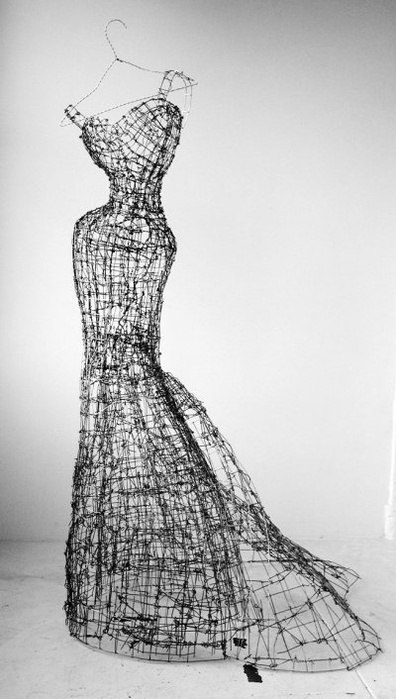
 Throughout their lives, girls regularly face the need to do a festive hairstyle for September 1, graduation, wedding or New Year's corporate party. Scallops, hairpins or headbands decorated with your own hands will help you create an original styling. You can create them from beads, satin and lace, and wire. Before you start creating, you should carefully think through the idea.
What will you need to make a hairpin?
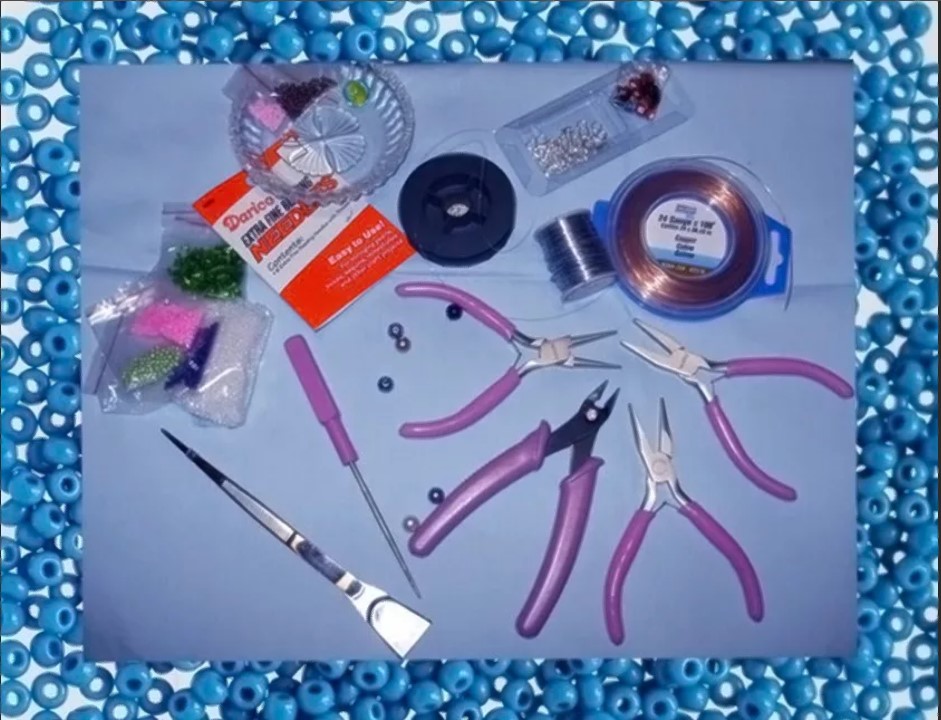 In order not to be distracted from the process, it is worth preparing in advance the necessary tools and materials for creating jewelry.
Depending on the chosen model, you may need:
- beads of various shapes and sizes;
- beads of desired colors;
- satin and lace ribbons;
- blanks for hairpins, headbands, invisible hairpins;
- wire;
- wire cutters;
- pliers;
- round nose pliers;
- glue gun
Important! This is an approximate list; for each product you should immediately decide what exactly to prepare.
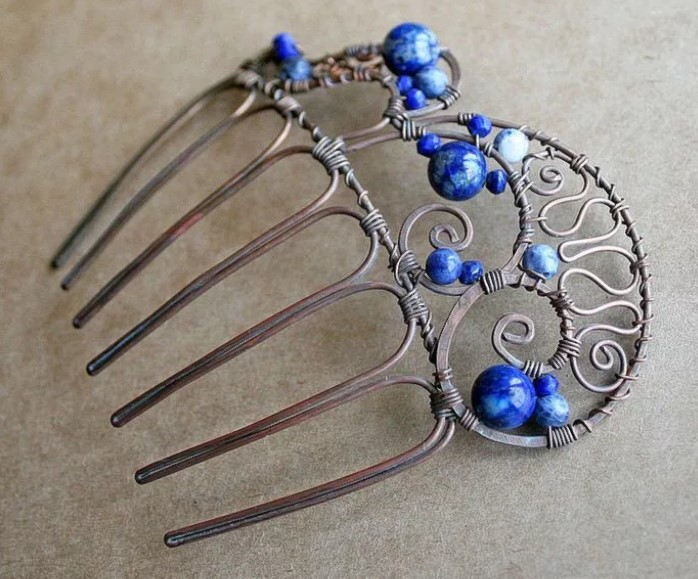
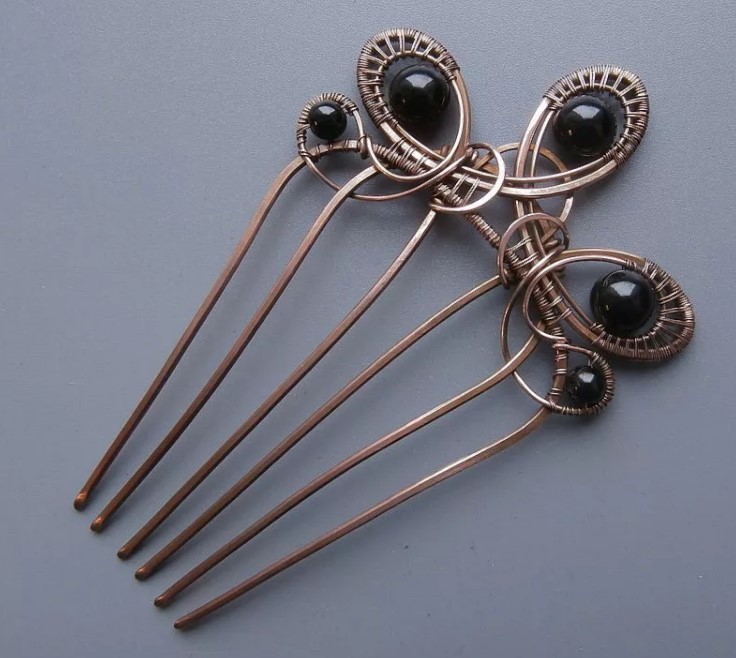
How to make a hair clip from beads and wire with your own hands?
In order to make an interesting and beautiful accessory, you need a little imagination, a minimum of skills and free time.

It is important to match the style of decoration to the overall image, so that everything fits harmoniously.
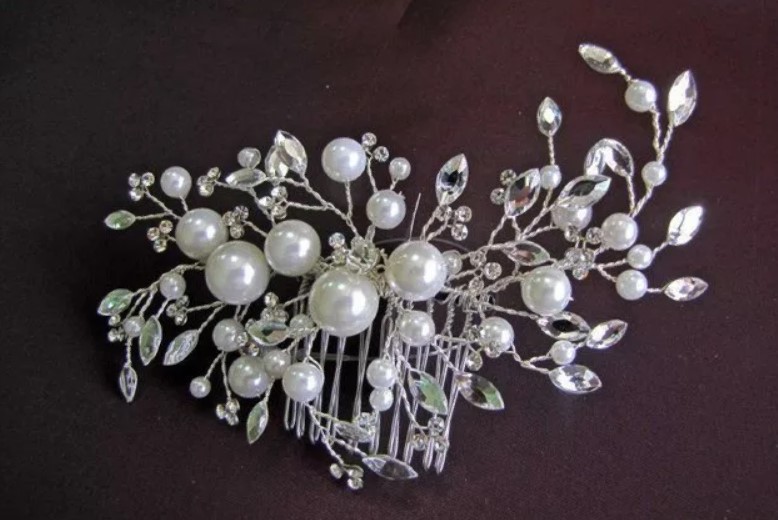
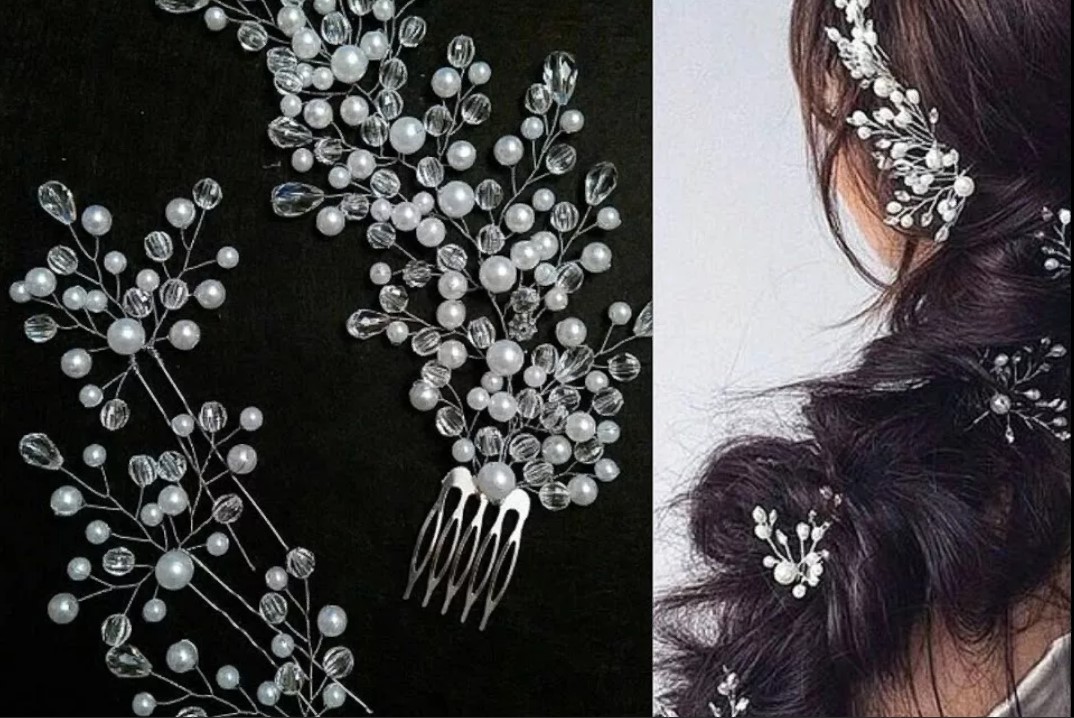
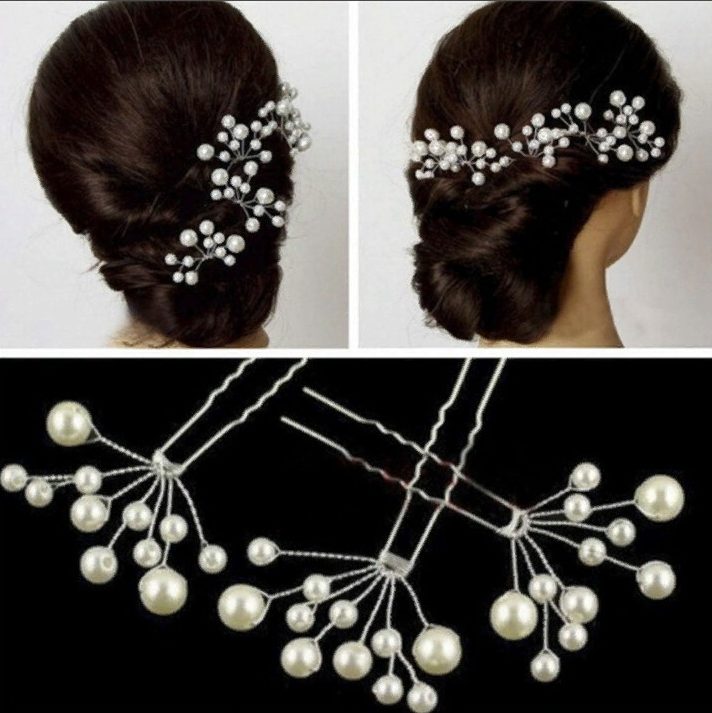
Vintage branch for wedding hairstyle
Often, when preparing for a wedding, it is frustrating that among the large assortment of hairpins, headbands and hairpins it is impossible to find the right one.
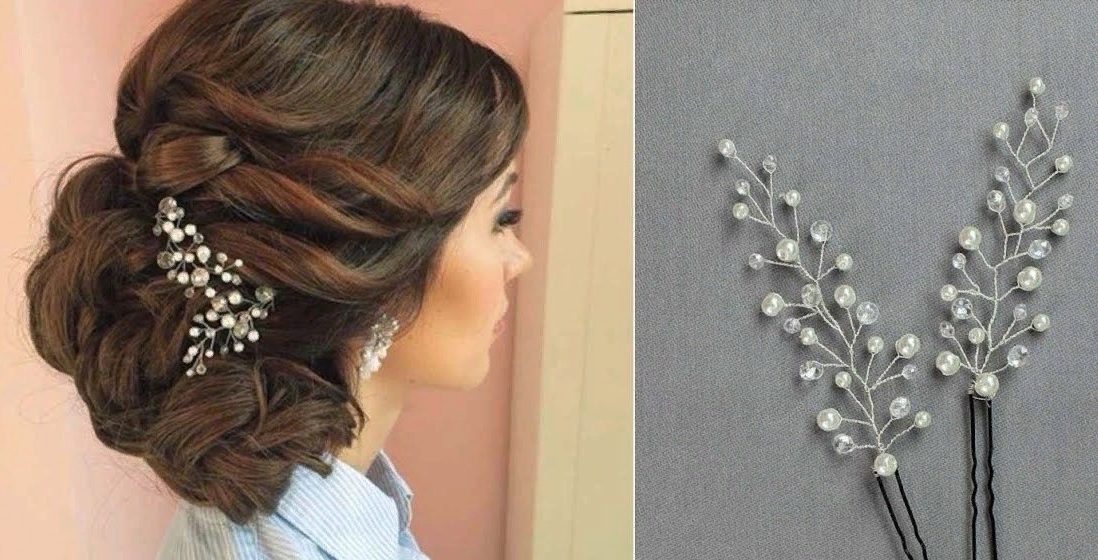
Making your own jewelry will help solve this problem.
Drawing a sketch
Having a clear idea of the image of the desired twig, you should draw it and weave it, adhering to the drawing. This way, in the end, you will get exactly what was intended, and will also help you not to stray from the right direction. For this you will need: paper, pencil, eraser, ruler.
First, you need to mark the length of 26 cm on the sheet and draw a vertical line. This segment will act as a boundary. Draw the branch itself along it, approximately what it will look like.
Important! You should regularly check the sketch while weaving so that the twig does not blur.
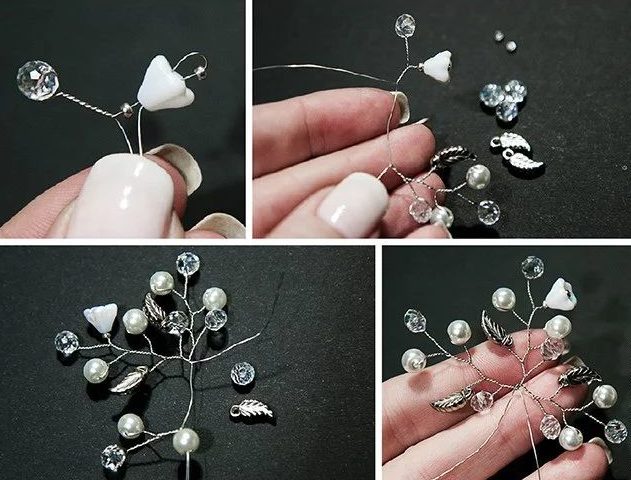
When the drawing is ready, the prepared beads are laid out on it to imagine what the finished product will look like.
Step by step steps:
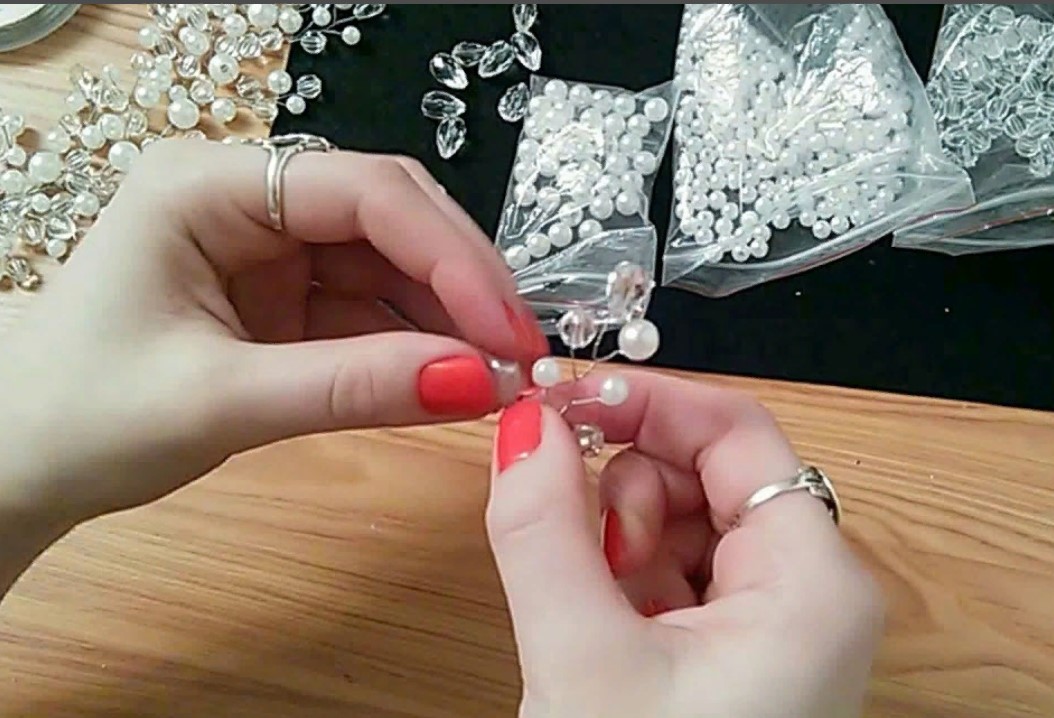
- Take the wire from a skein without cutting it, this way the branch will be solid and will look neater.
- The beads that complete the composition are put on first, that is, they are put on in the reverse order.
- Move all elements away from the edge by 53 cm. This will be the central branch.
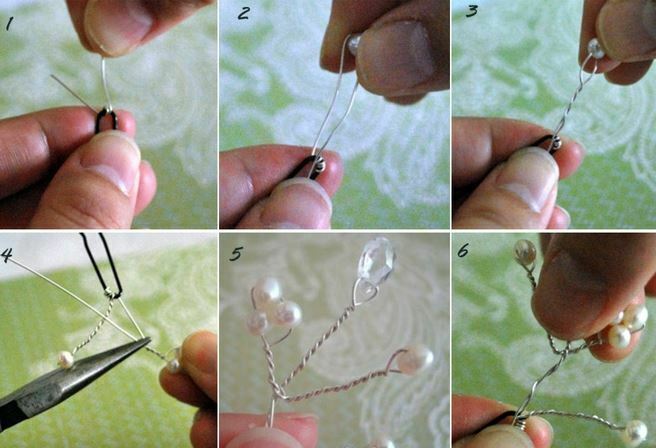
- Take the first bead and bend the wire in half. Then twist it 2.5 cm.
- Do the same with the second bead, but at a distance of 2 cm.
- Then we twist the two wires together so that there is a small indentation from the place where the first two branches are twisted.
- Next, you should do the same with all the beads, checking the sketch so that the branch clearly follows the pattern.
- Finally, cut the wire with wire cutters. Then twist the ends and press them with your fingers.
- This decoration can be attached to the hair with hairpins. Can also be used as a bracelet or necklace.
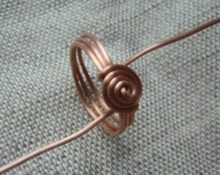
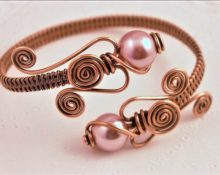
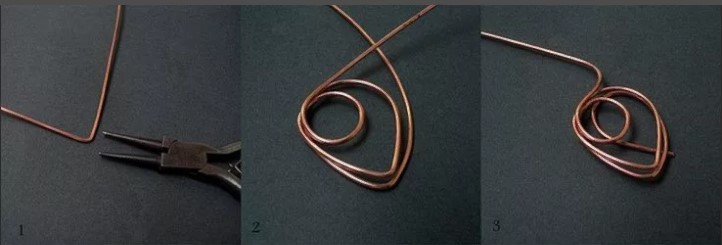
Wire Wrap Hair Comb
Combs were originally created for combing; over time, options for decorating hairstyles appeared.
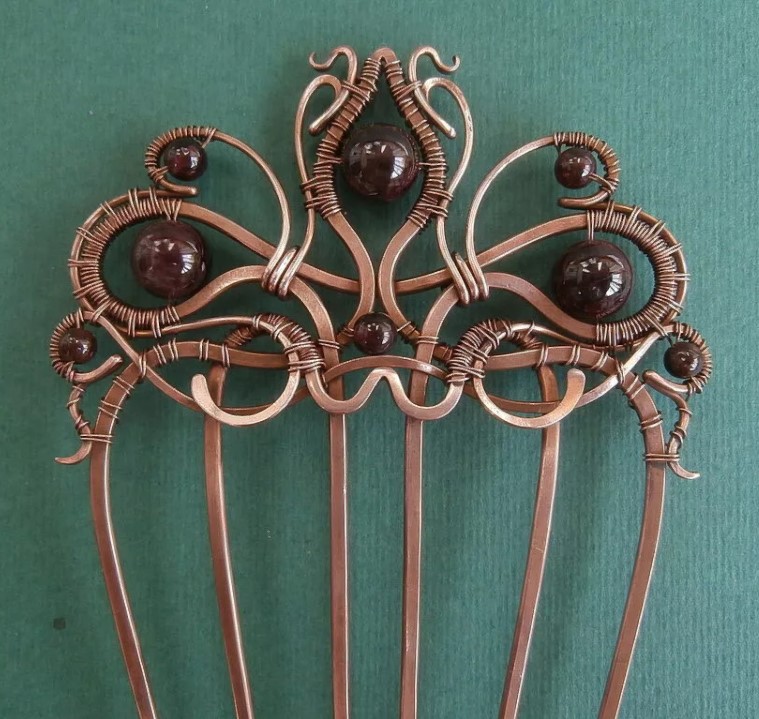
The wire wrap technique involves twisting wire, creating patterns and curls decorated with beads and stones.
Product options may vary.
To make it you will need:
- wire - 2.5 mm, 4 mm, 0.8 mm, 0.3 mm;
- green beads of different sizes;
- wire cutters;
- pliers;
- hammer.
Preparing a sketch
IN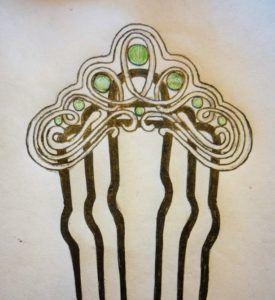 An important part of this technology is the sketch. It must be clearly drawn and thought out to the smallest detail, since all patterns are prepared according to it. Its parts must fit together exactly.
First you should sketch the ridge itself, noting all the bends on it. Then you can proceed to the decorative part, here you also need to accurately draw out all the curls and mark the location of the beads.
Work process:
- bend decorative elements according to a pattern from 2.5 mm wire, flatten the curves with a hammer;
- make the outer teeth from 4 mm wire, and the two middle pairs from 2.5 mm;
- put them on top of each other and weave them together with a thin wire;
- make a tight winding around the central part of the large cloves, immediately inserting the beads and attaching them to the upper base;
- connect two large decorative elements in the same way;
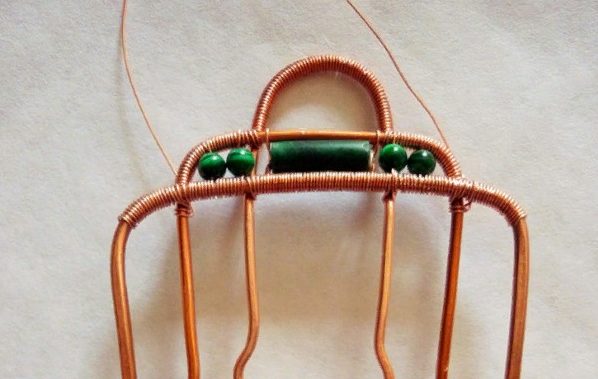
- attach the upper part to the base of the comb;
- fasten tightly with 0.8 mm wire in parallel, forming a lace pattern;
- make blackening and coat the finished comb with varnish.
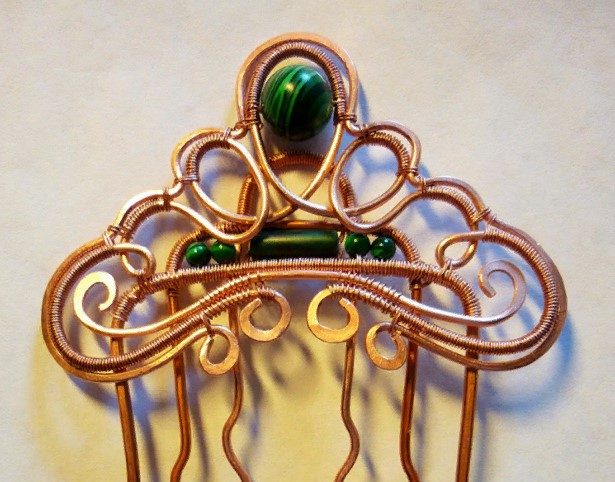
Important! During the entire process, you need to ensure that all the coils lie evenly and neatly.
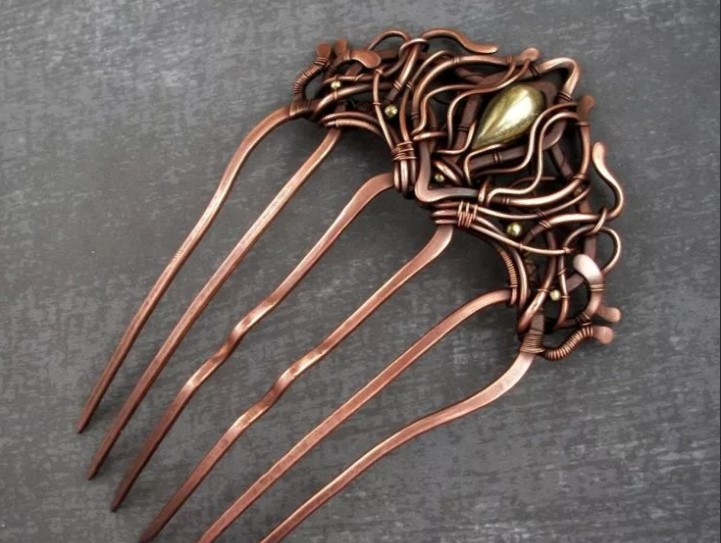
By choosing one of the options you like, you can make your own hair decoration to suit any outfit and situation. This very interesting and exciting activity will allow you to spend your free time profitably. Such accessories will complement the image with grace and originality, highlighting its owner in the crowd.
 1
1