Any mother wants her daughter to have a neat appearance at school or kindergarten. And to do this, you should collect your hair in a bun or secure it with hairpins. To prevent girls from looking alike in store-bought hair jewelry, you can try to make exclusive works in one copy. It will not take much time and does not require any special skills in needlework. But your baby will look the most beautiful compared to her peers.
Ribbon hairpins
If you are disappointed in the assortment of hairpins presented in the store, but you want to decorate your princess’s hair as original as possible, try making your own hair decoration from satin ribbons. Fortunately, in handicraft stores you can choose them in any color scheme and width.
The material is pliable and easy to work with, so even a mother who had never been into needlework before could cope with the task. By choosing the right colors and decorating the finished product with beads or rhinestones, you can make hairpins separately for each outfit of a little fashionista.
How to make hairpins from ribbons with your own hands
Having purchased satin braid and large beads, you can start working in the evening. Either buy the blank on which the future hairpin will be held, or use an old store-bought item.
What you will need
In addition to the base for the craft, you will need:
- satin ribbons of different widths and colors;
- reps;
- organza;
- braid;
- cord;
- decorations for the middle (buttons, beads, stones).
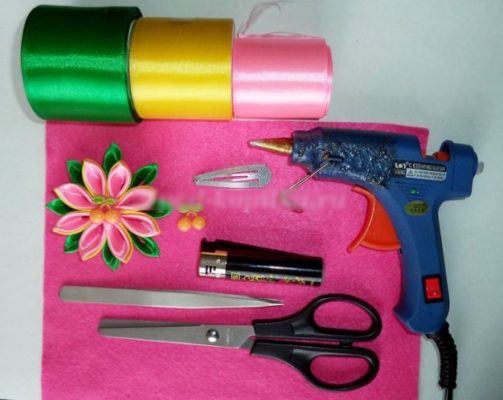
The following equipment should be prepared:
- needle and thread;
- scissors;
- hot silicone glue;
- matches;
- tweezers.
Instructions
First, let's try to make the simplest hairpin. Cut two rep ribbons, each 8cm long. Now finish the edges. Fold the ribbon in half lengthwise with the right side facing inward and make cuts along the edges at a 45-degree angle. Unfold the tape - you should have a triangle cut out along the edge. Do the same with the second tape.
To prevent the cut edges from fraying, carefully touch them with a burning match. Now drop a little glue into the middle of one ribbon and place the other one on top at an angle, so that the ends do not overlap each other.
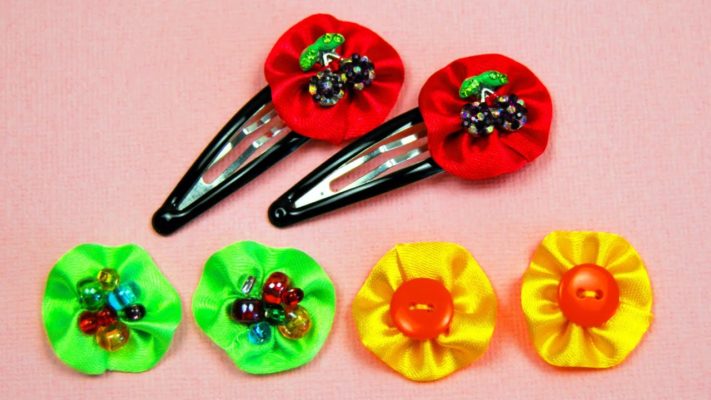
Let's start making the middle. Cut a piece of ribbon from grosgrain and two from organza. Length – 15 cm. With each of these tapes you need to do the following operation:
- roll in a circle and sew the two ends to each other;
- run a basting stitch in the center without tearing off the thread;
- pull the thread and make a knot.
There is no need to cut the thread, but continue to string the next bows on it. You should get a bow of three parts - the two outer parts are made of organza, and the middle, dense one is made of rep.
Now cut two satin ribbons 0.6 cm wide and 7.5 cm long and one in a more contrasting shade of the same length but 1.2 cm wide. Cut the edges into a triangle, as we did with the central blank, and singe it with a match. Take rep ribbons glued crosswise. Also glue two narrow ribbons crosswise, but at a large angle, and then perpendicular to the main workpiece - a wider ribbon.
Pour hot glue on top of the workpiece and attach our center in the form of a bow. To prevent traces of glue from being visible, sew a bead or a beautiful button in the center.
All that remains is to let the product dry and attach it to the automatic clamp.
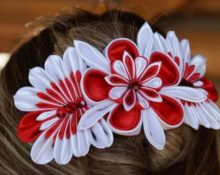
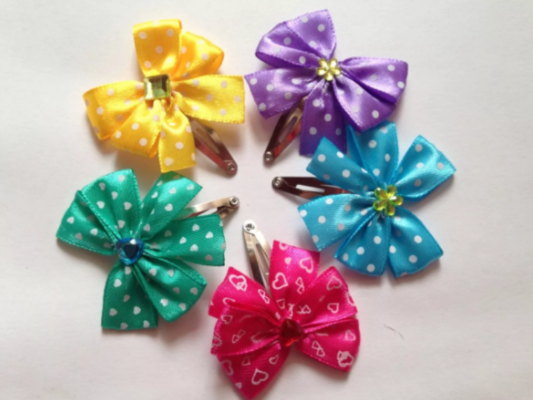
Interesting ideas for ribbon hairpins
Having mastered the simple technology of making hairpins from satin ribbons, you can proceed to more complex designs, using all your skills and imagination.
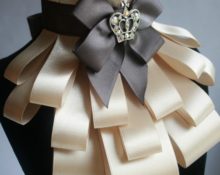
Bow hairpin
A wonderful addition to a girl's school uniform will be a bow hairpin made from satin ribbons and attached to a hair elastic. To make it, you need to buy in the store 0.48 m of satin ribbon 2.5 cm wide and 0.37 m of grosgrain ribbon with polka dots or with a pattern 0.9 cm wide.
First of all, cut the ribbons into pieces. We need two satin pieces of 17 cm and one of 14 cm. Rep pieces - two of 17 cm and one of 3 cm. Treat the edges with a burning match to prevent fraying.
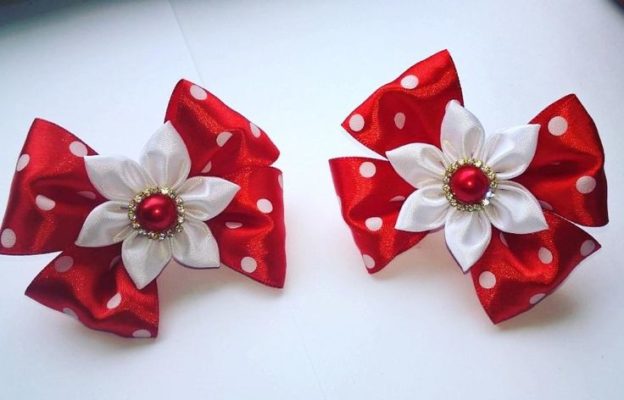
For the base we take long ribbons. We put dots of glue on top along the entire length, and on top of each we put a narrow ribbon. We use the remaining tape to make the middle. We roll it in a circle, stitch it, then tie it with thread to make a bow. We perform the same operations with two bases.
We pull the warps together and sew them together. We put the middle on top and stitch it again.And so that the threads are not visible, we will surround our product with a short grosgrain ribbon, which must be pulled off from the wrong side. After gluing the elastic band with silicone glue and waiting for the glue to set, you can use our bow.
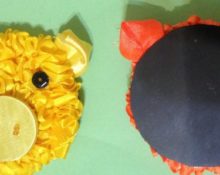
Ladybug hair clip
Children simply adore these solar insects. So your daughter will enjoy using the “Sunshine” hairpin.
Cut out 6x6 cm blanks from satin ribbons - two red and one black. Treat the cut ends with a burning match. Then roll each of the blanks into a triangle, turn them inside out, and you will get two red wings and a black body. Sew the wings to the base on the sides.
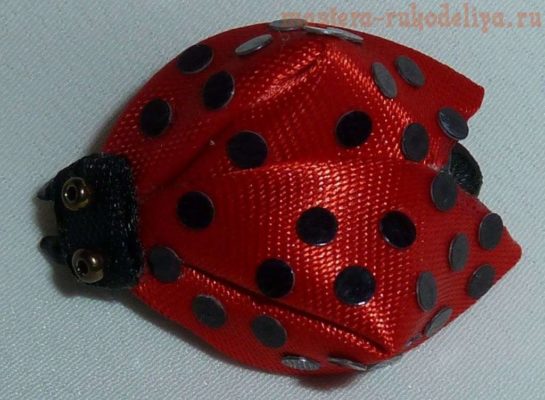
All that remains is to make the head of our insect from a bead or a black button, onto which two red dots should be applied - eyes. Now glue an elastic band to the back of the ladybug, and all your classmates will envy your daughter.
We looked at the simplest ways to make hairpins from satin ribbons. There are other, more complex ones, which you can turn to in the future, having mastered the basics according to our description.
 0
0