Men, unlike women, when choosing underwear, primarily focus on comfort. The fair half of humanity can purchase a set that, although inconvenient, is incredibly beautiful and effective. That is why it is quite difficult to meet a girl who wears spacious and wide panties, but for guys, “family pants” are considered one of the most successful underwear options.
“Family” panties in the form of wide shorts are called because they do not squeeze the man’s genitals. Narrower models provoke blood stagnation, which, in turn, contributes to the development of infertility and problems with potency.
Features of sewing men's family panties
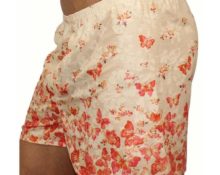
 Needlewomen who sew almost always have leftover fabrics in stock that are difficult to find use for. If these fabrics are natural and do not have bright, childish or feminine colors (flower or heart), they can be used to sew men’s family panties.
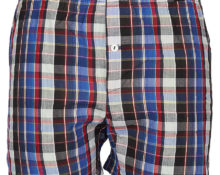
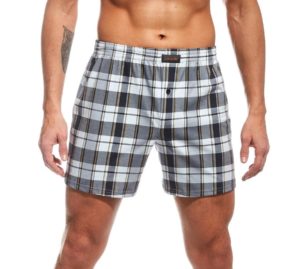
Reference! “Family briefs” are a common type of underwear for men.The style is most common in the CIS countries and Russia. Characterized by a loose and simple cut, they do not have a codpiece like boxers or trunks. This type of underwear is best worn with loose and wide trousers, used for sleeping and relaxing at home. If you wear family briefs under tight jeans or shorts, they will uncomfortably roll down and form wrinkles.
Hand-sewn underwear will be a good gift for a boyfriend, husband or son. Made according to individual measurements, taking into account special wishes, it will definitely fit in size and will please the person for whom it is intended.
The first thing you need to do before starting work is decide on the fabric. As already mentioned, underwear should be made of natural materials, so you need to consider the remains of chintz, satin or lightweight calico. These fabrics are very soft, light and at the same time durable and do not fade with frequent washing.
After choosing the fabric, you need to make sure you have the following tools and materials that will be useful for the job:
- threads of a color matching the fabric;
- sewing machine;
- graph paper;
- tape measure;
- linen elastic;
- needles, pins;
- scissors;
- pencil and chalk for transferring the drawing onto the fabric;
- iron.
Family panties can be sewn by hand without using a sewing machine. To do this, you need to stock up on comfortable needles, strong threads, and a thimble.
How to make a pattern for men's family briefs
 To create the correct pattern, you need to find out the man’s parameters by taking his measurements. For example, you can take the following parameters:
- Half waist circumference (ST) – 41 cm;
- Half-circumference of the hips, which is removed at the protruding point (SB) – 50 cm;
- The volume of the hips, which is removed in a high place (Poor) – 55 cm.
Important! The finished product will be loose and comfortable if you use the technique of adding a few centimeters to fit when constructing the drawing. You need to add 2 to 5 cm at the waist, 5-6 cm at the hips. In our case, allow 6 cm on the hips, 2 cm on the waist.
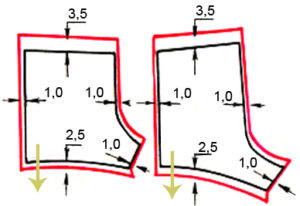
You need to build a pattern by drawing a vertical line on graph paper with the vertex at point A.
The drawing creation process is as follows:
- We indicate the height of the seat, for which point H is laid down from the marked point, obtaining a line of the length of the product. To do this, you need to use the formulas: AN = 0.5 C6 + 1 = 0.5 X 50 + 1 = 26cm – seat height; AN2 = AN + 7 (increase) = 26 + 7 = 33cm – length with allowance.
Important! Almost always, these values are used to construct both (back and front) halves of the product. However, in order to avoid confusion, it is still better to perform calculations sequentially.
- The pattern of the front element of family panties begins by setting aside a new measurement equal to the half-circumference of the hips from the known points A, H, H2. With an addition of 1 cm, the result is 26 cm. New points are designated by letters and numbers - A1, H1, H3.
- From measurement H1, measure 8.5 cm to the right (one-sixth of the half-circumference of the hips, excluding tenths).
- Then you need to calculate the new point B1, for which the half-circumference of the hips is divided by 6 and subtracted 1.8 cm. As a result, it turns out that point B1 is equal to 6.5 cm. The segment is connected by a line, not forgetting to set aside 1 cm from B1 and B (you need to check the drawing).
- From the designation A1, 1 cm is set aside in the upward direction and the resulting point is connected to the already known point A (as indicated in the diagram).
- On the resulting line, half the measurement ST is set aside, taking into account the 3 cm increase, and a point T is placed. The segment AT is equal to 23.5 cm (41/2 + 3).
- The seam line is drawn with a curved line, which should divide the angle A1H1B into two equal parts. Line length 4.5 cm.
- After this, you need to check the resulting pattern. The segments should be 31cm.
- From H you need to put a two-centimeter segment to the left and put point H2.
- From H5 to the left, continue the line to one-fourth of the half-circumference of the hips, removing 1 cm. The result should be a segment H5B2 = 11.5 cm.
- From point H5, lay a vertical line 3 cm down and mark point H6, from which the circumference of the hips minus one and a half centimeters is laid horizontally to the left. The result is a segment H6B3 equal to 12 cm.
- Next, you need to draw a line through points B3 and B2, drawing it up beyond B2 by 1 cm.
Important! From designation B3 you also need to set aside the same straight segment, however, its length can only be determined by measuring a section of the same front half.
- The waist is adjusted and the back seam is determined as follows: From A1, half of the known semicircle of the waist is laid horizontally to the left, taking into account the five centimeter increase, and T1 is placed. Segment A1T1 is 25.5 cm. From T1, 2 cm are laid vertically upward and point T2 is placed. Points A1 and T2 are connected by a line.
After the drawing is ready, you need to start cutting the fabric. To make this more convenient, schematic images of the front and back halves are transferred to a sheet of cellophane or cardboard. They will be convenient to use while laying out the material.
Advice! To ensure the accuracy of the resulting patterns, you can first sew a test product. After this, the pattern can be safely transferred to cardboard and used for cutting.
The front and back parts can be cut out entirely, without a side seam. This will significantly speed up the process and reduce the amount of skin irritating elements.
In the process of laying out parts of patterns on the material, it is necessary to take into account the directions of the grain thread. It is also worth paying attention to the fold line. If the material is slightly wider than 85cm, it needs to be folded lengthwise. Thus, to sew underwear for a man taller than 175 cm, you will need a little more than 1 m of fabric.
Important! To create a more voluminous model for a larger man with your own hands, you need to make an addition for the back part in the drawing. When laying out you will need to add one wedge.
How to sew men's family briefs: step-by-step instructions
 To prevent the edges of natural fabric from fraying due to frequent washing, the seams must be closed with a special seam - a linen seam. It is also possible to use an overlocker. It is also necessary to avoid unnecessary punctures, so it is also better to avoid finishing stitching. The lower sections of the material are processed with a hem seam with tucking from 0.7 to 1 cm of the fabric. The upper sections into which the elastic will be inserted should be wider than 2cm.
The step-by-step process of how to sew a product looks like this:
- After the crotch seams are sewn, you will end up with two halves of family panties, which need to be turned inside out and placed facing each other.
- The front and back middle seams are sewn in one line, after which the product is turned inside out.
- The bottom is hemmed taking into account the recommended hem, ironed, folded again and machine stitched near the edge of the fold.
- The upper cut is hemmed taking into account the need to insert an elastic band, not forgetting to make a hole for its insertion.
- The final step is to insert the elastic. You can stretch it with a pin. The ends are sewn by hand.
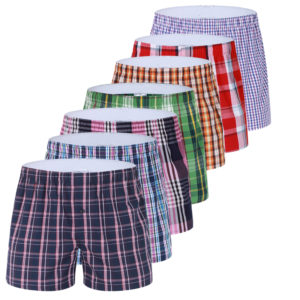
Ready-made patterns can be saved for sewing new family panties.If we take into account the recommendations of urologists and andrologists, then one man should have from 7 to 10 pairs for free use. During the hot season (summer and spring), linen should be changed 2-3 times a day. In winter, underwear can be changed once a day, but wear models made of denser and warmer fabrics that retain heat.
 0
0