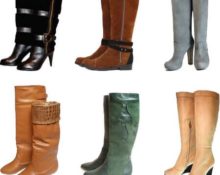
The type of boots used depends on the model that is planned to be made from them. To work with the bottom of shoes, old boots made of genuine leather, eco-leather or suede are suitable. Genuine leather is durable, elastic, and easy to process and paint. It practically does not change its appearance for many years, unlike leatherette. The lower part of the shoe (toe and heel) remains, as a rule, in good condition, along with the tops.
Attention! The best option would be autumn boots without insulation. Winter models stretch during wear due to the fur, so after removing the fur, the remaining base will not fit tightly to the leg.
What kind of boots can be used to make shoes?
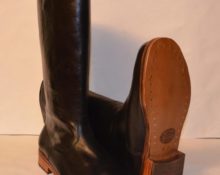
For some models, you can use any boots, even ones that have completely lost their original appearance or are cracked, made of any material. In this case, you will need additional good quality natural material to update the front of the shoes.It can also be leather or suede from old jackets, bags or boots. In this case, the boots will serve as a last with a ready-made sole for future shoes.
The boots can be turned into closed autumn shoes or ankle boots, provided the sole of any type is preserved (platform, heel, wedge). For summer versions of boots, you can take only the upper part, using it with a thin sole.
What materials and tools will be required
The set of necessary tools and materials depends on the model. Tools you may need:
- metal ruler;
- pattern;
- awl;
- needle;
- scissors;
- stationery knife;
- tweezers;
- glue gun;
- pencil.
Materials for work:
- old boots with heels (or any sole);
- glue “Moment” or another for gluing leather;
- thick cotton or nylon thread;
- pieces of leather or suede from an old jacket;
- a strip of soft leather to match the suede;
- decor (optional).
Shoes made from boots: step by step
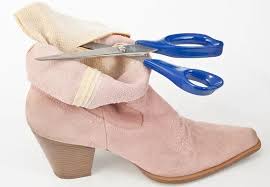
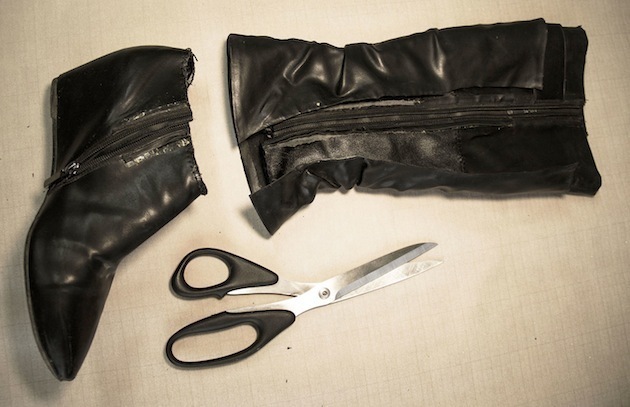
The process of making ankle boots from old cracked leatherette boots consists of several stages:
- Choose the height of the shoes (ankle-length or slightly higher).
- Draw a cutting line with a pencil. It can be flat or shaped at the master’s choice, using a ruler or pattern.
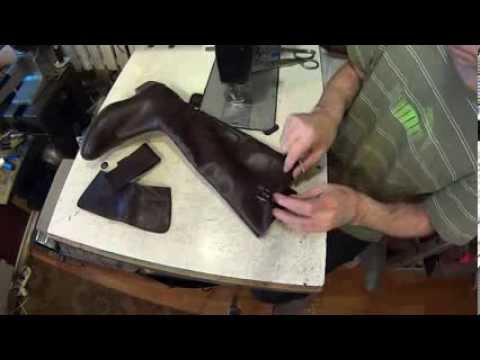
- Carefully trim the top along the marked line.
- Completely clean the workpiece from any remaining pieces of leatherette so that the surface is smooth.
- Distribute the prepared piece of suede over the front of the workpiece, starting from the inside (from the zipper) to the outside, running the material onto the heel and sole.
- Glue thoroughly with a gun, smoothing the suede well so that no folds form. For high-quality gluing, clamp the fabric with your palm, holding it while the glue sets.
- Leave the workpiece until the glue dries completely. This time is indicated on the tube.
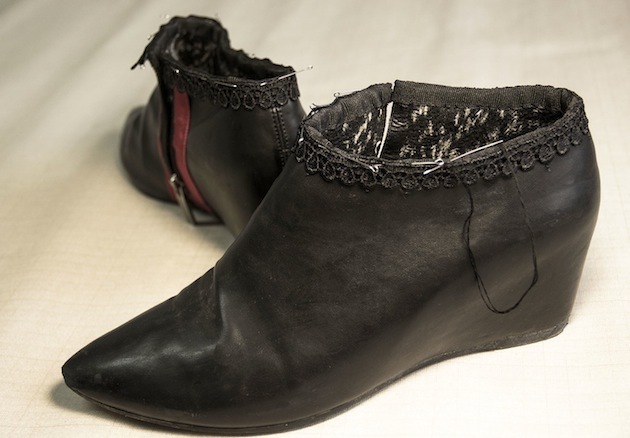
- After completely fixing the suede, carefully trim off the remains with a stationery knife.
- The side of the heel is shaped in the same way.
- The neck of the shoe is turned up, stitched with a matching transparent thread, and the edges of the cut zipper are also secured with it. For finishing, you can use a narrow strip of soft leather to match the suede, laying it evenly and trimming the cut edges.
- Ankle boots can be decorated with thick lace by gluing it to the side or back.
Important! To properly distribute the suede and cut the workpiece, the shoes must be put on the foot with the zipper fastened.
If old boots were decorated with decorative elements (fringe, straps, metal overlays), they can be torn off or removed before work, and then used to decorate updated shoes.
 0
0