sdelay.sam.ua
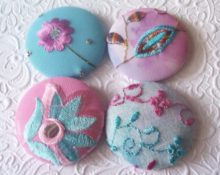
An embroidered card is a great addition to any gift. And it is valued much higher than the usual one. After all, it was made with my own hands, with soul and love. Each craft is unique and inimitable.
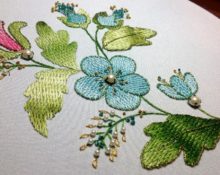
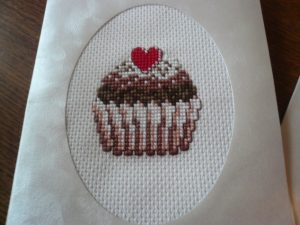
Cross-stitched cards look especially beautiful. For embroidery, it is better to take a special fabric - canvas with small cells. You can find the drawing diagram in our article or download it from the Internet. The main thing is that it matches the event for which you want to present it.
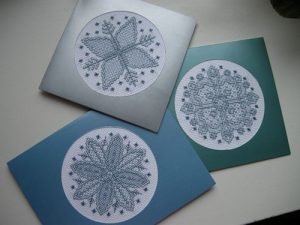
Nowadays, making embroidered cards is not particularly difficult. There are many blanks on sale. It’s better to choose double ones, with a window. They come with different cutouts (“apertures”) and are made from different types of paper. All you need to do is cross-stitch the fragment and insert it into the prepared frame.
We will tell you how to do this below:
- Iron the finished embroidery from the inside out. Place it on a mouse pad and place a purchased ready-made postcard with a window on top.
- Insert pins around the entire perimeter of the cutout.
- Trim the excess canvas, leaving 1 cm from the pins.
- Open the card and cover the back of the window with pieces of double-sided tape if the aperture is oval. If the cutout is square, cut into pieces along the length of the sides.
- Remove the top film from the double-sided tape and attach it to the embroidery. You can first mark in the drawing the main points to which the postcard should be attached with pins. Pull out the pins and carefully press the parts together.
- If the outline extends onto the fold of the card, trim it with scissors.
- Now we need to process the back side of the embroidery. This is done using another piece of paper. You also need to stick double-sided tape on it around the perimeter, remove the top layer and, pressing, combine it with the back side of the embroidery.
- All that remains is to write congratulations and wishes. This can be done with a metallic gel pen or any other - as your imagination dictates.
sdelay.sam.ua
If you don’t want to use ready-made postcards, you can easily make them yourself. To do this, use colored cardboard and cut out the “aperture” yourself, of any desired shape. It could be: an oval, a star, a heart, a window, Easter eggs - whatever you want.
You can perforate the front side of colored cardboard. She looks very impressive. For this, a figured hole punch is used. With its help you can make a “lace” card.
Lurex, lace, beads, and ribbons are used as decoration.
Making and cross-stitching postcards is also done using another method, even simpler - by gluing it onto a postcard.
In this case, it is better to choose a square or rectangular shape.
- We prepare the embroidery - iron it from the inside out.
- We cut the canvas to the size we need.
- We begin to slowly pull out the threads along the edges of the canvas. Thanks to this simple procedure, we will get a kind of fringe along the edge of the embroidery. There is no need to loosen up too much - everything is good in moderation.
- We glue the embroidery onto a piece of cardboard, preferably a different color, that is a few millimeters wider than the workpiece.
- We already glue this cardboard to a postcard, which you can make yourself or purchase in a special store. Ready!
You are convinced that embroidery - a postcard - is a fairly simple craft. And with the use of modern materials and technologies, its production has become even easier.
The process doesn't take much time, but it's a lot of fun. And the result exceeds all expectations!
 0
0