Do you think knitwear with pockets is a little rough around the edges? Or maybe you just don’t know the correct technique for sewing these elements to clothes? Can pockets be a decoration for your favorite things? How to achieve this? We'll talk about this and more below.
How to beautifully sew a pocket to a knitted item?
Some knitting lovers prefer to exclude this convenient addition to the chosen model, for fear of spoiling its appearance. To prevent this from happening, It is enough to know a number of basic techniques that will allow you to turn your pocket into a real work of art.

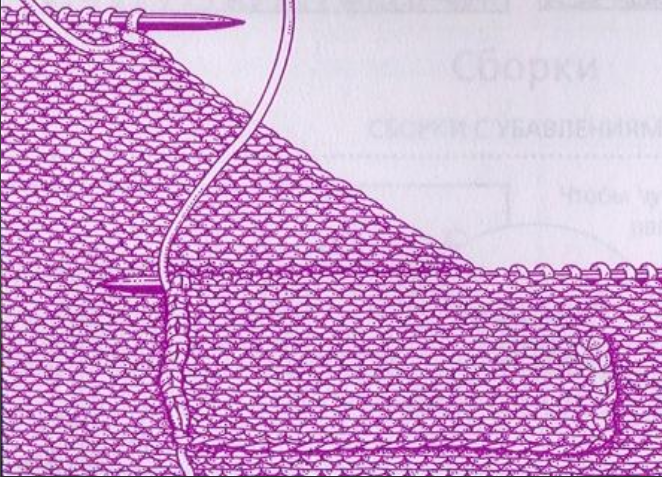
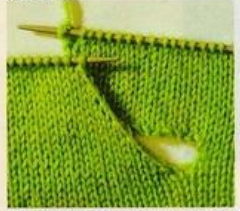
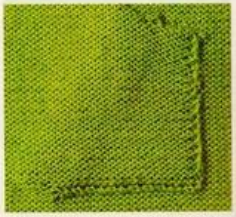
Stockinette patch pocket
Sequencing:
- when completing the knitting of this part, the last row should be the front row;
- model its position directly on the thing;
- the first loop following the edge loop should have the same direction as the outermost intended loop of the garment;
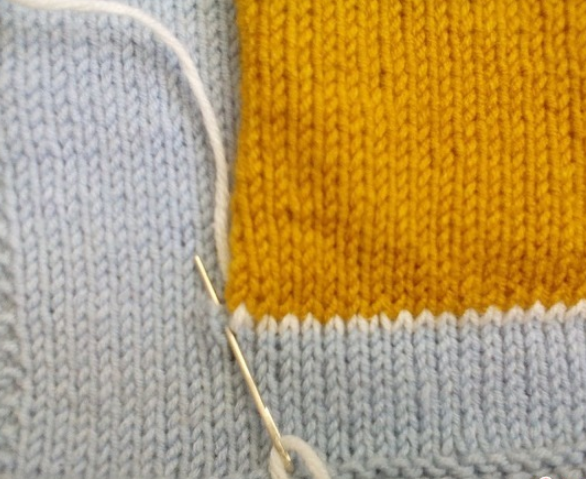
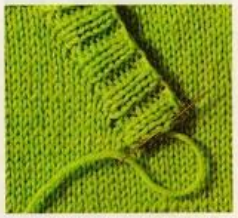
- the needle is inserted into the inter-loop space (in no case inside the loop);
- pass it behind the top broach connecting the edge and first loops;

- the needle will certainly fall into that loop again and “dive” to the bottom row;
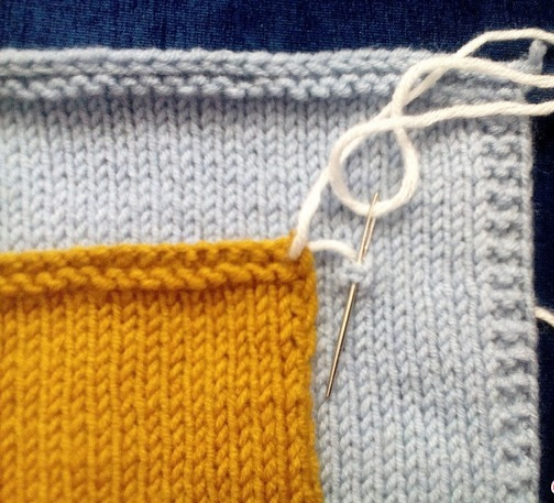
- cling to the thread of the second broach;
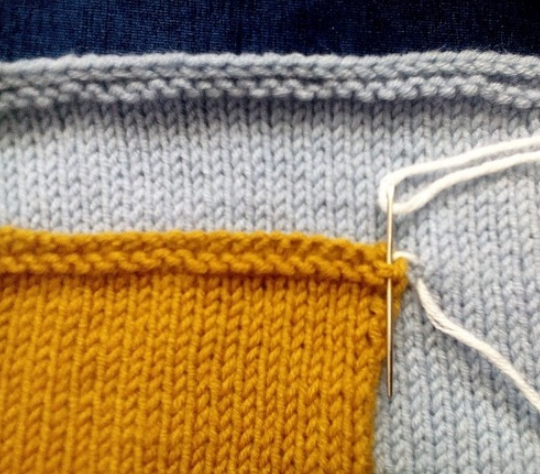
- lead the needle behind two broaches on the surface of the fabric;
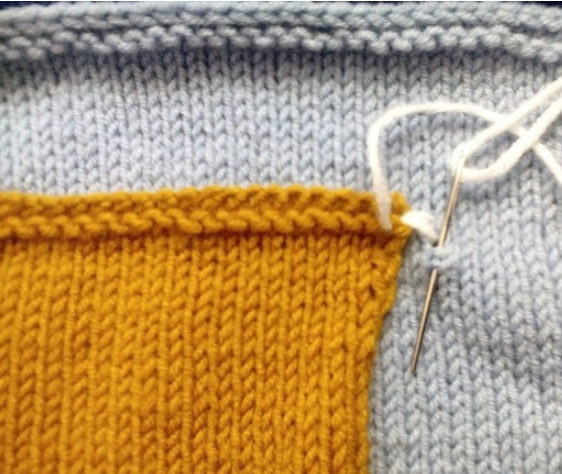
- a similar algorithm is repeated along the entire edge of the pocket;
- The needle is not inserted into the last broaching loop.
The edge and first loops are removed from the auxiliary thread in such a way that the edge loop is practically invisible (the main thing is that the loops do not twist).
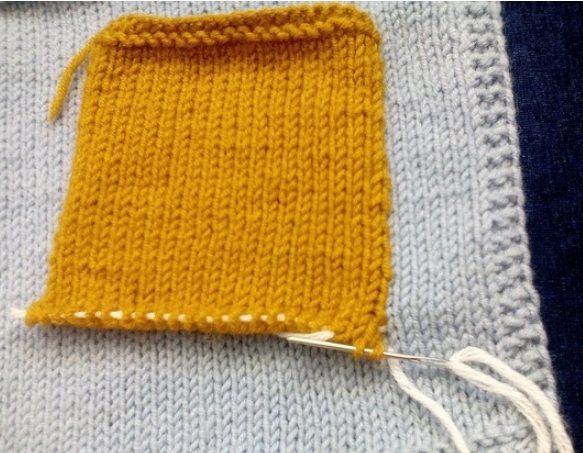
Next, the needle is inserted into the stitched loop and brought out in the adjacent one. The needle is again threaded inside the first and edge loops and inserted into the second, which is already stitched, and taken out in the next one.

Use a needle to hook the edge of the second loop, and again “dive” into the third...
Such the knitted seam must have uniform thread tension, otherwise, a visual sensation of unevenness of the pattern may occur.
The bottom of the pocket is stitched in this way until the auxiliary thread is almost completed and only a couple of loops remain on it.
The needle is inserted into the left second and immediately passes inside the edge and the first one following it (the edge visually “hides” behind it).
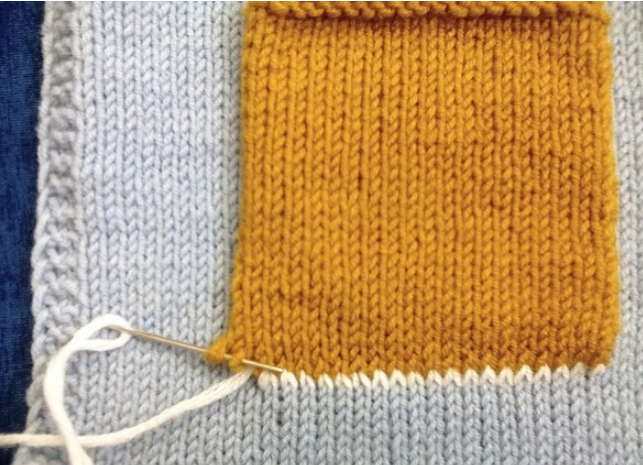
The next stitch covers the bottom row. The needle is threaded inside these same two loops, and then into the stitched loop on the product and pulled through from the overlying one.
They again prick with a needle into the area of the double broach connecting the edge and the first, sewing them with two broaches of the fabric, etc.
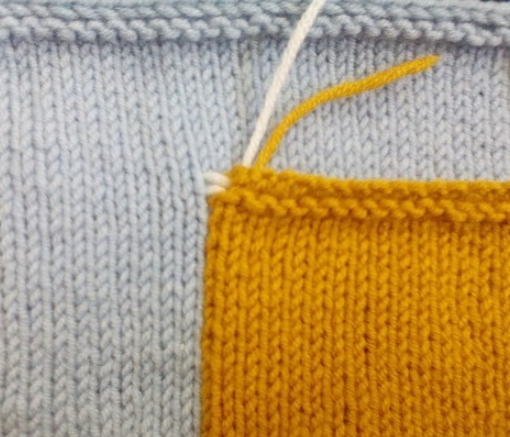
Advice. The edging of the pocket should be a pigtail, creating a feeling of the integrity of matter. The final stitch is tightened a little, the “tails” are removed inside out and secured.
Inner pocket
Algorithm of actions:
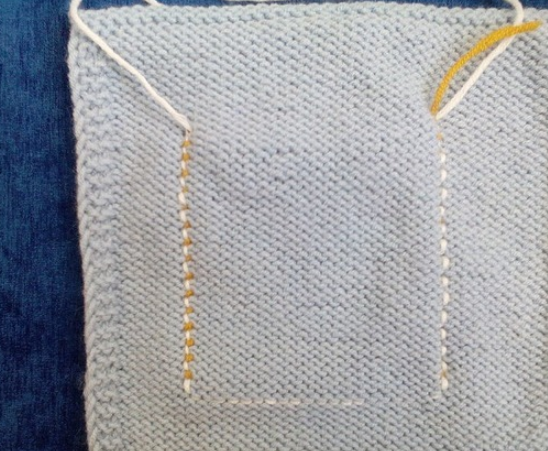
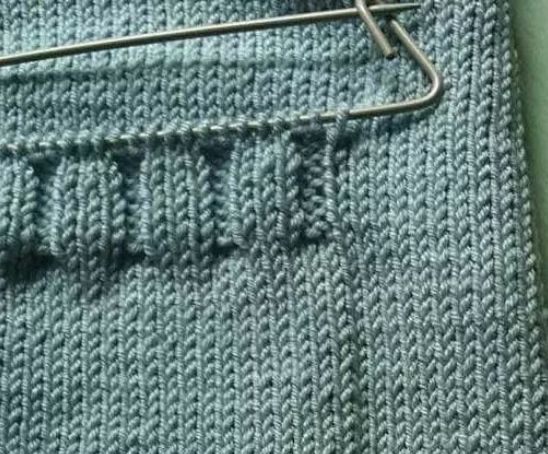
- open loops are left in place of future pockets, either gathered with a pin or previously closed;
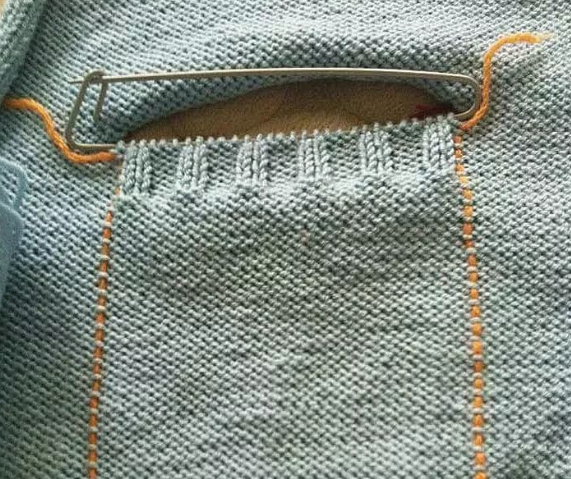
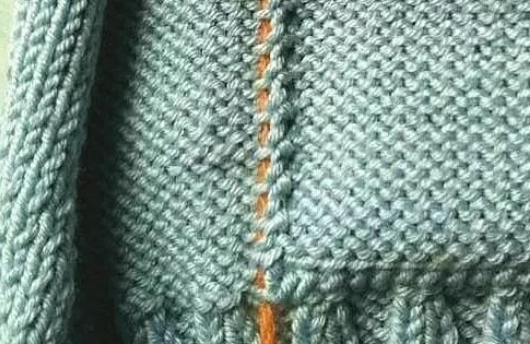
- with a needle and bright thread, baste the pocket along the contour, taking into account the slot; usually it approaches the elastic band at the bottom of the jacket;
- Along the bottom line, the “bag” is carefully sewn from the inside out to the loops of the row adjacent to the elastic band;

- the seam will be less noticeable when a single thread of the pocket is caught;

- from the sides it is also grabbed one thread at a time to the intended contour.
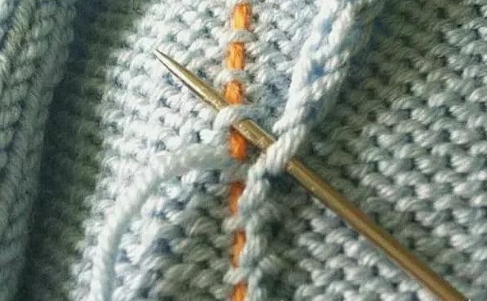
Important! If everything is done carefully, then the seam is absolutely invisible to the naked eye, and the marker thread is easily removed – you just need to lightly pull its tip.
Welt pocket
First way. The pocket itself can be knitted separately. In the product, at the place of fastening, remove the loops onto a separate knitting needle or pin. On the knitting needles in the next row, the same number of loops is cast on (as on a pin) and knitting continues.
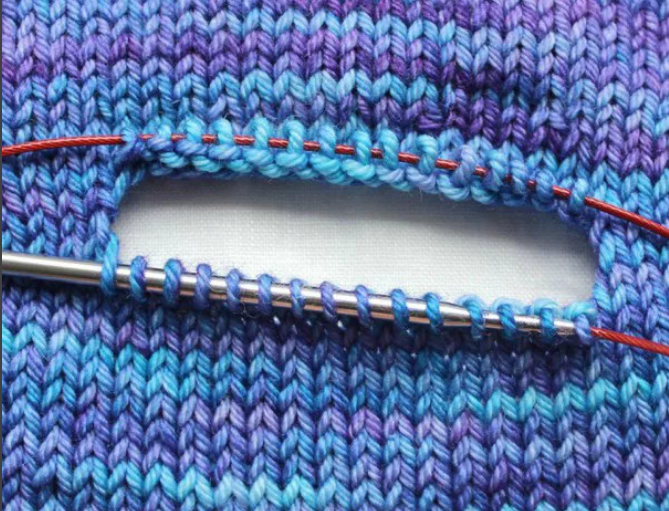
We sew the “bag” as if in a circle. On the outside, for beauty, you can tie an elastic band up to close the entrance to the pocket.
Another way. You can cast on the knitting needles with loops gathered on pins on both sides. Knit the depth of the pocket on each side, then sew using the above method.
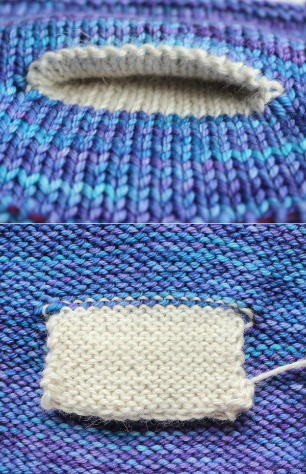
Slant pocket
The “bag” for it is knitted separately, and then sewn to the left slit.
The hole for the pocket is made in the front row, closing two loops.
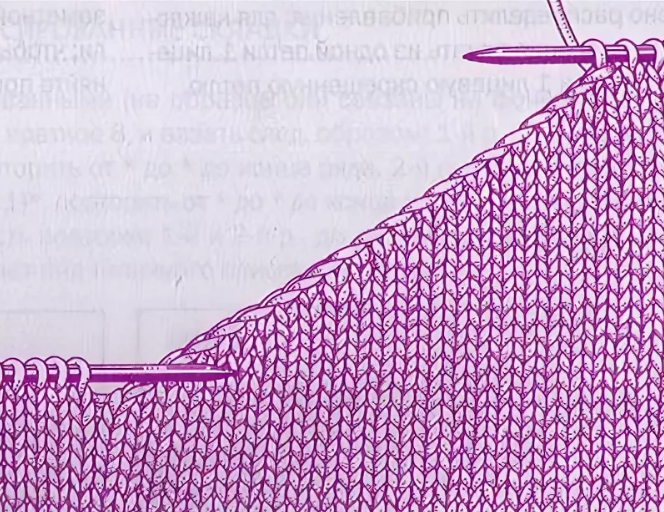
Then two shelves are knitted in parallel, using two balls at once (the advantage is that there is no need to count loops).
To make the entrance at an angle, each subsequent front row from the right inner edge is knitted like this: one front row, the second the same, but crossed, and to the left of the shelf - two loops together at once.
The edge is crocheted and a zipper is sewn in.
The “bag” is sewn on, placing it on the wrong side of the product.First, the beveled part is basted to the edge of the zipper, and then the other sides are sewn to the shelf using the same stitching principle.
Slanted pockets
We knit the “bag” simultaneously with the shelf, casting the required number of loops on its right side.
In order for the entrance to be inclined, we begin each front row on its left side, knitting two loops together so that they are inclined to the left.
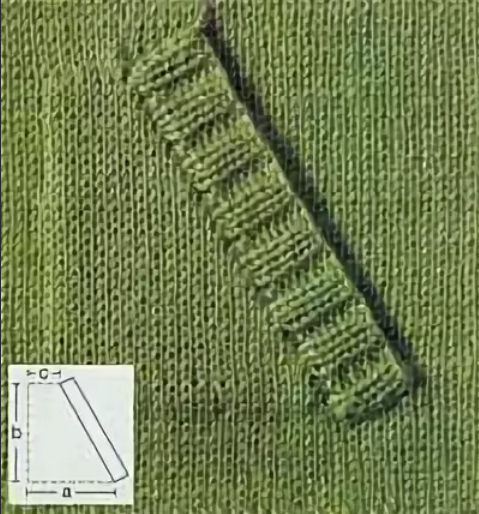
Upon completion of the work, tie the edge of the slot with an elastic band. The resulting strip on the sides is sewn to the fabric of the product using the same seam, which is called knitted or mattress.
The “bag” is carefully pinned and sewn along the edge using a blanket stitch.
Knowing these little tricks, the craftswoman will easily and accurately hem any pocket, making your favorite knitted item not only comfortable, but also easy to use.


 0
0