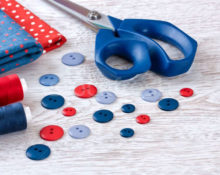
 In a knitting master's chest there will always be a lot of buttons and various interesting things. But they can just lie there, without being used. To prevent this from happening and for each one to find its place on a blouse, dress or other item, you just need to decorate it. You can decorate the clasp itself in several ways, and later in the article the most popular methods of decoration using a hook and yarn. We read and bring old things back to life.
Benefits of button binding
 The most important advantage of tying will be that even the most shabby and old thing is suddenly transformed and can be used again in work.
The second advantage is that the craftsman searches for the perfect color and shape of buttons for his product. And it simply cannot be more ideal than in a binding of a single-colored yarn.
What yarn and hook are suitable for knitted buttons?
To perform the tying, the master will not use a very thick thread. Since it won’t be possible to tie a small product beautifully. The most commonly used thread is the thickness of baby yarn or iris thread.Moreover, when working with iris threads, you can additionally create stunning lace elements.

But even when knitting a blouse, the craftsman can use the same yarn for tying buttons as for the main product.
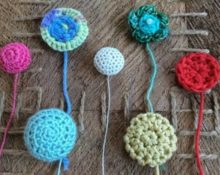
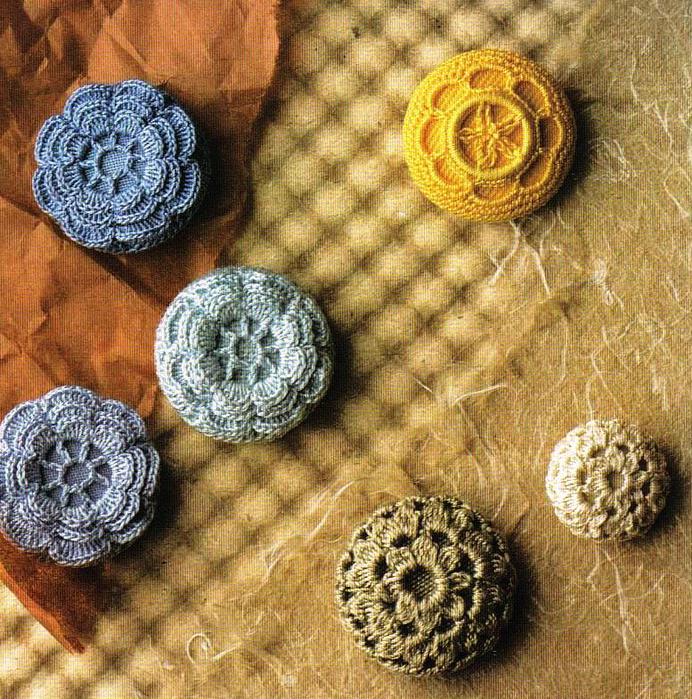
Ways to crochet buttons?
There are five ways at once that will allow you to crochet buttons. Very beautiful and not so complicated, they allow even a beginner to practice real mastery. There will definitely not be anyone indifferent to the finished work.
Tying flat buttons with holes
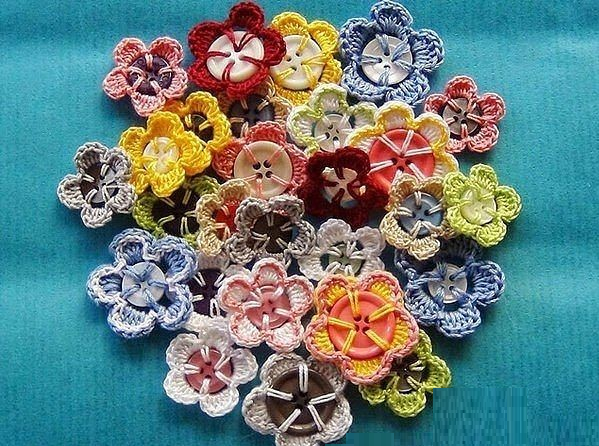
Lovely flat buttons with holes. Usually craftsmen do not like many holes in buttons. Sewing is long and laborious. But not in this case. There are holes in the button only for the hand. And the more there are, the better. Make beautiful flowers using simple flat buttons and yarn in just a few minutes.
For work use:
- flat button with 4 holes;
- hook according to the thickness of the yarn;
- yarn of medium thickness (you can use baby pekhorka).
Harness
According to the prepared pattern, you need to knit the last row. Just skip the first row, instead there will be a button itself. Thread the thread through the hole and begin the first petal of the pattern. Thanks to the different height columns, such smooth transitions are obtained. Knit 5 petals. There are only 4 holes, so you need to thread the thread twice through one hole.
Compound
After knitting the fifth petal, place a connecting stitch in the loop of the first element of the first petal. Next, tighten the thread and cut it, hiding the tip well.
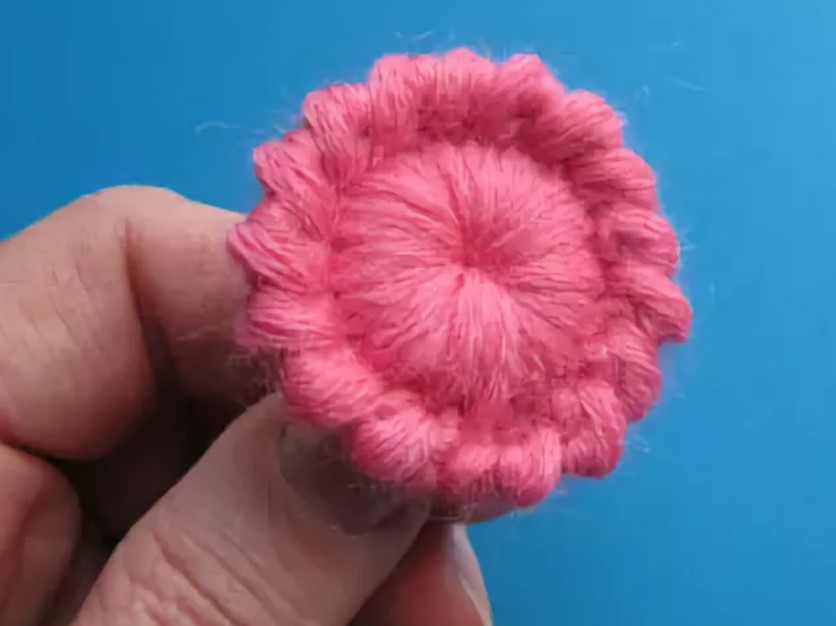
Tying metal buttons on legs
The lace blouse with round buttons, which the craftsman additionally knitted from plain yarn, looks amazing. This will seem very easy to those who have mastered the technique of knitting amigurumi toys.And those who have not yet made such toys can make a small harness according to the description provided.
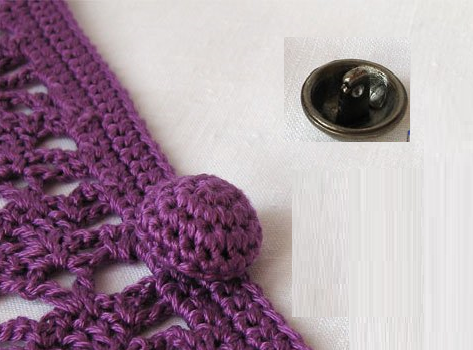
To work you will need:
- metal button on the leg;
- iris for tying;
- hook for the thickness of the iris thread.
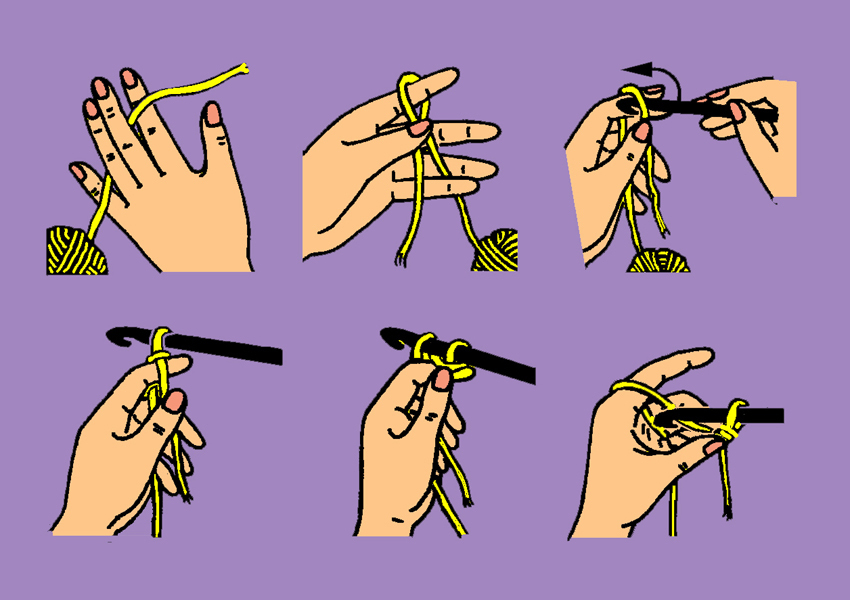
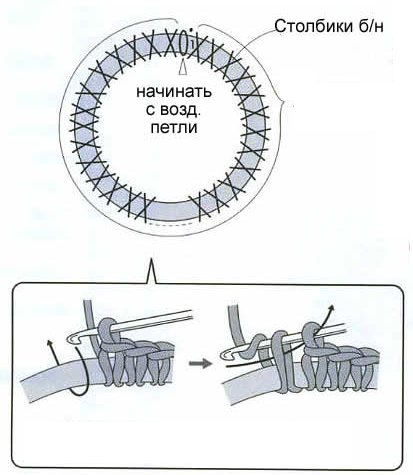
Amigurumi ring
At the very beginning you need to make an amigurumi ring. To do this, you need to twist the thread around your finger twice, then knit 6 single crochets there and just tighten the thread.
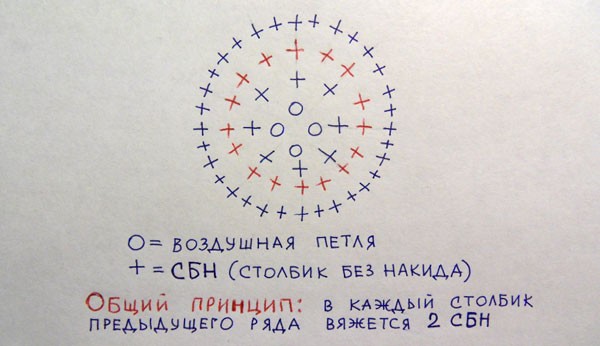
Subsequent laps
Then do each circle with additional loops. Knit in single crochets. To add to one previous loop, knit a stitch twice. Next, achieve the desired radius and knit in the same way, but decreasing the loops.
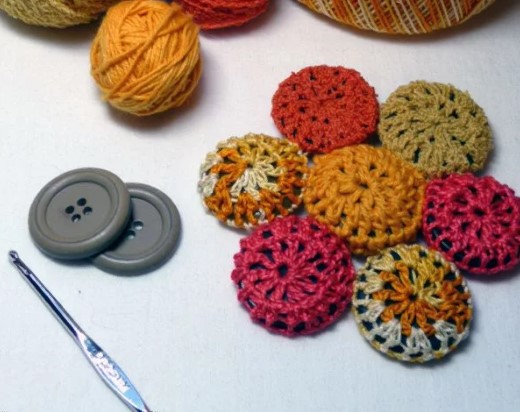
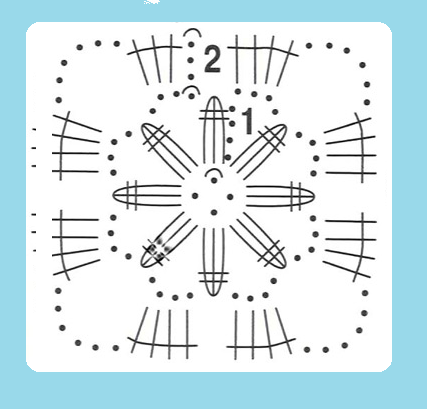
Openwork binding
The openwork is good everywhere, so it’s not surprising that the buttons with it turn out so elegant. Next, step-by-step tying with openwork patterns of buttons.
For work use:
- buttons;
- yarn;
- hook according to the thickness of the yarn.
Amigurumi tying
Initially, each one needs to be tied using the amigurumi technique. To do this, first an amigurumi loop, then rows with added loops. Do everything only with single crochets. Knit to the required diameter and then begin decreasing, having previously inserted a button into the circle. Tighten the last row well, and additionally stitch it with a needle and thread so that there is no hole left.
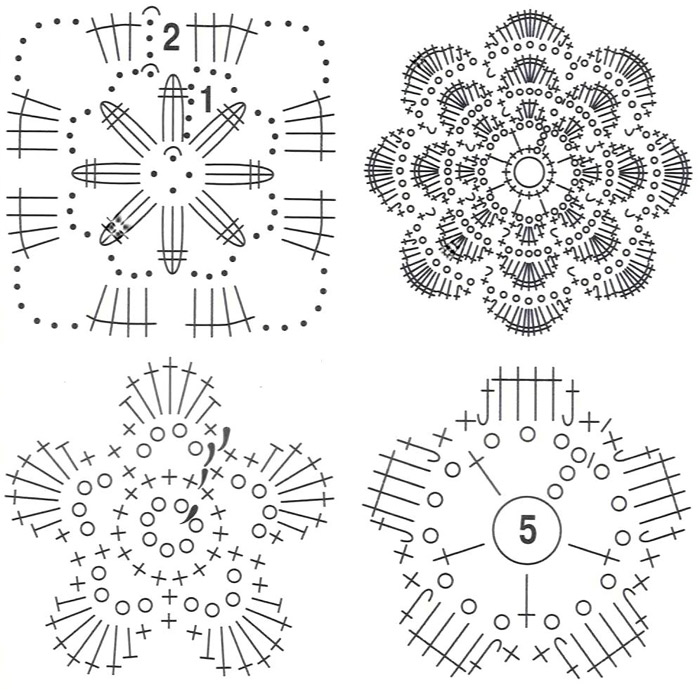
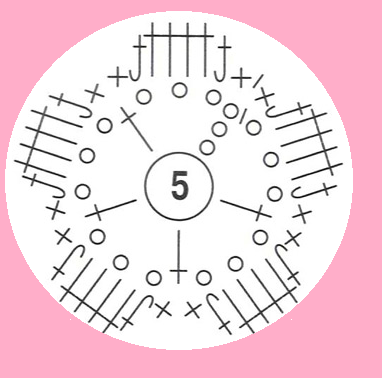
Openwork flowers
Make several flowers according to the patterns provided. Afterwards, simply sew them in the center, and if desired, also grab the edges of the petals.
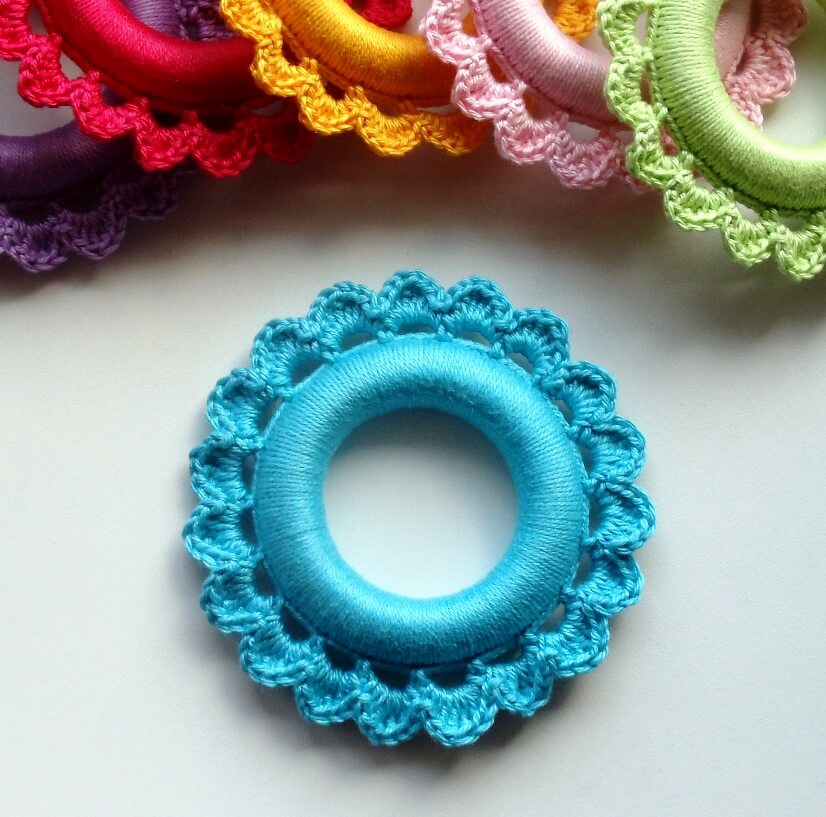
Ring tying
Simple knitted rings look very original. They can also be used as a fastener. Or use them to create a charming belt for a knitted item. Perhaps this is a future handbag handle.
For work use:
- yarn;
- rings;
- hook according to the thickness of the yarn.
Ring tying
The ring is tied with simple stitches, threading the thread through the hole each time. Make a lot of columns and, when doing so, align and pull each one closer to the previous one.
Border
For the border you should just use air loops. One element consists of 5 air loops, the last row is single crochet in each hole of the border, 10 stitches. Knit and also pull up to the previous one and make the element even.
This is the kind of charm you can get from a nondescript ring.
Tying with yarn and beads
A very interesting combination of yarn and beads. This kind of work deserves attention. Moreover, such work can be used not only as a fastener. She They are so attractive that some people use them as pendants and earrings. A very attractive set is obtained using this technique.
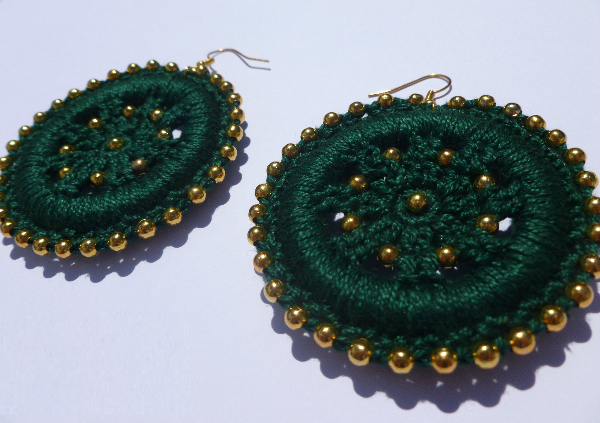
For work use:
- iris yarn;
- beads of a suitable color;
- hook;
- bead needle.
Harness
Tie using the familiar amigurumi technique. You can also make a binding with simple single crochets, but only if these are models not with holes, but with crosses in the center.
Bead decoration
The most crucial moment in this work has arrived. The decoration should be even and the beads should be sewn on carefully and with invisible stitches, since the work is very small and any loop will be visible.
These are the kind of original crafts a craftsman can make from simple materials. Therefore, you no longer need to throw away worn-out models; you can simply give them a small update and they will immediately find use.
 0
0