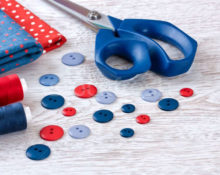
Almost every garment has buttons. If they come off, the image looks unkempt and sloppy. Such a small accessory can radically change your appearance. To return it to its place, you need to know how to sew it correctly. This article is devoted to the intricacies of working with a button on a leg. Read on to learn about them and how to make a thread column on flat fittings.
Features of working with a button on a leg
Any person sooner or later is faced with the need to sew on a button. When working with an accessory on a leg, you need to attach it in such a way that it is firmly fixed, the cap covers the column of the base, but the threads do not pull the fabric.
What do you need to sew?
The sewing process is impossible without the correct size needle:
 thick is suitable for attaching accessories to winter and demi-season clothing;
- regular is used for sewing knitwear, cotton, linen;
- thin – for very delicate, thin, light, silk materials.
 thick is suitable for attaching accessories to winter and demi-season clothing;
The sewing operation is carried out using thread. If fittings are attached to a leg, the cap will cover the attachment point. It is important that the threads are matched in color and do not differ much in shade from the fabric. For a flat button sewn on a leg, the tone of the threads must completely match the color of the material.
Also The thickness of the thread is important. It must match the fabric: a thin thread is selected for a thin material, but for a thick drape coat it can be very dense. Match the needle to the threads and fabric.
Step-by-step work process
- Let's mark the place where the accessory is attached. You can use a pencil or a thin marker;
- thread the needle and tie a small knot at the end. The thread can be double;
- on the front side of the product we stick a needle into the marked place, after 2-3 mm we bring it up;
- put the needle through the hole in the button leg;
- let's pass the needle next to the first stitch on the fabric and tighten the thread, holding the button;
- We’ll do the same thing 3-4 more times;
- then make a loop around the base, thread the needle and tighten the thread;
- repeat this action a couple more times;
- fix the thread under the base and cut off the excess;
- If desired, you can remove the thread from the wrong side of the product and fasten it there.
The work is completed, the fittings are firmly attached to the fabric, do not dangle, and easily fit into the loop on the clothing. If you need to sew on a whole row of buttons, first check that the vertical markings are correct.so that the distances between the accessories are the same, and then follow the sewing instructions.
Important! The beautiful appearance of the product is influenced by the correct marking of the distance of the button attachment point to the edge of the bead. It is calculated by the formula: half the diameter of the cap + 0.3 - 0.5 cm.
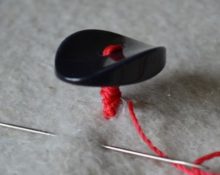
How to make a foot for a flat button and sew it on?
Flat buttons with two and four holes can and should be sewn on, forming a leg, if this concerns a fastening part of clothing. For decorative accessories, the usual method of sewing will be sufficient, but fastening clothes with fittings with a leg is much easier: it penetrates the loop faster.
Important! When such an accessory is torn off, only the smallest section of the fabric is damaged, which can then be repaired without much difficulty, making the patch invisible.
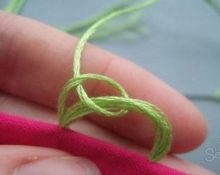
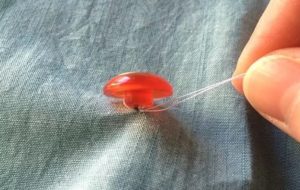
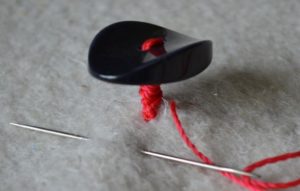
To make the thread column for a flat button invisible, we select a suitable needle, threads in color and some other means at hand to temporarily hold the accessory above the fabric. The leg will consist of entwined loose threads.
We begin to sew on the fittings with two holes:
 mark the place of attachment;
- make the first stitch, leaving a gap between the fabric and the button;
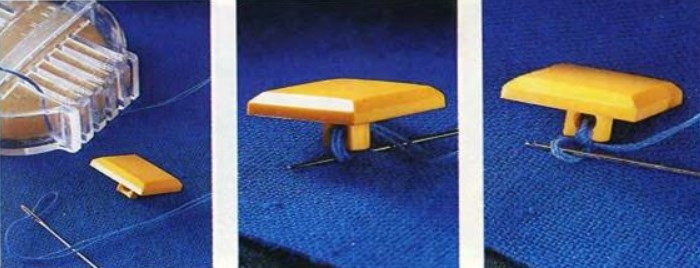
- Now you need to place a safety pin or 2 matches, 2 toothpicks, and if a larger gap is needed (for denser fabrics), then a ballpoint pen or a flat comb will do. Place the matches parallel to each other on both sides of the button;
- make a few stitches, attaching the fittings;
- we remove the matches and wrap the resulting stitches, laying the thread in tight turns around the leg;
- after wrapping is completed, pull the thread through the base of the leg, form and tighten a loop,
- bring the thread to the wrong side of the work and secure it there with a few stitches.
 mark the place of attachment;
Important! A toothpick or hairpin can be inserted on top of the button, between the holes, and then removed to form a stem. This will make the sewing process faster.
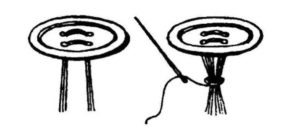
Accessories with two holes are sewn on with 5-6 stitches - this is enough to hold the button firmly.For accessories with four holes, you need to make 3-4 stitches for each pair. The formation of a thread column is carried out in a manner similar to that described above.
Sew a button with an eye on a sewing machine
 The factory machine easily performs the operation of sewing on buttons of any kind. You can also do this on a home sewing machine with a zigzag stitch.. First you need to read the instructions in detail. Look for a section that explains the process and describes it in detail. To attach a flat accessory, use a match placed on top, across the holes.
Try sewing any accessories to a test piece of fabric, but be sure to using a special foot that is used for sewing on buttons. Otherwise, the fittings may slip, uneven stitches, needle breakage, or damage to the accessory. Sew at the lowest speed to regulate the process. After completion, the threads need to be brought to the wrong side, tied together there and cut.
 0
0