Any thing sometimes needs minor repairs. Most often we have to sew on a torn button. There are usually no problems with thin summer and mid-season items. It is much more difficult to do this with outerwear, such as a coat.
What is needed to properly sew a button to a coat?
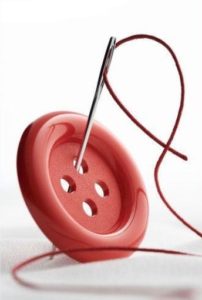
There are buttons on coats two types: flat, with holes drilled in them, and convex, with a leg-eye or a leg-loop. In order to sew both of them, we will definitely need:
- needle;
- a thread;
- subbutton;
- scissors;
- a thin piece of chalk or dry soap;
- long ruler.
Which needle is suitable?
 The bead to which the fasteners are sewn is usually very dense in structure. It consists of at least four layers of face material. In high-quality sewn items, there is also a hot-melt adhesive cushioning material inside (dublerin, non-woven fabric), which helps to keep its shape. The needle that will be used to sew on the button, should be sharp, not too thin, long enough, with a large eye. Otherwise, it will bend, break, or get “lost” in the layers.
Thread selection
The color of the thread should match the button if it has holes and the tone of the coat if it has a leg.
Thickness is not as important as strength. Do not use thread that has been sitting for many years. To see if it's good, try pulling on the end while holding the spool. If it breaks easily and immediately, you can throw it away; if you had to apply some force, feel free to use it.
What is a subbutton?
This is an additional small button that is sewn on the inside of the product at the same time and at the same level as the main one. In this case, the fabric appears between them, and during further use it does not deform in the places where it is fastened. The load on the mount is reduced, making it more durable.
Sew on a button with holes
 First, mark the place for sewing. To do this, place the coat on a flat surface and fasten it with all the remaining buttons. Align, smoothing with hands, so that the top and bottom coincide, there is no pulling anywhere, there are no folds.
- Draw a line in the empty slot with chalk.
- We unbutton the product, place a ruler along the fastener so that its edge divides the existing buttons into halves.
- We make another one on the horizontal mark - a vertical one along the ruler to make a cross. This place will be the center of the button to be sewn.
- We unwind the thread a little more than half a meter and cut it off.
- We thread one end into a needle, make a knot on the other, leaving a small tail.
- In the place marked with chalk, we pierce the fabric from the outside with a needle and pull the thread towards the wrong side until the knot stops.
- We string the counter button from the inside and pull it back.
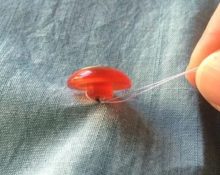
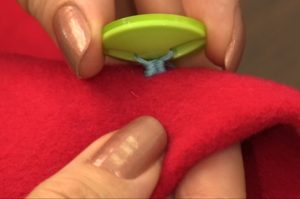
- We pass it through the holes in a large button and, using several stitches, loosely, slightly moving it away from the surface of the product, we make a bunch with a buttonhole.
- We build the “leg” with our own hands. To do this, pull the fastener, wrap the thread bundle between it and the material with the remaining thread until a tight column is formed. We fasten the thread on the front and then on the back side and cut off the excess.
 First, mark the place for sewing. To do this, place the coat on a flat surface and fasten it with all the remaining buttons. Align, smoothing with hands, so that the top and bottom coincide, there is no pulling anywhere, there are no folds.
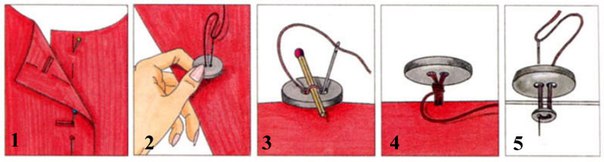
Important! There should be a play between the smooth button and the fabric that corresponds to the thickness of the coat at the location of the fastener. Otherwise, dents and wrinkles will soon appear around the fittings, and it will be very difficult to fasten the item.
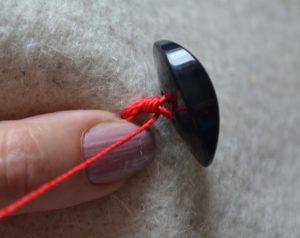
How to sew a button on a leg?
Some types of buttons are already equipped with a foot. They are sewn in exactly the same way as with holes. There is no need to make a column of thread if the leg is in the form of a loop. If it is in the form of a recessed eye, you need to leave a space of 1-2 mm between the button and the fabric. Without it, the button will be tightly grabbed, motionless and will not be able to move freely into the slot. At the end of the work, you need to make a couple of turns around the threads under the button leg, tighten with a loop and secure.
Tips for a needlewoman
 Sew with thread in two layers - fewer stitches will be needed. Accordingly, measure its length longer.
- To avoid bunching and give the “holey” button a straight leg, after the first stitch, insert between it and the material an empty rod bent in half, a comb with sparse teeth or another device of the required thickness.
- For outerwear with a dense material structure, use a thimble. It will protect your fingers from damage.
- If a torn button is lost and there is nothing to replace it with, you will have to rip off all the old accessories and purchase a new one.At the same time, it should match the coat in shape, design and color and fit into the loop not very tightly, but not too loosely, otherwise you will have to reduce or increase the cuts.
 Sew with thread in two layers - fewer stitches will be needed. Accordingly, measure its length longer.
If you sew a button to a coat correctly, following all the recommendations, you don’t have to worry about it coming off again. Your favorite item will look perfect, and you will wear it with pleasure.
 0
0