 People are accustomed to considering buttons only as fasteners for clothes. But, besides this, this item can be used in other ways, for example, to make beautiful crafts from them. These can be various materials for activities with young children. Working with these things develops fine motor skills in children. Or you can create original decorative decorations to transform the interior. Moreover, any craftswoman can cope with the process. All you need to do is show a little imagination and spend a couple of hours of free time.
Let's take a closer look at several options for products made from this material.
Together with children: crafts on paper
The easiest way to spend your free time pleasantly and usefully with your child is to make an unusual panel of buttons with your own hands. To make this process easy and enjoyable, you need to be properly prepared for it.
Preparatory stage
To do this, complete the following preparations.
- Choose a model suitable for children's creativity. This could be a product made using the appliqué technique or an unusual holiday card, as well as other variations.
- Prepare materials for work: buttons, thick paper or cardboard, pencils and markers, PVA glue. Depending on your idea, you may also need decorative elements (glitters, sequins, beads, satin ribbons, etc.) and acrylic varnish.
- Choose a well-lit, flat surface. Lay out the materials and tools on it in such an order that the necessary parts are at hand. But at the same time leave the central part free to work.
Attention! If the selected surface is not well lit, use additional lighting sources, such as a table lamp.
Applications
Let's look at an example of how to create an applique using buttons. You can bring it to kindergarten for a competition or exhibition.
To work you will need buttons of different colors, colored paper (you can use cardboard covered with variegated chintz), pencil and PVA glue.
Execution Process
- On a base (paper, cardboard) with a pencil, draw the contours of a figure to work with.
Advice! For convenience, you can use ready-made stencils.
- Using glue, fill the shape with material, alternating it in color.
- For greater safety, the top of the craft can be coated with acrylic varnish.
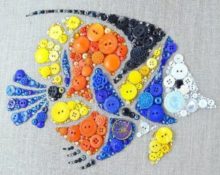
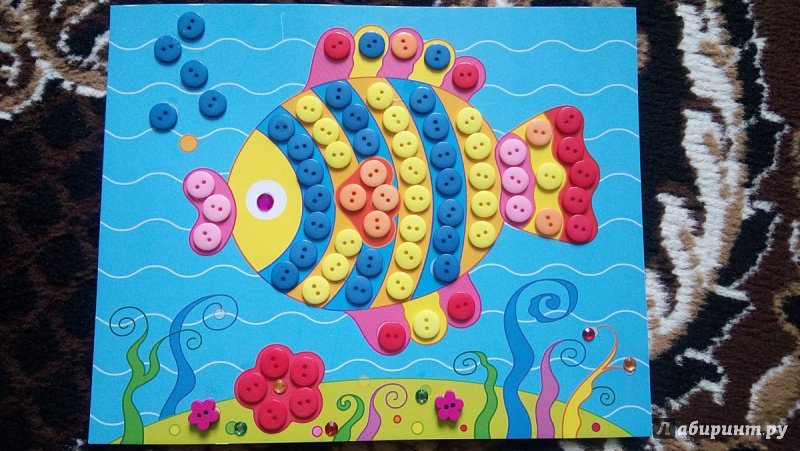
Button applique with colored paper
A more complex craft can be created using colored paper in addition to buttons.
Completing of the work
- First, an applique of colored paper is made on a blue sheet.
- Then the outline of the figures (fish, waves, algae, etc.) is drawn with pencils.
- Next, the button decor is glued on.
This product can be inserted into a beautiful frame and used to decorate a child’s room.
Postcards
Before any holiday, we begin to purchase various gifts for loved ones. Our little fidgets would also like to join this process. And the best way for them to please someone is to make their own original postcard for the New Year or March 8th.
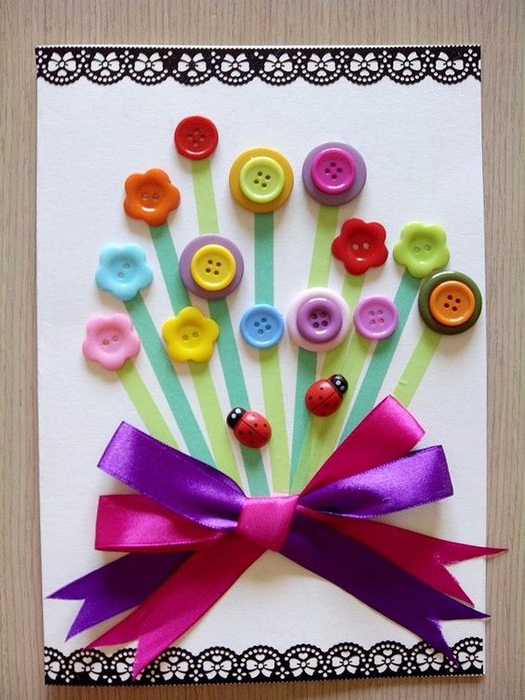
As in the previous craft, the basis for it is thick paper or cardboard. It will also be required colored paper, satin ribbons and two pieces of black narrow lace.
Attention! The last element can be replaced with paper decor cut from a thin black sheet.
Work process
- Attach lace along the top and bottom of the workpiece.
- Cut out several narrow strips of varying lengths from colored paper and glue them to the base, forming the stems of the future bouquet.
- Use buttons of various sizes as buds. In some places, attach the material in two layers. This maneuver will add volume to the image..
- Then attach a satin ribbon bow.
- The outside of the postcard is ready. All that remains is to write a congratulation with warm wishes on the reverse side.
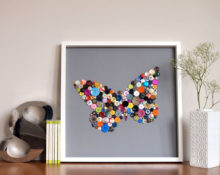
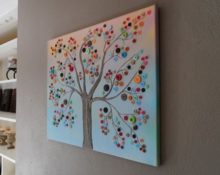
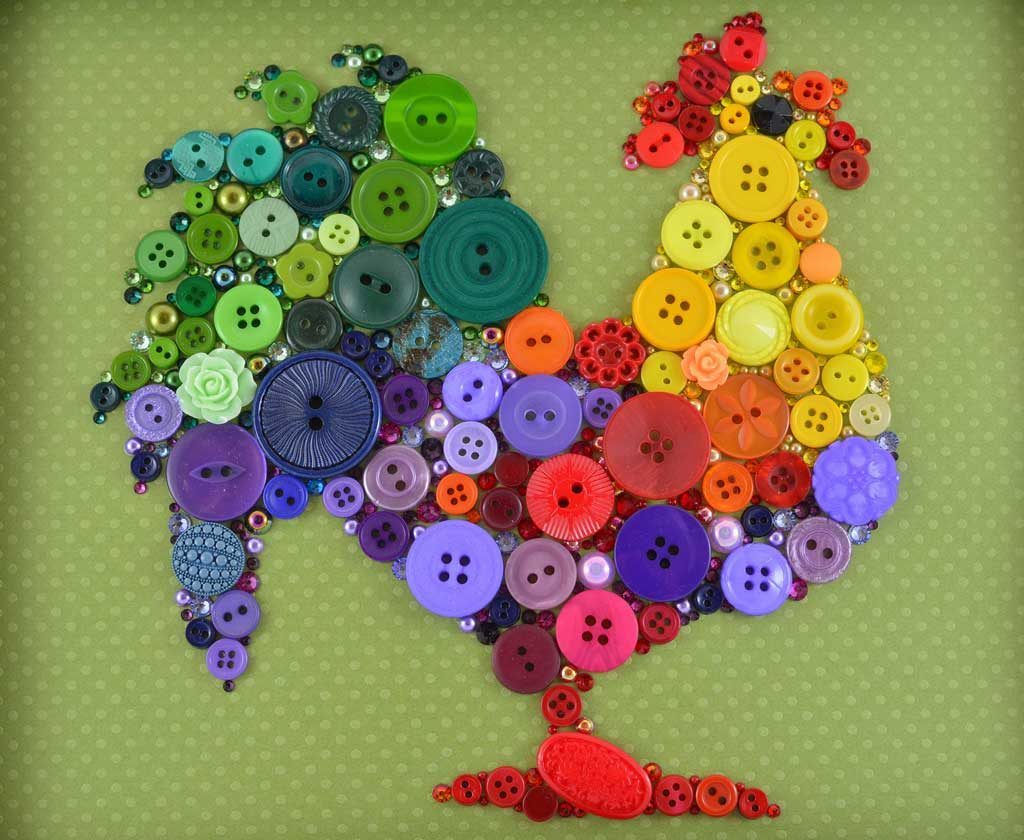
Button paintings
For adults, unlike children, this interesting activity will become a wonderful hobby. Using available materials, you can create paintings to decorate the interior.
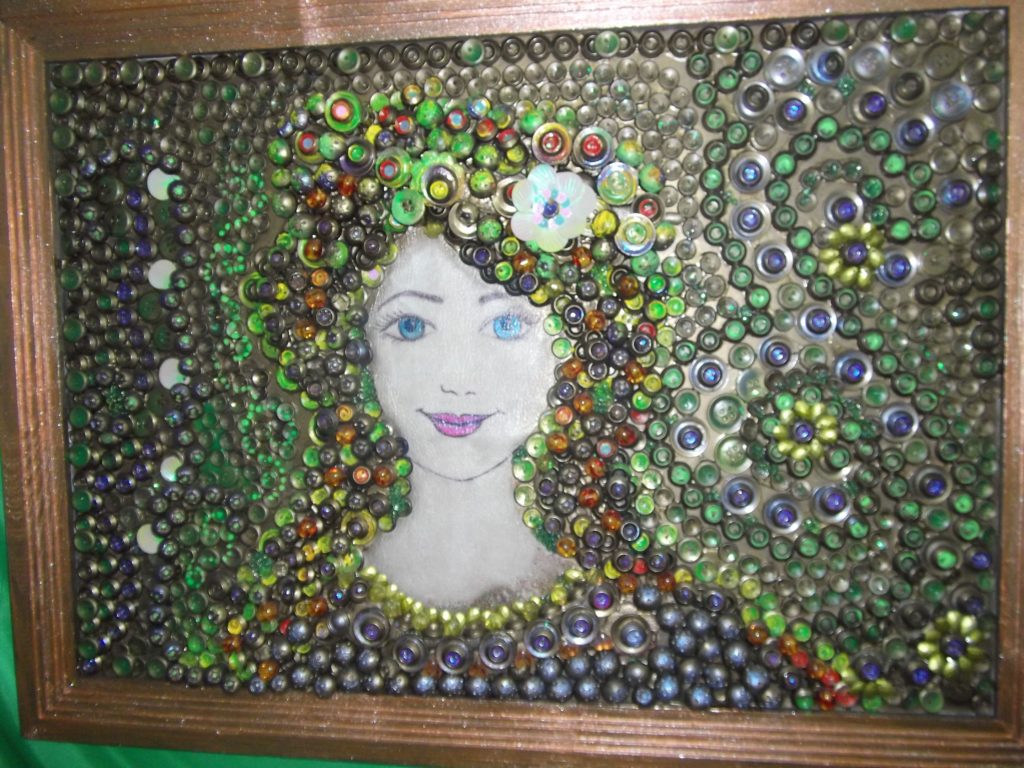
Completing of the work
- Take thin plywood or thick cardboard and paint it the base color.
- Draw the outlines of the image with a pencil. In our example, the main drawing is an image of a girl. Therefore, the face is done in color.
- Next, buttons are glued on to imitate hairstyles and clothes.
- Then you decorate the background.
Important! It is desirable that the direction of the gluing lines from the contour go in different directions.
- Now you should wait for the product to dry completely. This usually takes about a day.
- Cover the dried picture with acrylic varnish and place it in a frame.
Advice! You can use photographs or samples from the Internet as a stencil.
Crafts from buttons
In addition to paintings, you can use vases, coasters, various pots and bottles to decorate the room. Let us consider in detail two options for such products.
Vase made of buttons
The first one is completely created from buttons using a balloon and PVA glue.
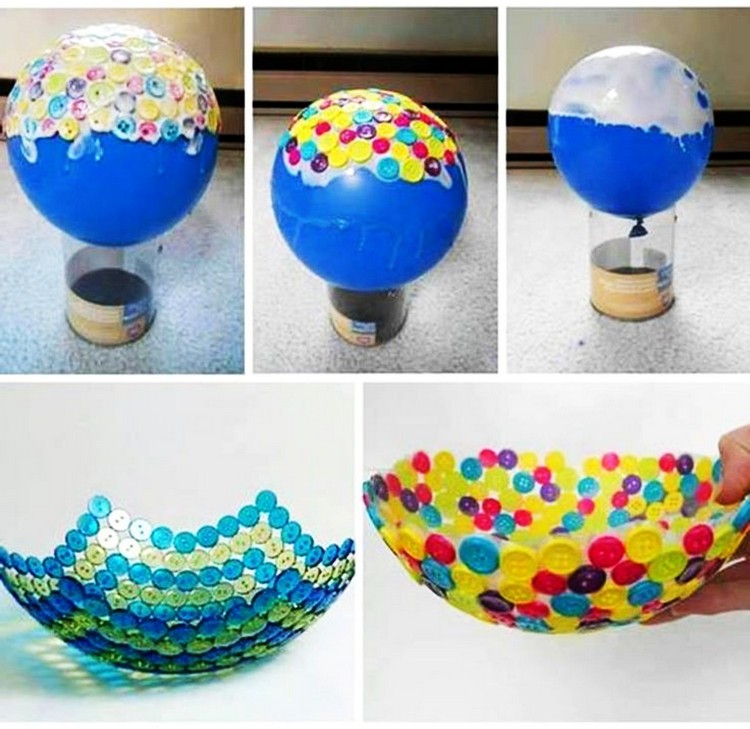
Process of creation
- Take a balloon and inflate it to the desired volume of the future vase.
- Place the ball on an empty container (glass, jar).
- Treat the top of the ball with PVA.
- Then lay the material on the treated surface. At the same time, press the elements tightly against each other.
- After achieving the required size and shape, fill the top of the workpiece with glue.
- Leave it like this until completely dry.
- Then gently deflate the balloon.
- For greater strength, the vase can be coated with acrylic varnish.
Reference! Using materials of different colors, you can lay out beautiful patterns. To do this, draw an outline with a marker on the surface of the inflated ball.
Button decor
The second method is to decorate the finished item with this material.
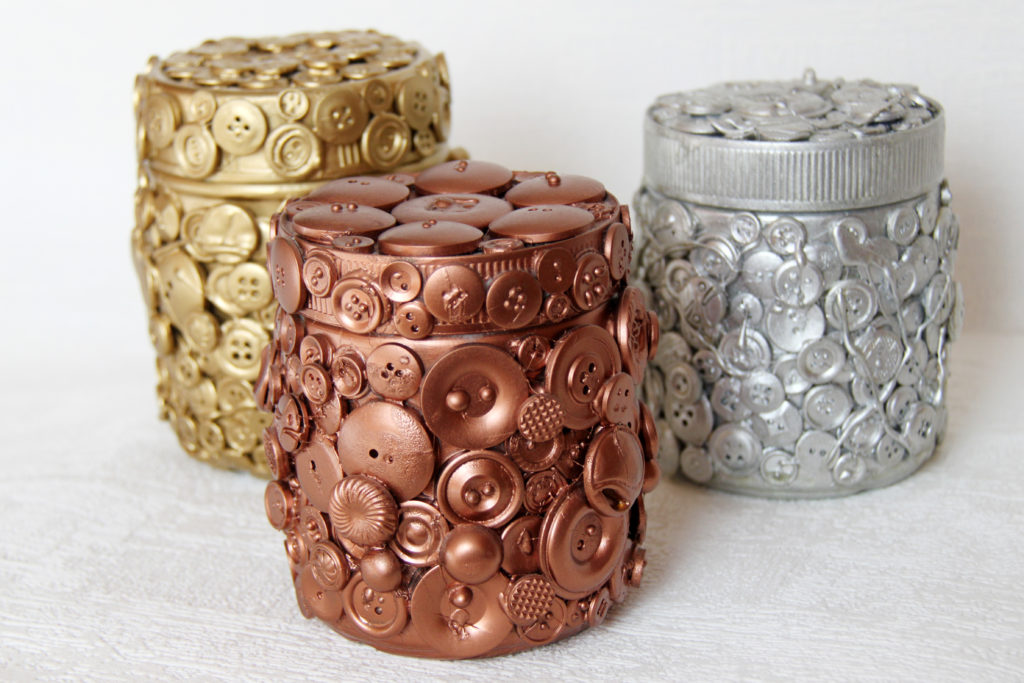
To make such an item you will need empty jar with lid, buttons and pearlescent paint.
Execution Process
- Apply glue to the surface of the jar.
- Cover the jar with various buttons.
- When the product is dry, coat the jar with pearlescent paint.
Advice! If you want to give the product a more impressive look, apply the decor in several layers.
Buttons on thought pillows
In addition to decorating various objects, this material can be used to decorate various textile items, such as decorative pillows. This method also has two variations.
First way
At the first only buttons are used.
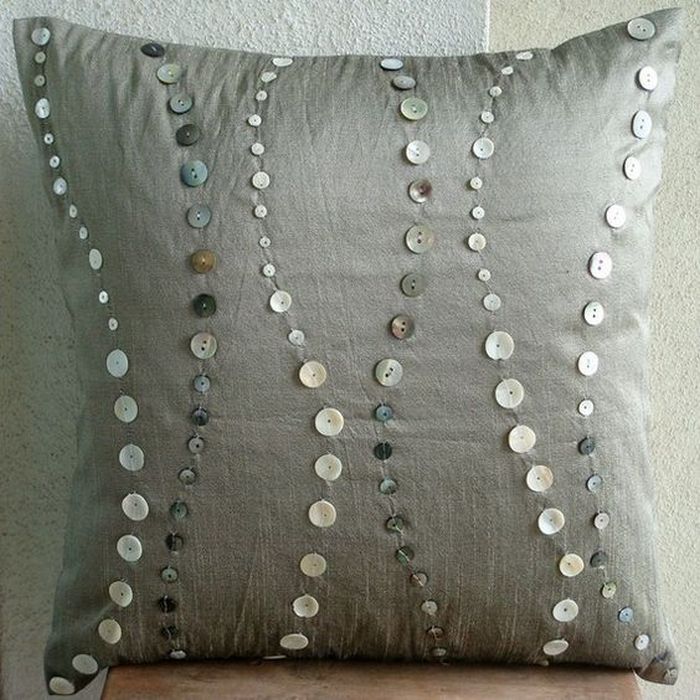
Completing of the work
- Sew a pillowcase of the desired size.
- Using a stencil, draw the outline of the design from the wrong side.
- Using the outline as a guide, sew on buttons to create the desired pattern.
- Wash and dry the finished product.
Second way
At the second button decor is combined with embroidery or fabric appliqué.
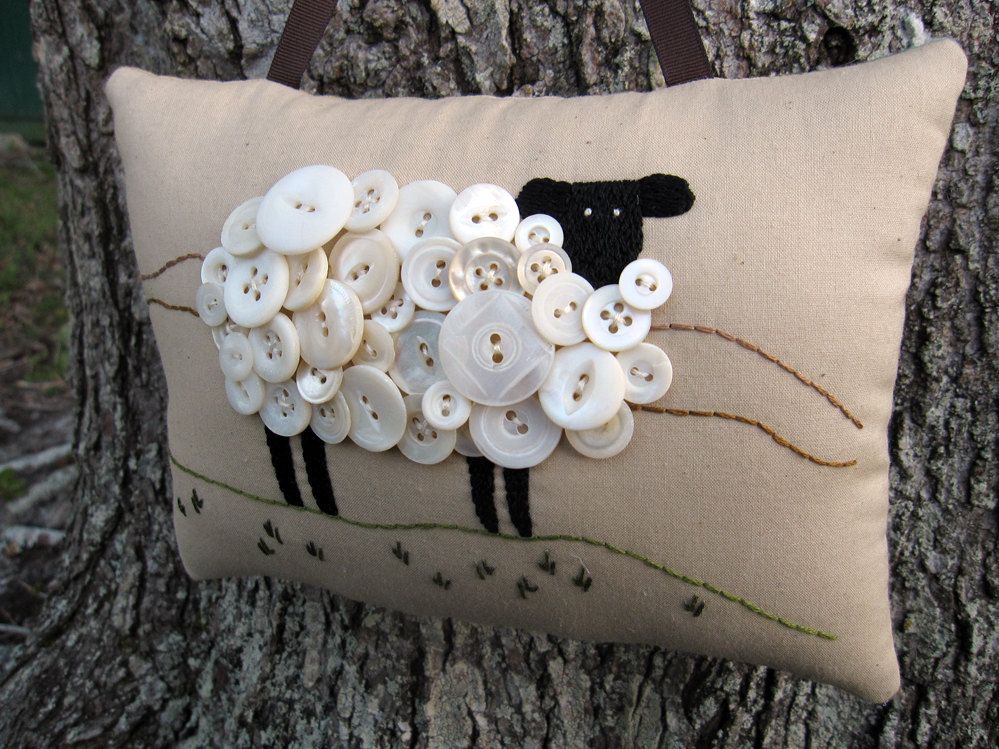
This way you will get a particularly attractive product with a picture.
Work process
- Sew a pillowcase according to the required dimensions.
- On the front side, sew an applique in the form of a lamb figurine.
- Using colored threads (floss or wool), embroider lines imitating a meadow and grass.
- Embroider the eyes.
- Fill the body of the lamb with sewn buttons. Wherein overlap them. This way they will add volume to the image.
Button jewelry
Not only the interior can be transformed with the help of these gizmos. Buttons are also great for creating unusual jewelry.
Necklace
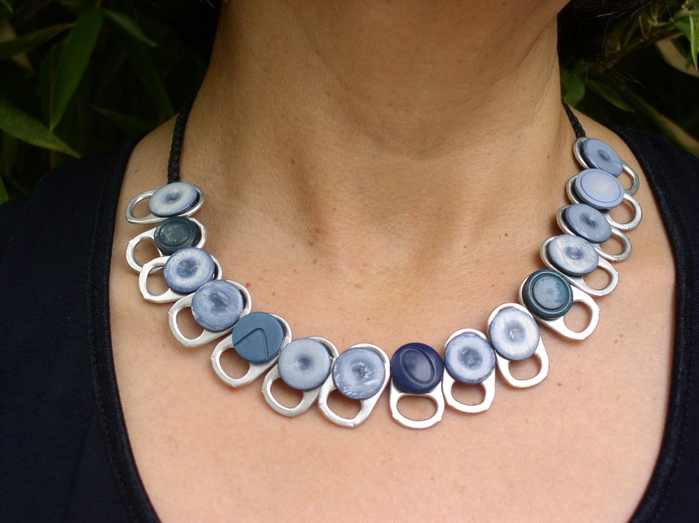
For example, to create such an unusual necklace you You will need 15 keys to tin cans, the same number of buttons, lace and accessories.
The working process
- Measure a cord of sufficient size and secure a locking mechanism at the ends.
- Sew keys with buttons on them in the center of the cord.
Attention! Before starting work, carefully clean the metal parts so that there are no sharp protrusions left on them.
Earrings
Using a pair of metal buttons and beads, you can make original earrings.
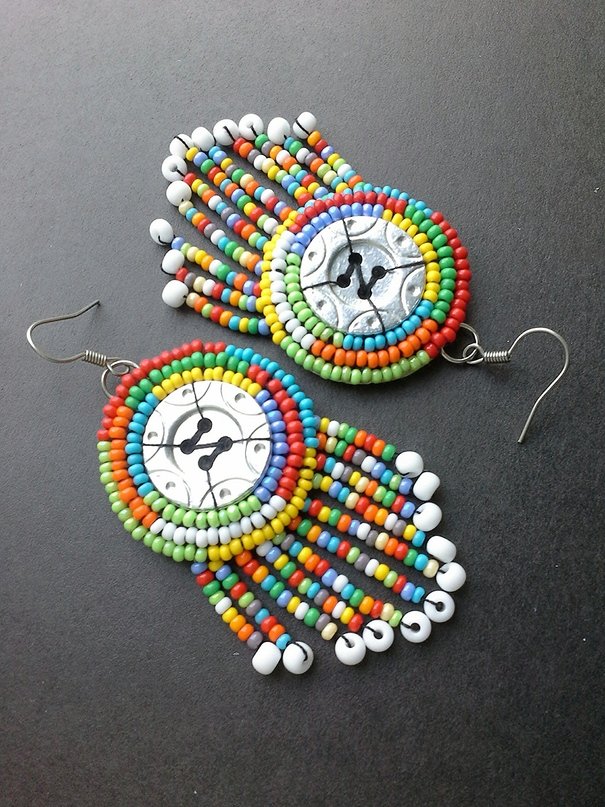
Completing of the work
- Cut two circles of the desired diameter from felt.
- Create 11 strands of beads and attach to the bottom of the base.
- Sew a metal button in the center and make three turns with beaded thread.
- Attach the earring hook to the top of the workpiece.
- Make the second earring identically.
Every thrifty housewife has a lot of accessories cut from old clothes. So, in order to please your loved ones with an unusual gift, you just need to use your imagination. Happy creativity!
 1
1