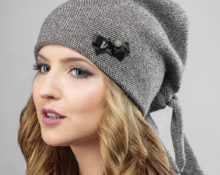
Carefree and tender, thick and warm, lace and with fillet mesh - this is all a “women’s bandana”. This piece can easily complement almost any outfit, from a romantic dress to a rugged one with boyfriend jeans and a leather jacket.
The hands of a master are ready to create masterpieces that cannot always be found on store shelves. But and for a beginner there will always be a couple of models that he can easily complete with the help of diagrams and detailed descriptions.
In this article you can find some of the simplest bandana models and more complex work that will require attention and time. The detailed description that follows each product will leave no questions regarding its operation.
Yarn and hook
A bandana can be made from different yarns. Only it should not be prickly, as it will come into contact with the delicate skin of the face.
For a summer and light bandana, you should look for something made of cotton. It can be an iris of varying thickness.But a bandana can also be created for cooler seasons, and a range of acrylic yarns with the addition of merino wool are well suited. Good and appetizing models are made from mohair, not too thick.
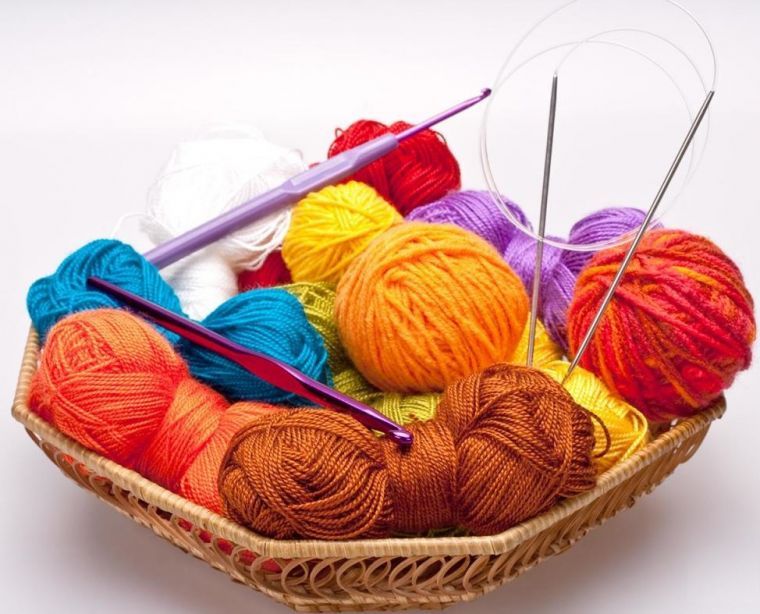 The hook must meet two important requirements - it is a suitable size and a comfortable handle.. When knitting a large product, convenience is always an important criterion. Handles will not get tired if you choose the right handle. Many beginners opt for a hook with a flat center. Some people like to work with a thick and wooden handle. But plastic products do not remain on the sidelines; there is also a buyer for them.
Measurements
There is no special measurement for a bandana. But it will be a shame if, after much work, it becomes difficult to tie it around your head. That's why for your work it is worth measuring the circumference of your head. Add 20 cm or more to the ties. Make this indicator the longest side of the product.
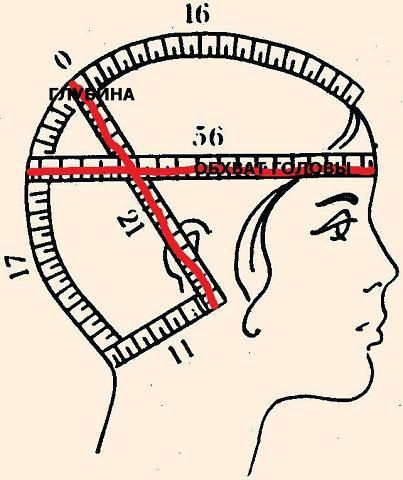 And now height of triangle (this is the measurement from the larger side to the opposite vertex of the angle). This indicator can also be measured - it is equal to depth (measured from the earlobe to the ear without any division). For this indicator it is worth making an increase of at least 10 cm.
Sample
Before any knitted product there are a number of things that need to be done. Even masters always make such important preparations.
Set of first crochet stitches
No product is complete without a sample - this helps to make accurate calculations and knit the product exactly to size.
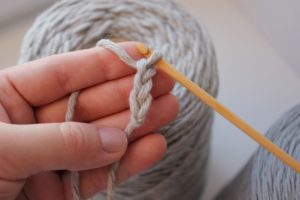
First chain set
A small square fabric is knitted and a ruler is used to determine how many loops are in 10 cm and the required number of rows. These numbers make up the knitting gauge and it further helps determine the stitches and rows for the entire garment.
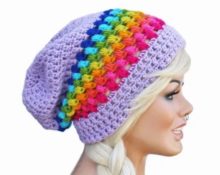
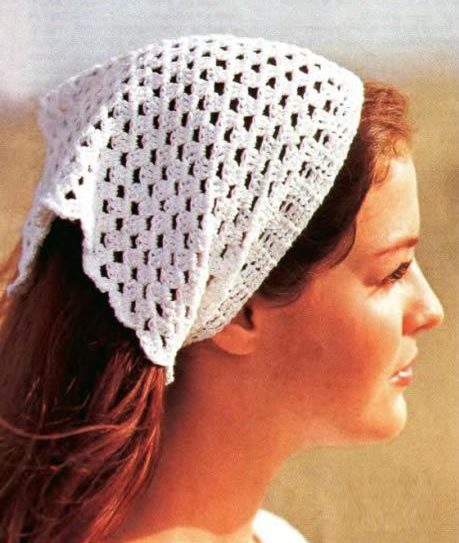
Bandana for a beginner
The simplest product you can find on the Internet is This is a product with such a simple pattern. But he looks so lovely. It’s interesting that initially only handbags and rugs were made from it. Now such a simple pattern can easily be added to children’s blouses and many, many things. The pattern was no exception, and the snow-white yarn made the product even more attractive.
 To work you will need:
- iris yarn;
- hook number 1.75.
First row
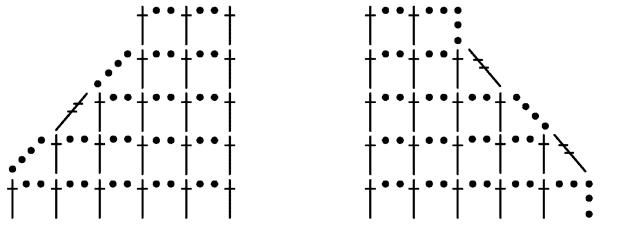
Cast on the required number of loops, pay attention to the required size and repeat. Knit the first row according to the pattern and then begin decreasing.
 Decreases
Decrease in each subsequent row by half a repeat at the beginning of each row. At first you will get an uneven edge, but then these defects will be corrected.
End of product
Knit like this until the repeats run out. It will stop when there is only one protruding rapport left.
Harness
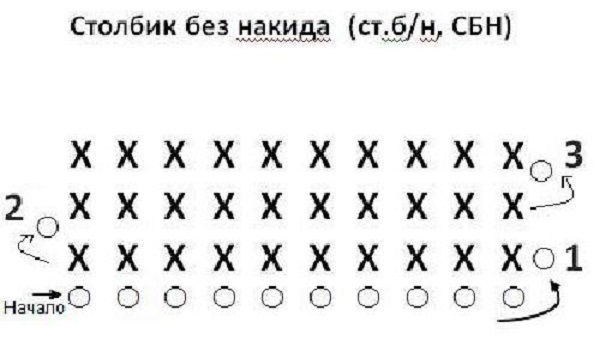
The tying is done with simple single crochet stitches.. They smooth out all the unevenness of the fabric that resulted from shortening the loops in each row.
If all the sizes are calculated correctly, the bandana will definitely fit.
Beige bandana
This charming piece has a luxurious look thanks to the thick cotton thread and lightly starched fiber. The shell pattern also makes the product dense and at the same time presents beautiful lace elements to each shell. Many girls dream of trying to make this headdress. Right now all the secrets of this wonderful product.
 To work you will need:
- cotton thread of medium thickness;
- hook number 2.
Sample
To create this headdress you will need to knit a sample and count how many repeats necessary for length and width.Calculate everything and you can start making the product.
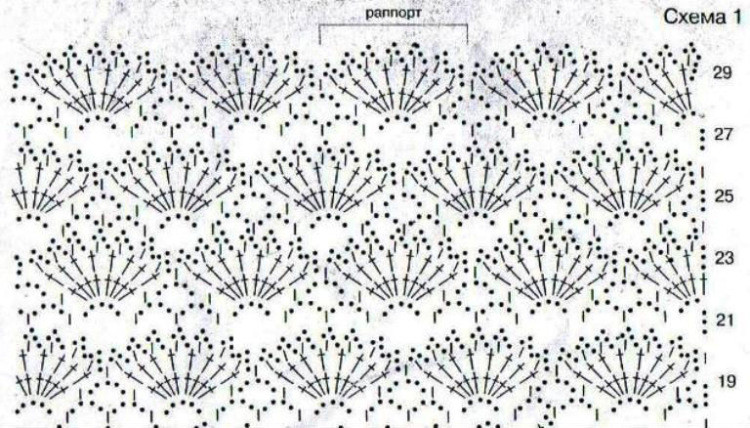 First row
Knit the first row over the corresponding number of air loops. Accordingly, no reduction is required yet.
Decreases
Decreases must be started from the second row and then made in each row at the beginning and at the end, so that there is a symmetrical bevel of the product. If you reduce the whole repeat, you will get a very short product and the bevel will be too noticeable. In this decreasing pattern, do 1/3 of the whole rapport.
Stage: the last row should consist of 1 repeat and protrude like the corner of a handkerchief.
Harness
So that after knitting the product there are no bevels or irregularities left in the fabric. Ideally, you should get an even isosceles triangle, not necessarily equilateral. Tying is a crochet step that is also done with crochet.
 Knitting occurs in the opposite direction. The result is a very dense cable, which easily smoothes out all the irregularities if they occur during the decrease.
At this point the knitting is finished and you can try it on.
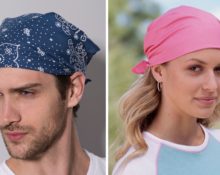
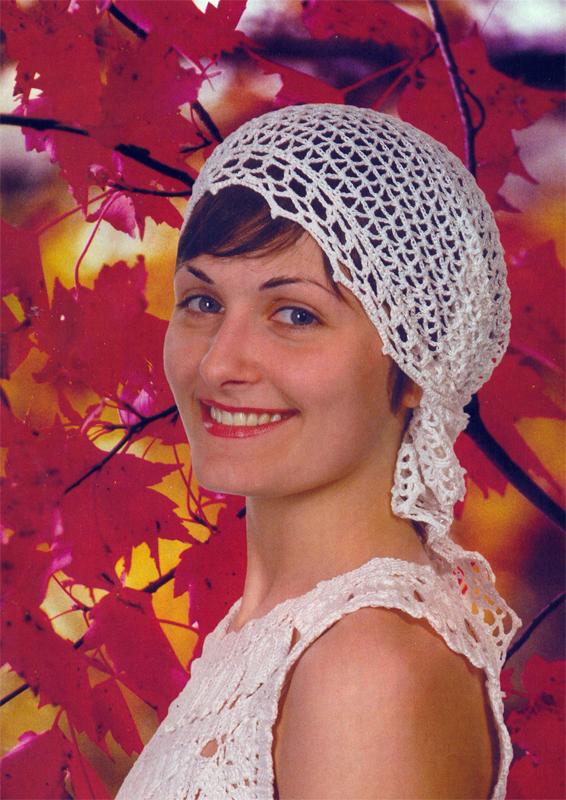
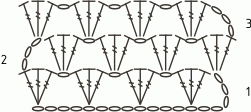
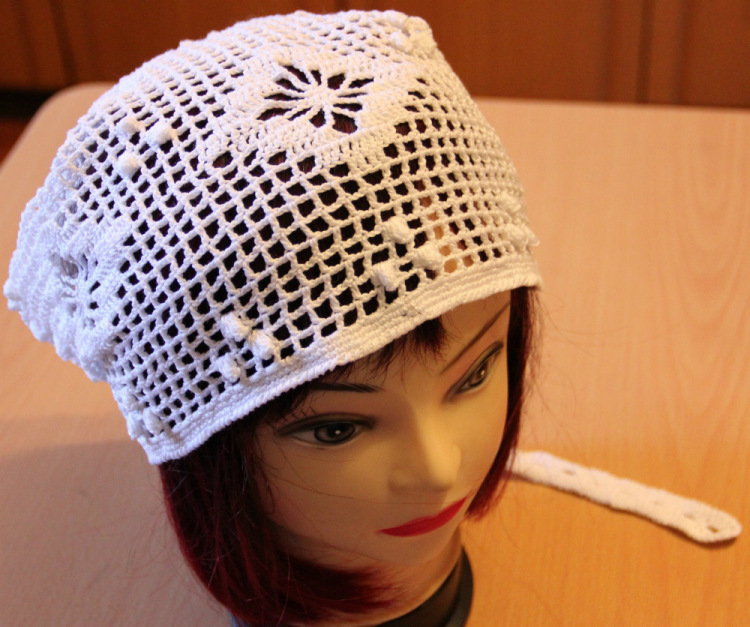
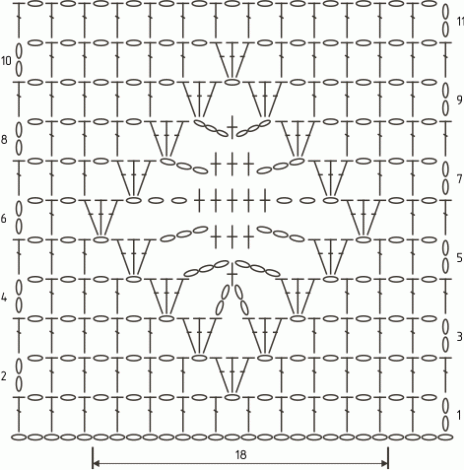
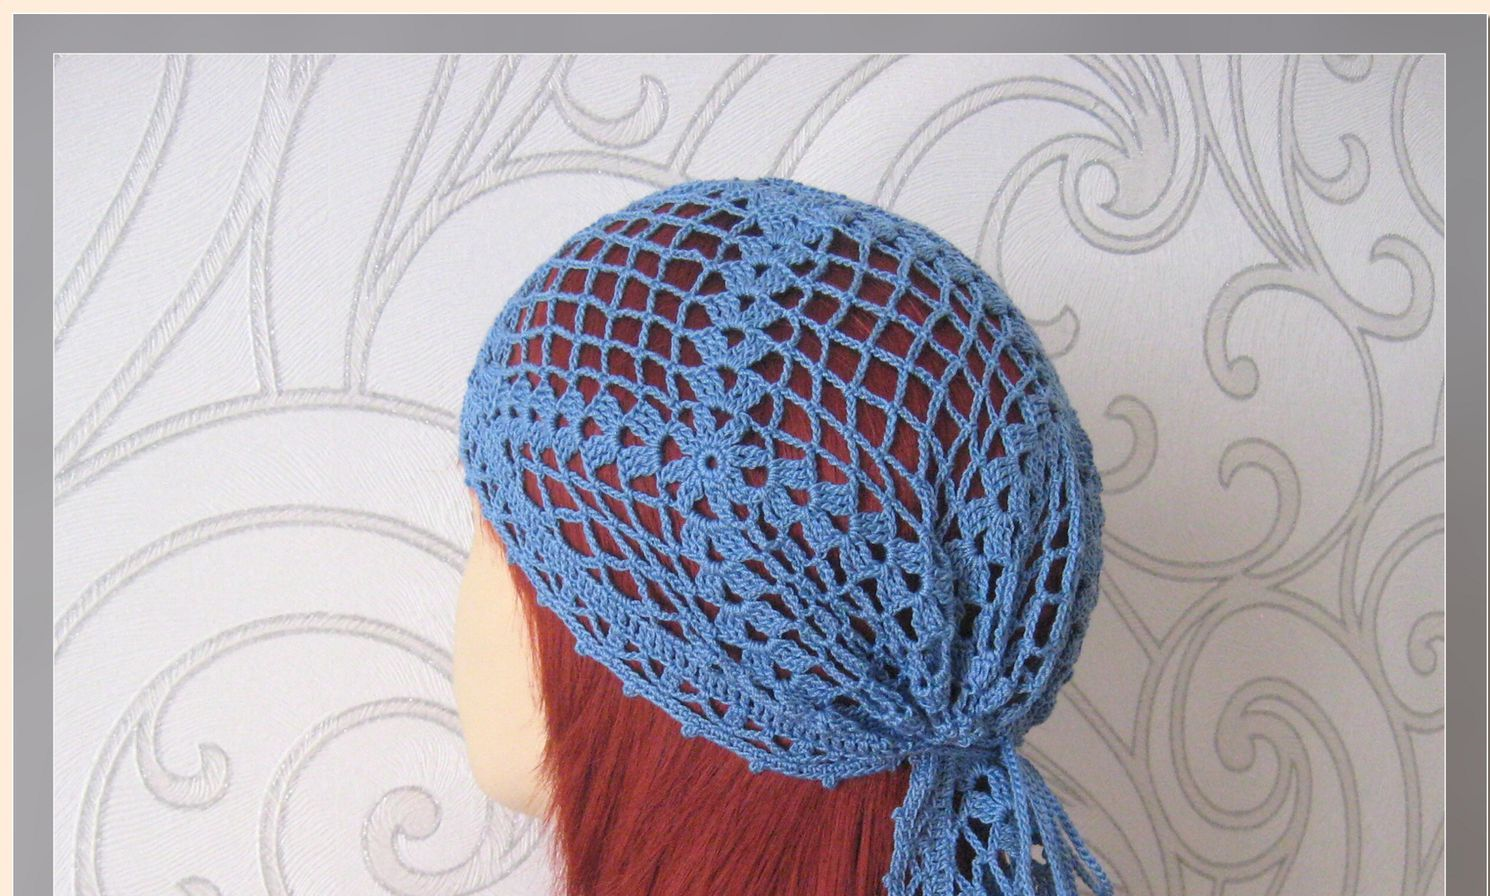
Bandana with loin net
Mesh products are very popular. In hot weather they are very comfortable and light. A thin thread and a fancy pattern will make such a little thing very elegant. Cones will add unusualness. Despite such a complex stitch, this gorgeous hat is knitted very quickly. You need to figure out the pattern, and then you can knit without peeking.
 To work you will need:
- white cotton yarn, you can use an iris thread;
- hook 0.95.
 First row
Make a set of loops for the length of the product. This will be the longest side. To measure, you need to measure the circumference of the head, and make allowances for the length of the corners when tying. Complete the first row without changes.
Decreases
Make diagonal decreases for the fillet mesh very simple. Since the mesh consists of squares, you just need to knit not a square, but a diagonal, and the result is a triangle instead of a square.
 The last row
Make decreases until the last square remains. Complete it and knitting according to the main pattern is finished. This square must protrude. The result will be a very beautiful isosceles triangle. Some may end up with an equilateral triangle, but this is not necessary.
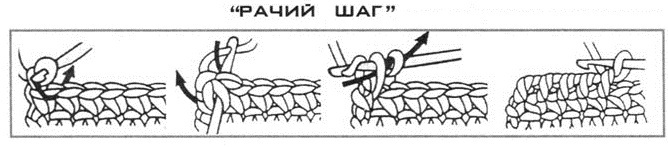
Harness
Make a single crochet stitch all over the scarf. Along the longest side you need to make two such rows, and the last one is a crab step.
A similar model with an equally charming combination of large mesh and blue color is also good for summer.
Thick bandana
Not only summer models can be performed. Beautiful and unique models for colder seasons. Many will complement short jackets well and become an indispensable accessory. For more extravagant ladies, there is a model with multi-yarn and fringe; it will definitely make the look unforgettable.
 To work you will need:
yarn in thickness with children's pekhorka of medium thickness;
hook number 2.
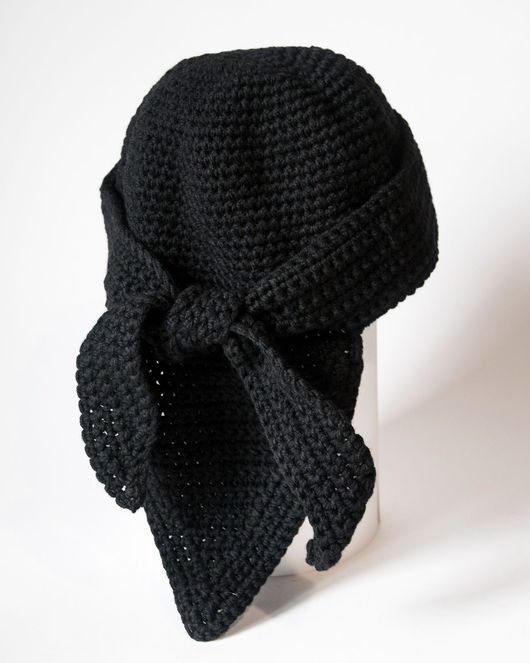
Bandana hat
This very interesting bandana hat model. It is sometimes called a decoy bandana. In the center is a regular hat crocheted from single crochets.
The hat is knitted according to the given pattern and increased to the desired circumference, and then simply knit rows without changes until the desired length is achieved.
 Blende
The tail of the hat is knitted separately. To do this, from a third of the loops, knit single crochets in straight and reverse rows and decrease in each row, one stitch on each side.Do this until one column remains, which will act as a corner. Tie two rows of single crochet stitches, and make a rounded corner in the corner.
Important! To obtain a rounded corner, you need to knit two single crochet stitches in three places of the corner in one previous stitch.
Lapel
The remaining loops on the hat itself will also come in handy. For the lapel you need these loops and an additional 40 loops, 20 on each side. Knit rows across the entire resulting fabric in single crochet stitches. In each row, decrease by one stitch on each edge. This will create a small bevel to simulate a scarf. Knit only 5 rows for the lapel.
Try on the resulting cap and tie the lapel with a knot at the back of the head over the cap. This is such an interesting product.
 Knitting bandanas is not as difficult as it might seem when you see the pattern. Anyone who has mastered single crochets, double crochets and a couple more loops will also master medium patterns for knitting scarves. You shouldn’t be afraid and it’s better to try your hand, because only training makes you stronger. A strong master will be able to create more than one masterpiece. Therefore, a beginner has something to strive for.
 0
0