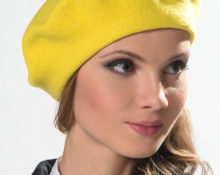
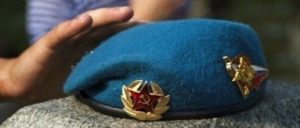
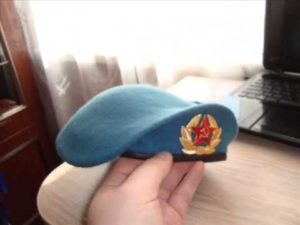
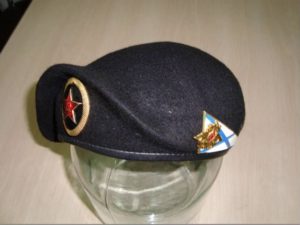
Regulatory documents prescribe exactly how to wear a beret. From there you will find out at what distance from the eyes the headdress should “sit” (usually they require 2 cm), and you will also understand which side the bend should be made on. If you don’t want to make a mistake and appear inappropriately on a holiday, first re-read the charter, and only then start “fighting off”.
What is needed for this?
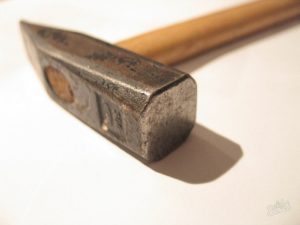
 Often, berets are literally “beaten”, that is, to give the correct shape you will need a hammer. In the case of products made from thin fabrics, and not from thick wool, you can get by with less drastic measures. For example, you can turn to heated water (sweet or starchy), paraffin, or hairspray.
Since most methods require washing, you will have to find the right place to dry before starting manipulations. In this context, a window sill is definitely not suitable, as well as rooms with drafts and rooms with high humidity. You should not place woolen or wool-blend items near heating appliances.. This is fraught with deformation and change in size.
By what means can you fix the shape of a beret?
Home fitting methods are inexpensive. All items necessary for the procedure, with the exception of paraffin, can definitely be found in the kitchen or bathroom.
Sugar water and plate
It is necessary to wet the beret, pull it onto a flat plate (choose dishes that are ideal in size) and leave it in this state until it dries completely. Then place the headdress at the bottom of a basin filled with warm, sweetened water. Wait 2 hours. Dry.
Important! The plate is removed only after drying, that is, there is no need to remove the headdress from it.
Paraffin
 Wet it, put it on a mannequin or ball, give it the desired look and let it dry. When this happens, melt the paraffin and apply it pointwise to areas that need additional hardness (processing is carried out from the wrong side). Correct it, iron it with your hand, and then let it dry completely.
Laundry soap
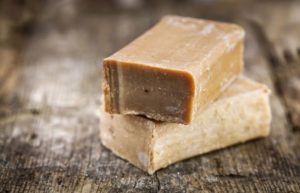 Classic laundry soap has a specific aroma. If you don’t want to become a source of such a smell on a holiday, buy a modern version of household soap in the store (only without coloring additives, otherwise unwanted stains will appear on the headdress). Well, or a product of the same name, suitable for washing children's clothes.
Wet the beret pointwise (only those parts that will undergo transformation). Rub wet areas with a bar of soap. Then fold the headdress to the desired side and secure the edge with a clothespin or paper clips. Leave for several hours.
Rigid frame
 Make a cardboard backing. A frame made of wire or other material that holds its shape well and is able to transfer it to another object is also suitable.. Then place the beret on the frame or place the backing inside it. Fix in the desired state with double-sided tape and store without removing or moving for several weeks.
Adhesive layer
Buy a base for the adhesive layer (for example, bag flezelin). Take measurements from the beret (you need height and circumference). Transfer the dimensions of the beret onto the interlayer and cut out. Then glue using a hot iron.
Hairspray (maximum strong hold)
 Apply a thick layer of the product to the headdress, previously properly “beaten”. There is no point in saving varnish. The more you spray it, the better the beret will “stand”. At the same time, keep in mind that some of these products contain microelements that add shine. This effect is not needed, so read the instructions carefully.
We beat back step by step at home
The reverse side should be processed, not the front side.
Method 1
The most complex and expensive method. However, if performed correctly and strictly following all the instructions, the result will be a headdress that is ideal in shape and angle.
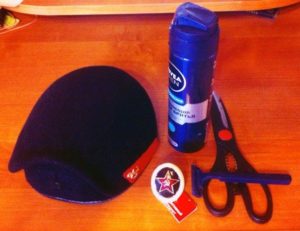
For the event you will need:
 hot water (some recommend sweet, but this is not necessary);
- cockade;
- colorless hairspray;
- shaving foam;
- scissors;
- dull razor;
- plastic card.
 hot water (some recommend sweet, but this is not necessary);
Algorithm of actions:
- tear off the lining of the beret (in some cases this step can be skipped) and place the headdress in hot water for 2 minutes;
- take it out, remove excess water with your hands (precisely to drive, without twisting or squeezing);
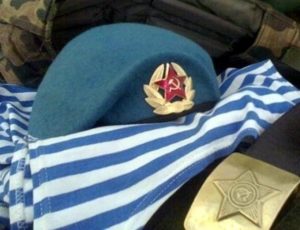
- after the water stops dripping, insert the cockade (For correct placement, follow the liner inside the beret);
- put on the head, tie;
- smooth out the headdress, give it the correct shape;
- cover the beret with shaving foam without removing it from the head;
- wait a few minutes, wet your hands and start rubbing in the foam;
- give final shape;
- leave alone for 1.5 hours (no need to remove);
- After this time, remove the headdress, clean from pellets and residual traces of foam (small signs of wear - pellets - are removed using a razor drawn along the pile);
- fill the inside with a large amount of varnish (you should not spare the product, as it will give the headdress the necessary hardness);
- cut a small rectangle out of the card, then make 2 holes in the piece for the “antennae” of the cockade, insert the cockade and tighten the “antennae” to your taste.
Important! The pellets can also be removed using a special machine. It works much more carefully, cleans better, causes less damage to fibers and costs mere pennies.
If you need recommendations for ironing the beret (5th step), then follow the following instructions:
- smooth the left side of the beret back (while bringing your hand straight to the back of your head);
- smooth the crown to the right;
- We create a half-disc at the right ear.
Method 2
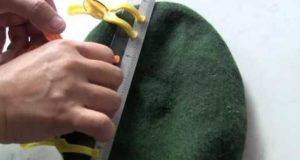
The method is suitable for military and civilians who want to flatten one side of their headgear (bevel it to one side). To do this, you literally have to break off the edge. You will need a hammer and a hard surface strong enough to withstand repeated direct hits from the tool. (barracks stool, for example).
Step-by-step instruction:
 using a spray bottle, spray water on the beret;
- iron it through 2 layers of gauze;
- place on a flat, durable surface;
- Use a hammer to beat off the desired edge.
 using a spray bottle, spray water on the beret;
The blows should be light, but accurate. If you don’t have the skills to handle the tool or are afraid of ruining the item, use a steel spoon. However, the process of involving her will take longer.
Important! Some servicemen, who do not have any tools at hand, generally make do with a barracks iron mug.
Method 3
A method that is relevant for the teardrop beret. Take a hat, wet it with water and quickly shake it off (no need to get too wet). Next, put the product on yourself and give it the shape prescribed in the charter. Continue this way until completely dry (do not forget to smooth and adjust the beret from time to time, otherwise it will not dry correctly).
When the beret becomes dry, press down the edge with pliers. If the tool is handled correctly, the part will become as sharp as required.
 If the idea of wearing a wet headgear is not pleasant in itself or there are reasons to refrain from such a step, and you have a mannequin or at least a ball at hand, the circumference of which coincides with the circumference of your head, then put a beret on them. However, you need to be prepared for a not entirely correct fit - nevertheless, these objects do not correspond to the curves and structural features of your particular head.
Method 4
 Soak the headdress in hot water, remove the bulk of the water with your hand, put the product on, and then give the edge a sharp shape using your fingers (punch the edge), paper clips or clothespins.
Method 5
Wash the product, sprinkle the seam with starch and beat off the edge. Brush off any remaining starch.
Method 6
Wash and iron through gauze (double). Before ironing, place a rolled up wet towel inside the headdress (helps create a shape).Then beat off the edges with a hammer.
Method 7
 Soak for a couple of minutes in warm water. Take it out and stuff it tightly with newspapers. Ensure that the form adopted corresponds to that required by the charter. Smooth out the folds, and “bevel” the desired side and secure with clothespins. Leave until completely dry (in this case, the item should be kept away from operating heating devices and direct sunlight).
Final step: try on the dry beret and, if necessary, correct any imperfections with your fingers dipped in water.
Method 8
- Mix 180 g of water (cold) with 100 g of starch. Mix thoroughly. Add the resulting mixture to 900 g of heated water.
- Dip the beret and give it the desired look after pulling it out. Once you achieve your goal, put it on the ball or dummy. Let dry.
Important! The visor cannot be wet.
Suture beret: nuances
If it does not fit tightly, it will have to be sutured. Next, the headdress is slightly wetted and twisted on the desired side. There is no need to do anything else. No ironing, no pressing.
Tips for beginners
Helpful Notes:
- when beating, it is better to use sweet water;
- soft berets fit well (take note of this if you want to wear a teardrop-shaped beret);
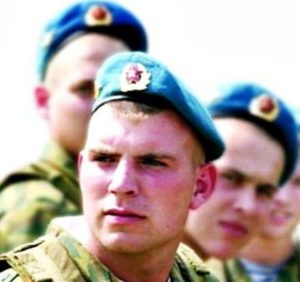
- active and retired military personnel, just like representatives of the reserves, must wear a beret on their heads, put in order according to the regulations (overgrown hair sticking out in different directions is unacceptable);
- a disposable machine is useful not only for removing pellets, but also for eliminating excess fluffiness (while beating, hair begins to come out of the headdress and it looks ugly, but the blade will help give the product a decent look);
- some use ordinary 3-liter glass jars (you need to turn the neck down) instead of a head, a mannequin or a ball.
 when beating, it is better to use sweet water;
 0
0