 Modern berets have practically preserved the images of their ancestors. Throughout history, they have changed, but have not lost their main features. According to the main version, berets originated from Celtic headdresses, which, due to the lack of dyes and the poor development of chemical enterprises, were traditionally made blue. They then took root in army uniforms and became an integral part of the military. And after some time they came into fashion among the ordinary civilian population and have survived to this day.
Review of women's beret models
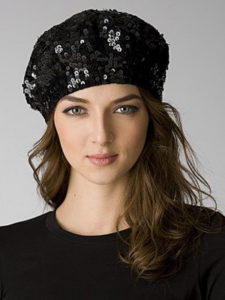
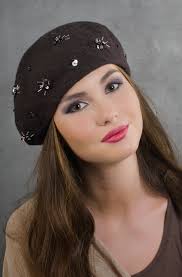 Berets have entered modern fashion. Store shelves are full of a huge variety of these hats; they are popular mainly among women (although men also wear them on duty: paratroopers, marines).
Berets are made different shapes and sizes, volumes and differ in the width of the circumference. Thanks to the ability to change these parameters and customize them individually, this huge range exists.
Also important is material selection, from which the beret will be made. Typically used for these purposes
 leather;
- suede leather;
- drape;
- felt;
- fur;
- cotton;
- velveteen.
In general, almost any material is suitable for using and sewing a beret. And its low cost makes this headdress especially favorite among most ladies.
The beret can be chosen to suit the season of the year, the color of the dress and according to your personal wishes. In any case, it will suit even the most demanding buyer and will not leave anyone indifferent. If you want to learn how to make berets with your own hands, we will help you, describe in detail all the nuances of sewing and advise you on choosing a model.
Women's knitted beret
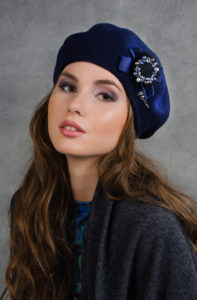 A beret made of knitted fabric is suitable for everyone. Soft, thin and comfortable, it will look perfect on any head. And thanks to the ability to choose the size and shape, you can find berets to suit any face shape. But due to the light, wind-blown fabric, it is suitable only as a demi-season option or in cool summers. Such a beret will not be able to withstand low temperatures, so to maintain health it is better to replace it with a woolen one.
Women's knitted beret pattern
If you have chosen knitwear for the product and want to make a light and elegant beret with your own hands, then we offer step-by-step instructions for the pattern.
Since we chose a knitted beret as the first example, we will first look at the main points that will be similar in the pattern of absolutely any model:
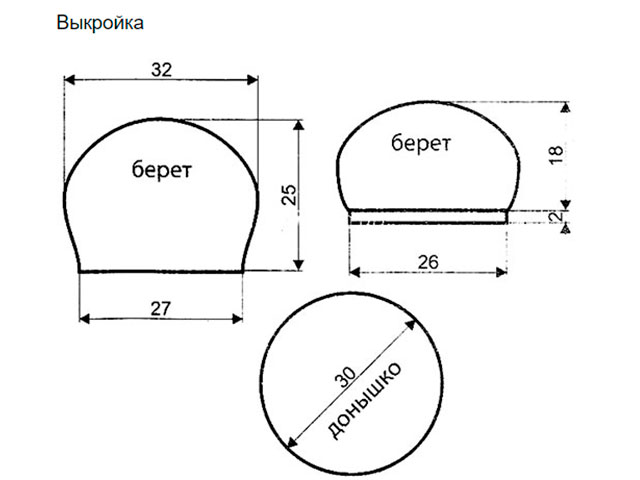
- Take the dimensions of the head. Measure the head circumference using a centimeter and calculate the diameter. The diameter can be found from the formula C=2πr. Accordingly, the diameter is equal to the circumference divided by 3.14. It is best to remember these dimensions for future work, since they are needed for all types of hats.
- Then, on graph paper, the details of the future workpiece are drawn out with a pencil. Bottom, band and side according to appropriate dimensions.
- Transfer the drawing to the previously prepared fabric.
IMPORTANT: draw out the details on the fabric with a margin of approximately 1 cm (taking into account the cost of seams).
- Cut out all the parts and cut the fabric.
- Then sew the parts together using a sewing machine (you won’t be able to make neat, invisible and strong seams by hand if you don’t have enough experience in this).
Since the knitted beret is very thin, it is necessary to make a lining. It is cut out in the same way as the base according to the drawings. Then machine the lining inside the beret. After all this, you need to attach the band, that is, the part that will be directly on the head.
IMPORTANT: when choosing knitted fabric for sewing, work with it very carefully. It is the thinnest and most stretchable of all, so it is quite difficult to work with it. Make sure to iron the seams thoroughly after each stitching to avoid any unsightly wrinkles.
We sew a women's knitted beret
In principle, there is nothing difficult about sewing the parts together. You don’t even need any special knowledge or skills to do this. Suffice it to remember school classes. During sewing, a certain sequence is established and there is one important condition. After each seam, it is necessary to smooth it out and check against the measurements to see if the outline of the future product has gone astray. It is better to adjust this at each stage of sewing so that the end result can please you and not upset you.
Sequence of sewing steps:
- Sew the parts of the side together, making it whole.
- Iron along the seam.
- Then the bottom is sewn to the side, forming the base.
- The seams are ironed again.
- Finally, the band is sewn on, while controlling the level of its fit on the head.
Women's drape beret
 Drape is best suited in the cold season, even in winter. Thanks to its density, it retains heat and provides excellent warmth. In addition, the hardness of the material allows it to be given a stable shape and retain it during long-term wear. Such a headdress will look great on girls, emphasizing with its smooth contours their sophisticated figure and expressive look. And the variety of shapes and sizes will allow you to choose a beret for any head.
Pattern of a women's beret from drape
The main points that we described above are also preserved for embroidery of this model. But it should be said about the features. The biggest difficulty when working with drape is its rigidity and density. This should be taken into account when cutting the material and embroidering the components. Many women specifically use products to soften the tissue or beat it off.
Sewing a beret from a drape with your own hands
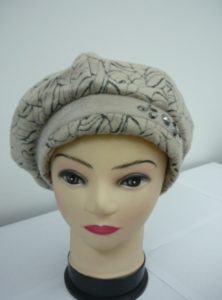 All components are the same as in the knitwear version. The plan for stitching the parts does not change either. But if you want to choose drape as the main material for sewing, then be prepared to spend a lot of effort and time; you may not be able to achieve the desired results the first time. Due to its high density, the drape is not very pliable and measurements may be lost when sewing. Monitor this especially carefully at all stages.
Children's beret
 Little fashionistas are the hardest to please. They want everything at once. And with such a huge selection of hats, your head is simply spinning. Try offering your child berets as a headdress. A girl is sure to love this versatile item.She will feel like a fashionista to match those who shine in modern magazines and on the catwalk. The model option can be chosen by the young fashionista herself. Pink fur is suitable for a children's version; all girls love dolls in childhood and choose delicate pink tones. Be sure to add jewelry to complement your princess look.
Children's beret pattern
For the pattern, we buy pink fur or any fabric, depending on what season we are preparing the headdress for. Take measurements from your head and draw out the corresponding blanks, first on paper, and then on the material from which you will sew. Cut the fabric according to the appropriate markings. Now you can start stitching.
IMPORTANT: a child’s head is much smaller than an adult’s, this must be taken into account when preparing the details of the hat. Don't make the side and band too big. Otherwise, they will look ugly on a girl’s small and neat head.
We sew a children's beret with our own hands
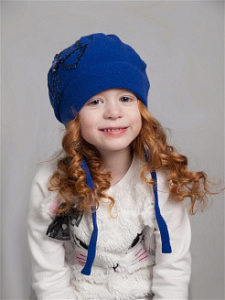 This beret is sewn according to all the basic rules described in the article. Before making seams on a machine, you need to make a hand stitch for fixation and basting. This will also be convenient for preliminary fitting of a beret. If your daughter is already quite old, you can do the work together. You can teach her the art of seamstress and instill a love for needlework. Add some jewelry to complete the look. You can buy it at any jewelry kiosk. Beads, butterflies, ribbon bows, hairpins, and brooches will look great. You can invite the girl to make her own choice and attach this detail to her new hat.
Tips from an experienced seamstress
 With the help of this article, you can step by step make a unique thing that will be one and only. This is why handmade work is valued. After all, you won’t find a second copy like this in anyone’s possession.The manipulations described above are quite enough to create a real masterpiece. Don’t forget to use your imagination and fantasy, then the result will exceed any expectations. You can stick to a certain style, but at the same time add something of your own, creating elegant things. In manual work this is only welcome. And to make the work easier, we will share some secrets in sewing.
Here are some of them:
- When working with drape, treat it with steam, so the material will soften and be more amenable to processing.
- When choosing this material, you need stronger needles and denser threads.
- The beret must be decorated with decor, without it there will be a feeling of emptiness.
- Make all seams using a machine only. Hand stitching can greatly distort shapes.
- Always keep in mind that you need to take extra fabric for the seams.
- You need to find out in advance how much fabric you will need for sewing and buy it in the store. You need to take it with a reserve for decor and damage to the material.
- If you have old things, you can easily make do with them. Make a beret out of things you haven't worn for a long time. Breathe a second life into them.
I hope the article was interesting and useful for you. Handicraft is something that anyone can learn. The main thing is to show desire and desire in this direction.


 leather;
 0
0