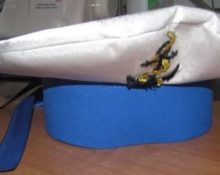
Many parents, in order to save money or create an exclusive costume for the holiday, undertake to make it themselves. Not everyone can sew, and therefore one of the simplest options is a sailor’s suit. He will need a vest, a blue tie and shorts. But the most important element is the cap, which is easy to make yourself from paper. The main thing is to take measurements of the head correctly, accurately draw the patterns and carefully assemble all the parts.
What measurements are needed?
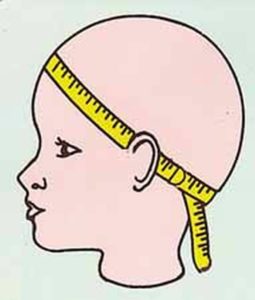 The only measurement you need to take is head circumference. According to the rules a measuring tape is applied 1.5 - 2 cm above the eyebrows, passed around the head above the ears and along the most convex part of the back of the head. Denoted by the Latin letter O. For a clear fit, add three centimeters to the resulting length for freedom and allowances for connection.
Important! The headdress should fit snugly, without falling down, but not put too much pressure on the head.
Tools and materials
Before starting work, prepare the following materials and tools:
- scissors;
- ruler;
- centimeter;
- pencil;
- glue;
- compass;
- thick paper;
- colored paper.
Cutting out the details
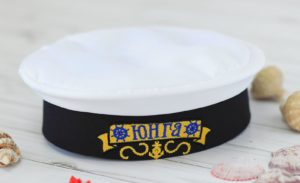
The cap consists of a band, crown, piping and ribbons. After taking measurements, the details are drawn on thick paper. In order to make a headband, draw a straight line equal to the circumference of the head plus three centimeters. Put 5 - 5.5 cm upward and draw two perpendiculars along the edges - this will be the height of the side. Then they are connected to form a rectangle.
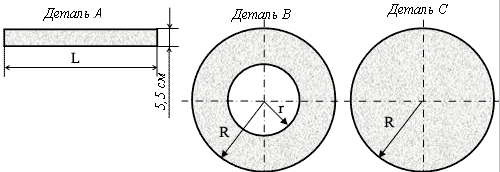
The crown consists of a large and small circle, the radii are calculated using the formulas:
- r = O/2P, where P = 3.14 cm, r is the inner radius;
- R = r + 7 cm, R is the outer radius.
By drawing these two circles from one center, the second part of the sailor's hat is obtained. The edging is obtained by drawing a circle according to the dimensions of a larger radius.
Important! To make a cap from fabric, you can use the same pattern.
We design ribbons
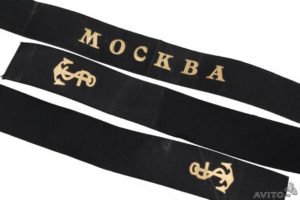 They are cut out of black and colored paper or satin ribbon; each length is 10 centimeters plus 1 - 1.5 cm for allowance. They are made either as two separate ones or as one long straight line. Don’t forget about the special attributes of the navy. The edges of the ribbons are decorated with anchors cut out of yellow or golden paper, and the side is decorated with an inscription with the name of the fleet, ship, or city. Which are printed or transferred to tracing paper, and then made into stencils. Triangles can be cut out at the bottom if desired.
Important! For an aesthetically pleasing headdress, it is better to opt for fabric tapes, which can also be glued with PVA glue.
Folding the cap
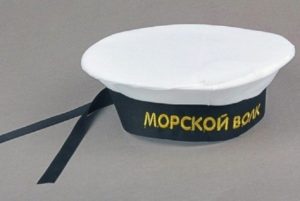 Assembly begins by connecting two circles - the crown and the bottom. PVA glue is applied to the edge of one of the parts, and the second is pressed tightly against it. Do this carefully, you need to make sure that the middle does not stick. While the glue dries on the already assembled parts, glue the band along the side cuts. After the glue has dried well, connect all the parts together. To do this, cut the edge of a smaller radius, bend it and glue it to the side.
Important! When a suit is made for a baby, the inside of the side is treated with fabric so that it does not rub and irritate the skin.
The base of the cap is ready, all that remains is to decorate it with ribbons. There are three options, in two of them the upper edges can be hidden between the paper base and the fabric glued along the inside:
 if one long ribbon is cut, then it is used to cover the rim of the cap, leaving 10 cm free edges at the back;
- two separate tapes are connected to each other so that they diverge at the bottom, and attached to the base with glue, a stapler or thread;
- if they are made of satin ribbon, then they can also be glued or sewn.
Such a costume can be made for matinees in kindergarten, Victory Day celebrations or the navy.


 if one long ribbon is cut, then it is used to cover the rim of the cap, leaving 10 cm free edges at the back;
 0
0