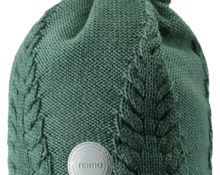
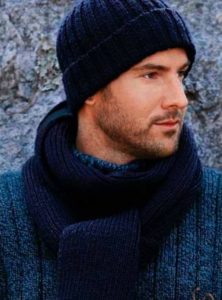
 A warm and fashionable beanie is worn with a down jacket, sheepskin coat, wool coat and leather jacket. It is not necessary to buy a universal headdress if you have time and knitting needles. Knit a man's hat yourself. It is guaranteed to fit in size and color.
We have selected several models of such products. We’ll also tell you how to knit them with your own hands.
Materials and tools for work
Before you start, stock up on knitting needles (regular or circular, depending on the specific model), scissors and yarn.
It is best to knit a warm hat from wool. And if you want to give a man a headdress for the off-season, you can use mixed threads. In addition to natural wool, they contain synthetic fibers. Or use acrylic yarn, which is perfect for spring or fall.
On average, it takes 2 skeins of thread to make 1 item..
To make the right choice of knitting needles, compare them with the selected yarn. The knitting tool should be equal in thickness to the thread folded in half.
We knit a beanie hat for men
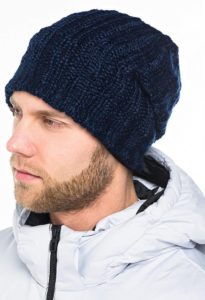
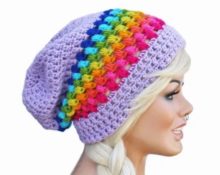
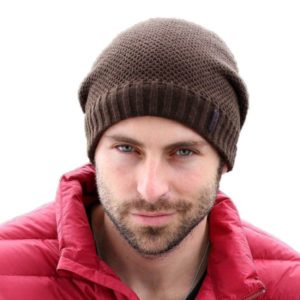
Despite the simple style, men's beanies do not look boring. After all, the presented photos convince us that you can knit a hat in different ways.
For beginners - a simple hat without a lapel
Let's start with a shallow, close-fitting, solid-colored cap. Size: 55–58 cm.
Tools and materials
- Scissors, thick needle, thread to match the yarn.
- Knitting needles, thickness: 3 and 3.5 mm.
- 2 skeins of plain yarn: acrylic with wool, 50 g each.
Drawing
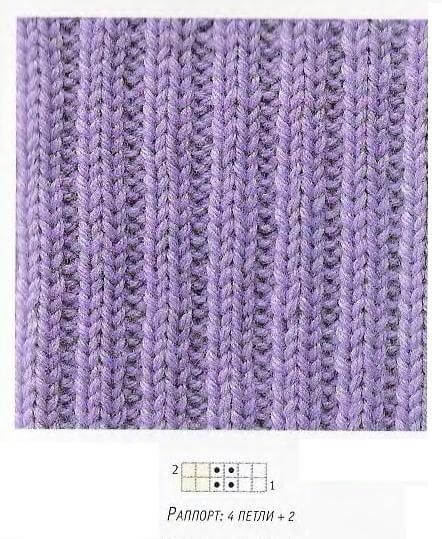
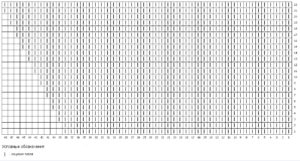
We knit with an elastic band, 2 through 2.
- First row: knit 2, purl 2, knit 2.
- In the second row, the order changes: first there are 2 purl stitches, then 2 knit stitches.
Algorithm of actions
Cast on 114 stitches on needles (3 mm). Knit 28 rows with an elastic band. Then switch to 3.5mm knitting needles. Knit 56 rows in height. Start decorating the crown.
The crown is knitted in accordance with this description.
- Row 57: knit 2, purl 2, knit 2. At the end: 2 knit stitches.
- Row 58: purl 2, knit 1, purl 2. We finish with 2 purls.
- Row 59: knit 2, purl 1, knit 2. At the end: 2 knits.
- Row 60: purl 2, knit 1, purl 2. At the end: purl 2.
We knit in a similar way up to 64 (with inclusion). On the 65th row the pattern changes: knit 2, knit 2, knit 2.
The same pattern is repeated in row 69. From 66 to 68 we apply the pattern used from 58 to 64 rows.
In the future we knit according to the following description.
- Row 70: wrong side only.
- Row 71: Solid double knit.
- 72: reverse side only.
- 73: knit 1 time, all others – double knit.
We tighten the last 8 loose loops using a needle and thread. After this, we sew the side seam along the wrong side.
Important! Be sure to wash the finished product before wearing.Use only liquid powder, do not forget to add a special conditioner.
Dry away from heat sources and direct sunlight.
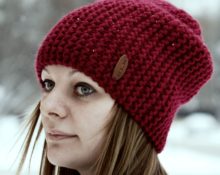
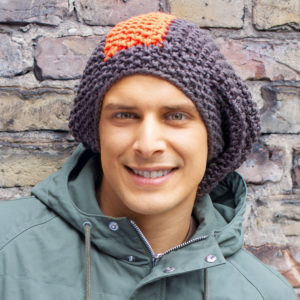
Beanie with lapel
The knitted pattern is similar to the previous one, but more interesting. Its highlight is the lapel. For craftswomen who want to create an even more spectacular accessory, we recommend that you try decorating the top of your head with a fur pompom. This solution will look fashionable and appropriate.
It’s worth thinking about a scarf of the same texture, knitting and tone. A product of sizes 56–58 will require 2 skeins of thread of medium thickness. Once you decide to knit a scarf, buy 8 more skeins.
Important! Need a winter hat? Then buy yarn not of medium thickness, but thinner, but knit in 2 threads.
Materials and tools
- 2 skeins of yarn: acrylic and wool in a ratio of 50:50, 50 g each skein.
- Scissors, needle, thread.
- Knitting needles (3 and 3.5 mm).
Drawing
We knit with a double elastic band (knit 2, purl 2, repeat). We work the first 10 cm on 3 mm knitting needles. Next we move on to 3.5mm.
Algorithm of actions
- Cast on 114 stitches.
- Knit 10 cm with 3 mm knitting needles (ribbing, 2/2).
- Knit another 28 rows using 3.5mm needles.
Next we move on to decorating the top. His scheme is as follows.
- 1st row: 2 l. p., 2 i. p..together, 2 l. p.. At the end of 2 l. p. Repeat the pattern for the next 3 rows.
- 5 row: 2 l. p., 2 l. items together, 2 l. p., 2 l. together. Next we knit 1 p. And. p., 1 r l. p., 1 i. P..
- Then: 1 l. p., knit 2 together, 1 l. P.
- Purl row, double knit row. Then - purl.
- Then we start with a single knit stitch, all subsequent stitches are double knit stitches.
- When 8 loops remain, tie the top with thread and needle, and then sew the side.
Making a scarf is even easier. From 8 balls you will get an accessory with the following dimensions: 174x20.5 cm.To create it, cast on 65 loops and knit with a single elastic band (1/1). Finally, close the loops and wash the resulting scarf.
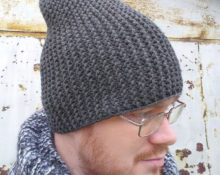
Beanie hat with garter stitch
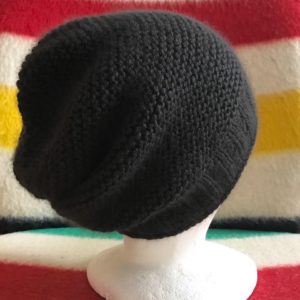
You will need 120 grams of yarn. Recommended thread composition: 48% mink, 52% goat down. The entire product is knitted with knit stitches, but the hat will have to be turned over every other row. That is, odd rows are knitted from the front side of the hat, and even rows are knitted from the wrong side.
Description of work
- Cast on 48 stitches.
- Knit 38 knits in row 1.
- Turn over to the other side, knit 38 knits in the 2nd row.
- The 3rd and 4th rows are 39 loops each, but we knit the 3rd from the front side of the hat, and the 4th from the back.
- 5 (with LS) and 6 (with IZ) - 40 loops each.
Repeat the algorithm for 22 rows. Every 2 rows increase the number of stitches knitted by 1.
The 22nd row will be the last and should be purl, that is, knitted on the back side of the cap. There are 48 stitches in this row.
At this stage we will have 1 segment of the headdress. The hat consists of 6–8 such elements. When you are done with the last one, tighten 10 loose loops and form them into a crown.
Double hat
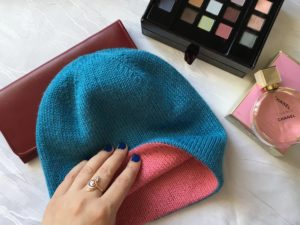
Men's hats can be original transformers.
The main feature of this headdress is the ability to turn it inside out and put it on inside out. It looks most impressive when the inner and outer sides are made of threads of different shades.
The hat is also notable for its unlimited number of ways to wear it. You can make a lapel or fold at the back, or pull it up a little and give it a shoulder blade shape.
The product is designed for a head circumference of 55–56 cm. Number of loops: 110 + 1. Number of wedges: 4.
Materials and tools
- Circular knitting needles No. 3.
- Hook.
- Ruler.
- Additional thread.
- Scissors.
The yarn itself must be 100% acrylic (100 g 320 m). You will need 4 skeins of different colors (for example, 2 blue and 2 white).
Completing of the work
We cast on the loops using a hook and a knitting needle (111 sts). We use an additional thread at this stage. Having finished, we take threads of the main color, for example, blue, and knit a row of l. P. Then you will need to divide the available number of loops between 2 knitting needles. One should be 56, the other should be 55.
The next step is closing the circle. In this case, the line with the additional thread should be facing inward, and the line with the main thread should be facing outward. To make a closure, just transfer the first stitch to another needle and knit it. After this, you can start knitting the second row. It knits l. p., as well as the 68 following after it. In total it should be 70 rubles.
crown
Next we move on to the design of the crown. We knit it with decreases. It looks like this.
- 11 l. P.;
- 2 decreases;
- 1 l. P.;
- 2 decreases;
- 23 l. P.;
- 2 decreases;
- 1 l. P.;
- 2 decreases;
- 22 l. P.;
- 2 decreases;
- 1 l. P.;
- 2 decreases;
- 23 l. P.;
- 2 decreases;
- 1 l. P.;
- 2 decreases;
- 11 l. P.
The decrease is done as follows: the first loop is thrown onto another knitting needle, the second is knitted. p., then the first thrown loop is lowered through the second.
Then there is a row of only facial loops. After it there is a row with decreases. It is similar to the first row of the same name, only at the beginning and at the end they knit not 11, but 10 liters. n. Sections that previously had 23 and 22 liters. n., will decrease by 2 l. p. each (there will be 21 and 20 loops, respectively). After that again there is a row of only l. P.
In the third row with decreases along the edges there should be 9 knit stitches (1 less). After the first 9 knits, decreases are made, and then 19 knits. n. After the second pair of decreases, 18 l are knitted in the middle. P.That is, in each subsequent row with decreases we knit 1 knit stitch less on the sides and 2 loops less in other places. The number of decreases in the row itself is unchanged - 16.
Repeat the pattern until there are 7 loops left on each knitting needle.. At this stage, cut the thread from the ball (but not at the root). The remaining thread will need to be threaded through the loops of the hat using a hook. Afterwards, the thread is simply tightened and removed inside the cap.
Second side
Then the second contrasting half of the headdress is knitted. To start it, you will have to cast on the outer loops of the already knitted part onto the knitting needle. Having done this, unravel the line of additional loops. As a result, an unclosed line will appear, into which the thread from the second contrasting ball is tied.
Working with the second side of the beanie is identical to the first. When you complete the design of the top of the head, send one of the parts of the hat inside (let it temporarily become the wrong side).
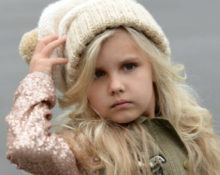
Oversized beanie hat
Accessories with thick knit are at the peak of popularity. To make such a beanie you will need:
- knitting needles (6 and 4.5);
- thick yarn (100% wool, 50 g 80 m).
Knitting pattern
We cast on 75 stitches (4.5 knitting needles), knit 16 rows (or 8 cm) with a double alternating elastic band. Then we change the knitting needles to a number six and knit 3 rows using purl stitch. Then there are 3 rows of the front one. And so on in a circle.
Having knitted approximately 28 cm, begin to form the crown. To do this, all loops are knitted in 2s together. The remaining ones are pulled together with a regular thread and brought out inside out.
Tips for knitting a beanie hat
- Use programs to automatically calculate the number of loops. To use them, you need to know the following parameters: head circumference, knitting density (for a beanie, take 3 or 4), the number of wedges (we knitted 4 in a double cap).
- Individual calculation of loops will help to avoid incorrect fit of the finished product. Practice shows that an operation performed independently does not provide such accuracy as using programs.
- The formation of the top deserves special attention. To make the tops knitted with knitting needles beautiful, after removing the knitting needles from the loops, thread a regular thread with a needle into the loops. Tighten it, bring it to the reverse side, and only then start stitching.
Have fun and productive needlework!
 0
0