 Each generation has its own associations with the word cap - military, pioneer, headdresses of flight attendants and salesmen. They are different, but give the image rigor and completeness. Let us consider in detail how to cut out and sew a cap with your own hands for adults or children (for a holiday or a matinee).
Selection of materials and tools
The main criterion for selection is density of matter. Soft, flowing material will not give clear, laconic folds that are inherent in any cap style, so we sweep them away right away.
 Suitable for us:
- cloth;
- dense linen, cotton;
- felt;
- drape;
- suede leather.
Required tools:
- sewing machine;
- scissors;
- measuring tape;
- chalk.
In addition, you will need an adhesive pad.
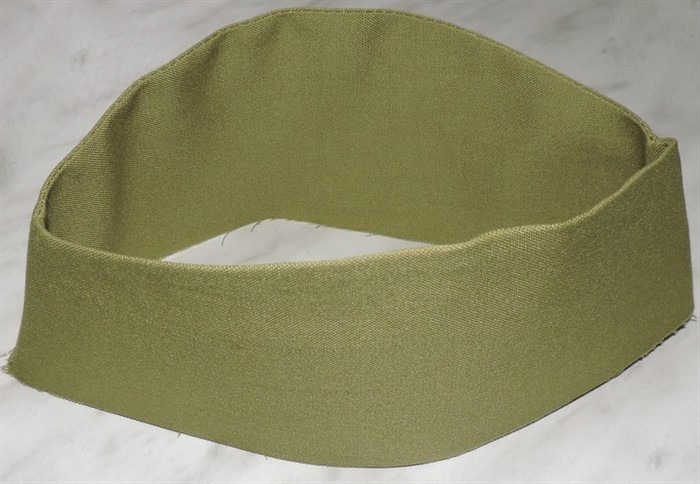
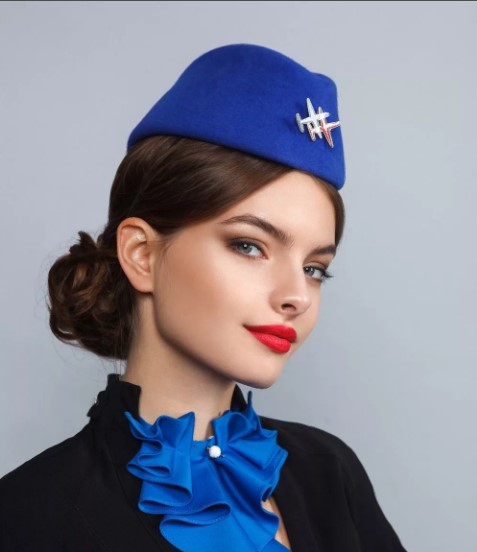
Reference! The headdress is a slightly flattened cap; it was part of the uniform of the armed forces of different countries. At the moment, part of the uniform of flight attendants of many airlines and restaurant chefs. Headdress of some children's organizations.
We sew different types of caps
Pioneer cap
According to this pattern, the cap is sewn from double-sided fabric, without a pronounced reverse side. If you have a different material, then we make the lapel stitched.
 Progress:
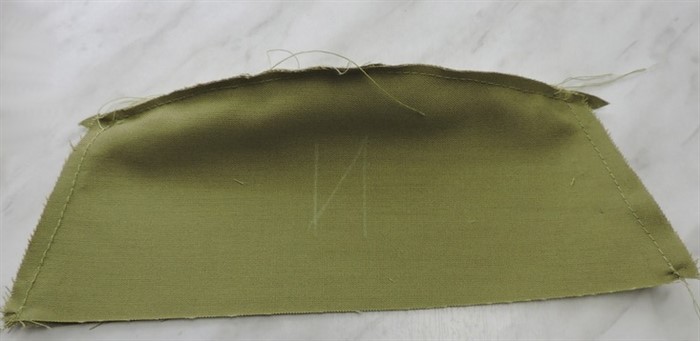
- Determine the head circumference.
- Select the height of the cap.
- We build a rectangle with a width equal to the circumference of the head, plus 0.5 cm for fit. The height is equal to the height of the cap, plus the height of the lapel.
- We cut out, not forgetting the seam allowances.
- We decorate with emblems and badges as desired.
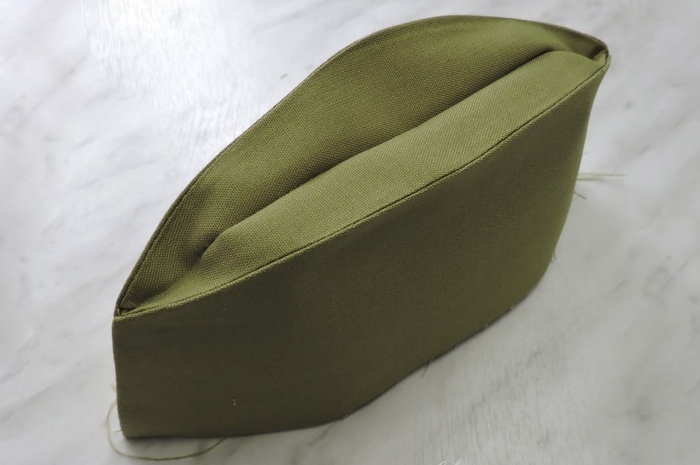
- Sew the side seams up to the lapel.
- Turn over the bottom edge, fold it in and sew a stitch.
- We perform a lapel.
- Iron it out.
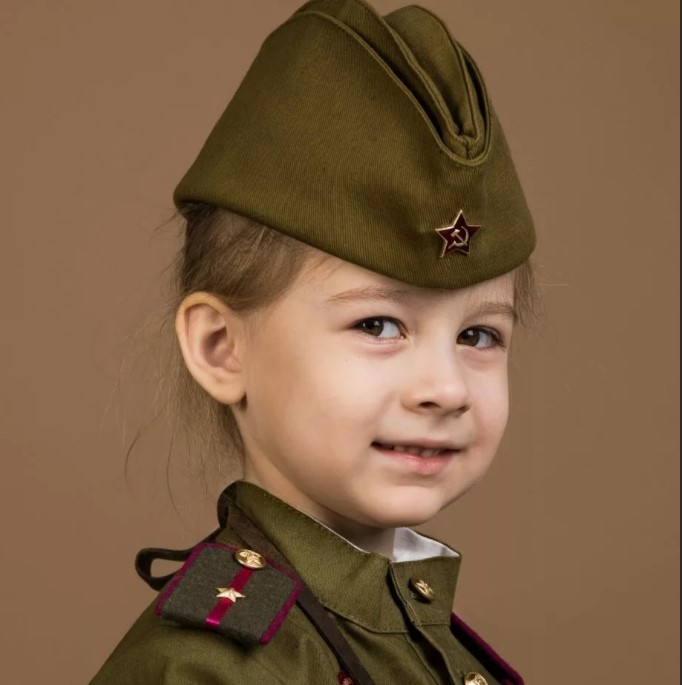
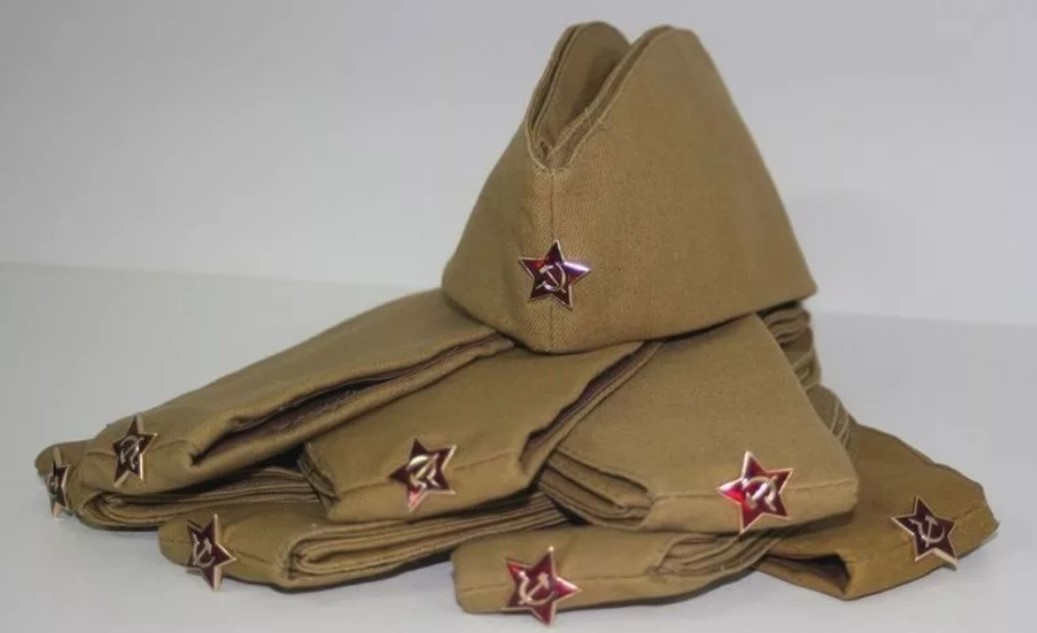
Soldier's cap for May 9
The main cap is for Victory Day.
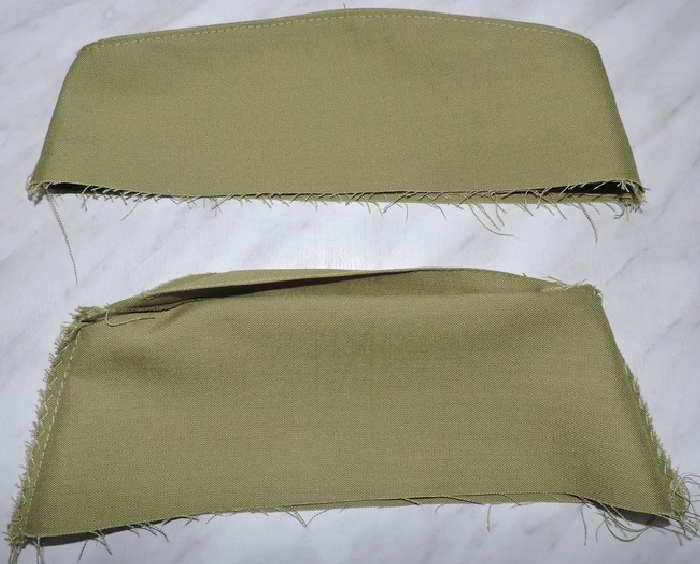
We build the pattern based on the circumference of the head:
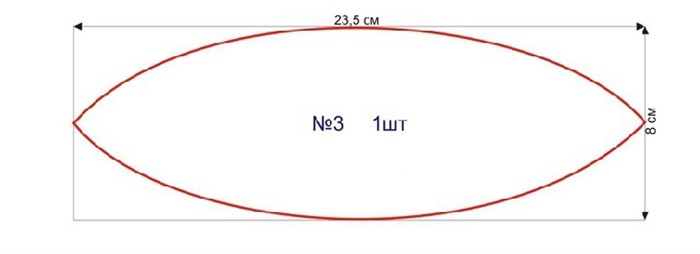
- No. 1 – beads – 4 pcs.;
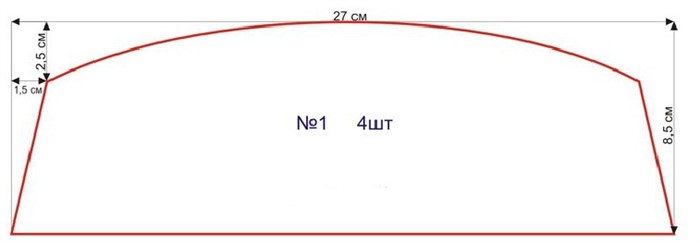
- No. 2 – main part – 2 pcs.;
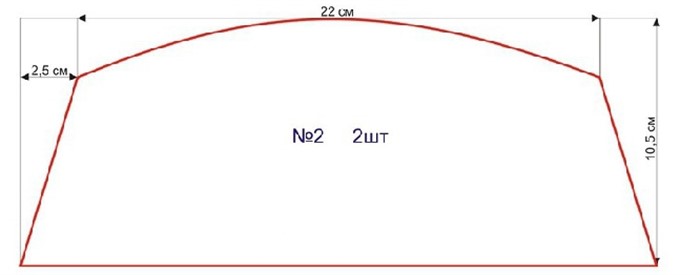
- No. 3 – bottom – 1 pc.
 Progress:
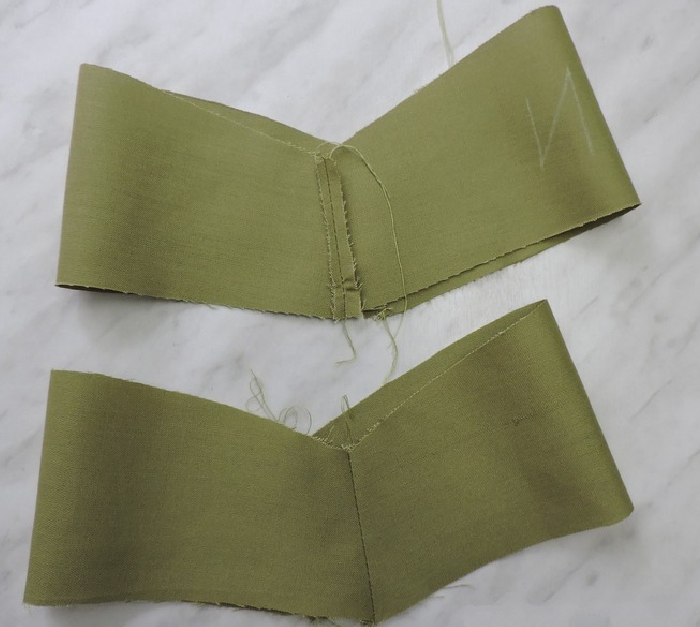
- After cutting, we mark the wrong side on each part, it will be more convenient.
- Using a needle, we connect the second and third pieces in the middle. Front to front.
- We sew, in addition, we lay a line in the center of the bottom.
- Sew the side seams.
- Turn it right side out.
- Steam using an iron.
- We put the first parts, we have four of them, in pairs and sew the sides together.
- Let's iron it out.
- Turn it inside out.
- We insert one of them inside the other, face to face.
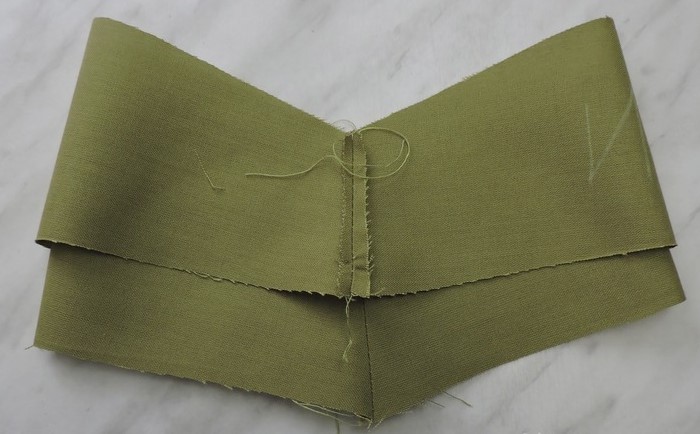
- Sew along the top edge.
- Turn it inside out.
- We sew a line on the front side.
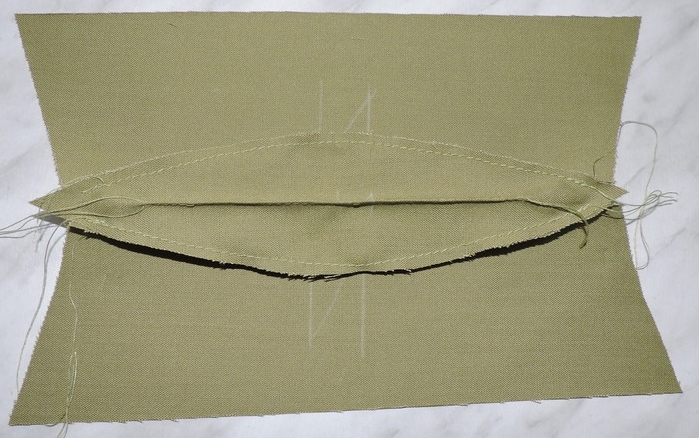
- We turn the top piece inside out, then put it inside the bottom piece.
- We chop it off.
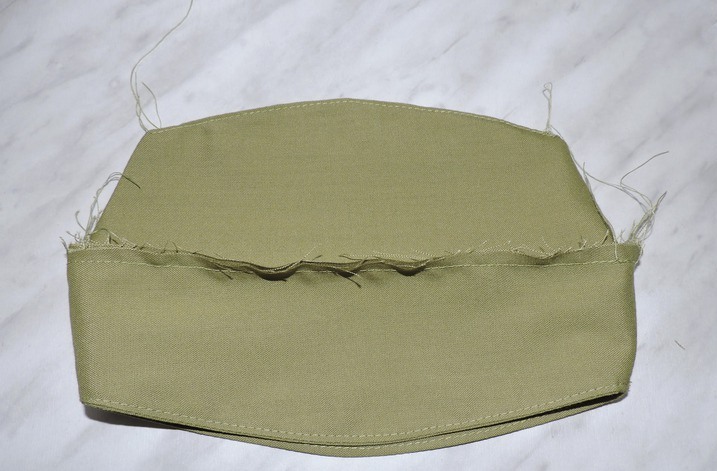
- We stitch it.
- We sew the lapel.
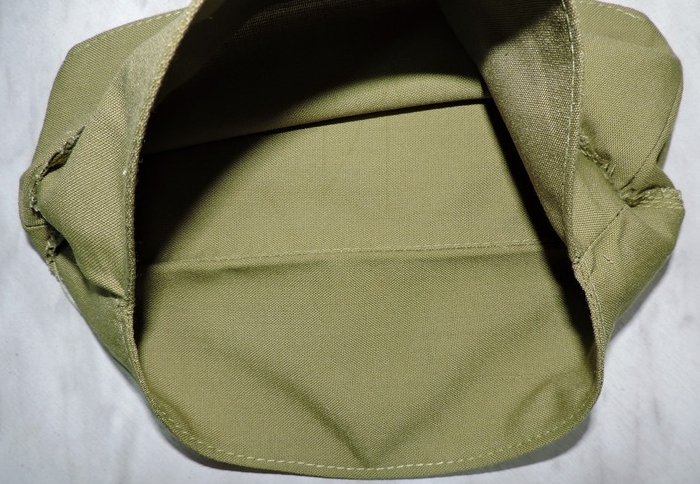
- We fasten the seam on the wrong side, inside the lapel.
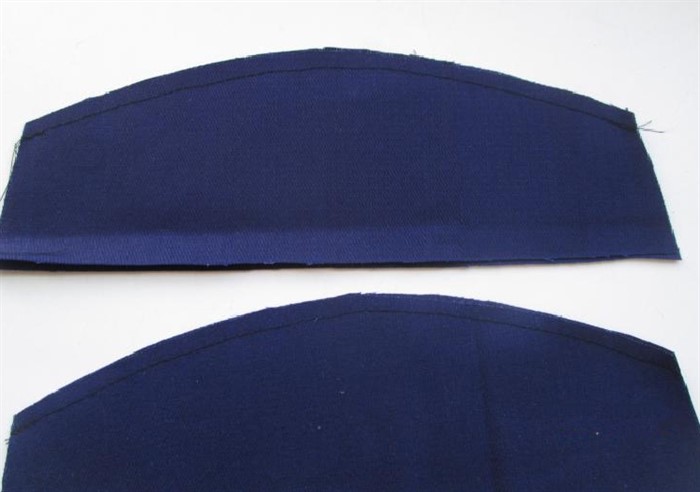
A simplified version of the cap
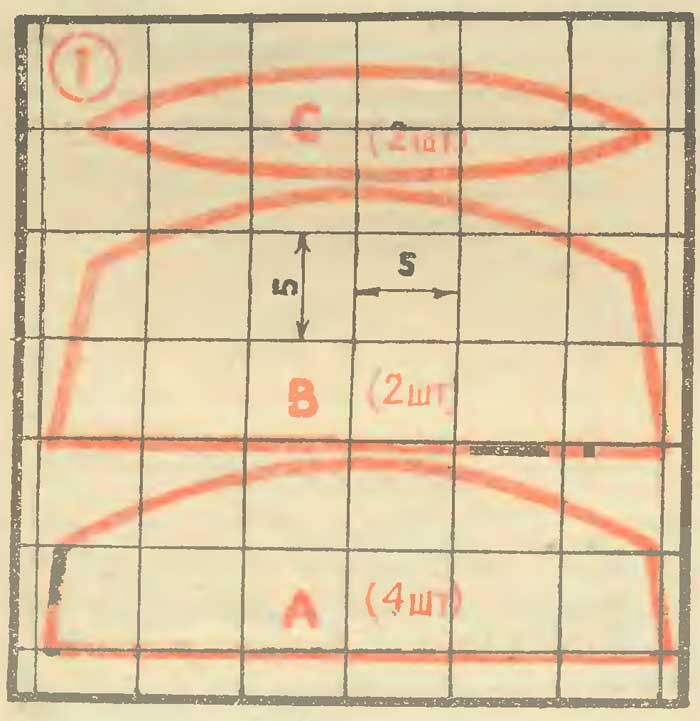 Sequence of work:
- We fold part C face to face, iron it, so we get a fold.
- Sew along the top of A and C.
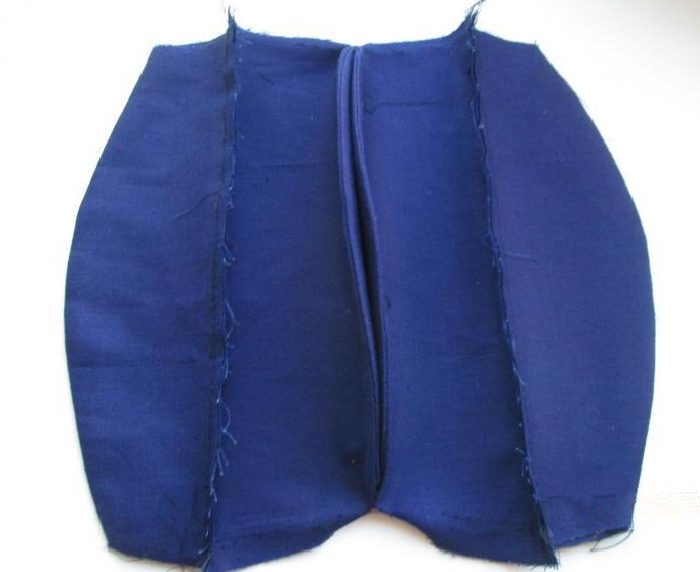
- We sew the side seams of blanks A in pairs.
- We fold parts B right sides together and sew them together. The lower sections are open.
- Turn blanks B inside out and iron. We sew the cuts.
- We sew the blanks B at the edge and iron them.
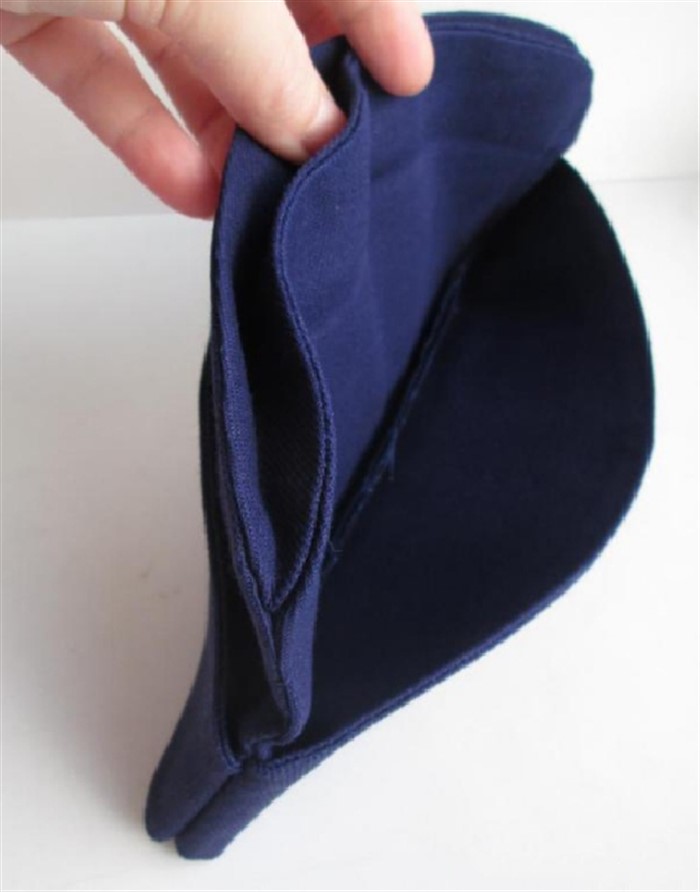
- We put the sides into the main part and sew as in the previous model.
- Sew in the round.
- Turn it inside out.
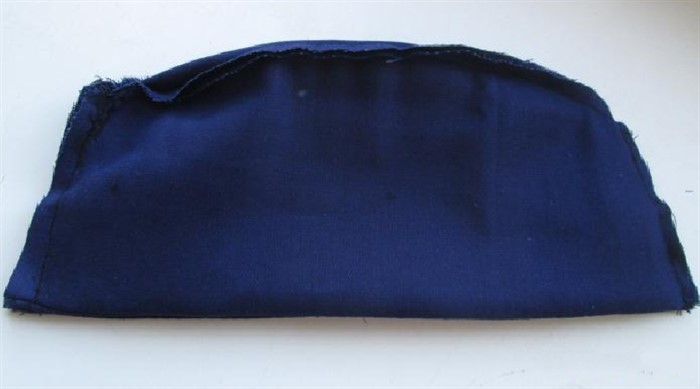
- Ironing.
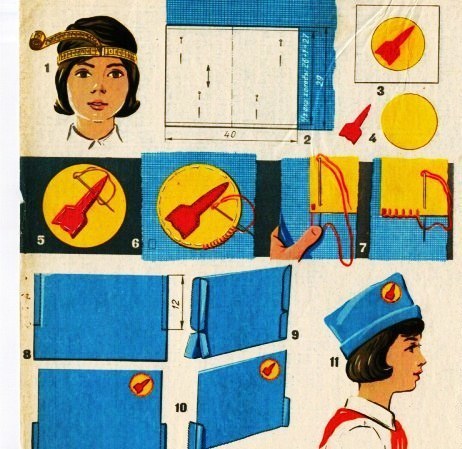
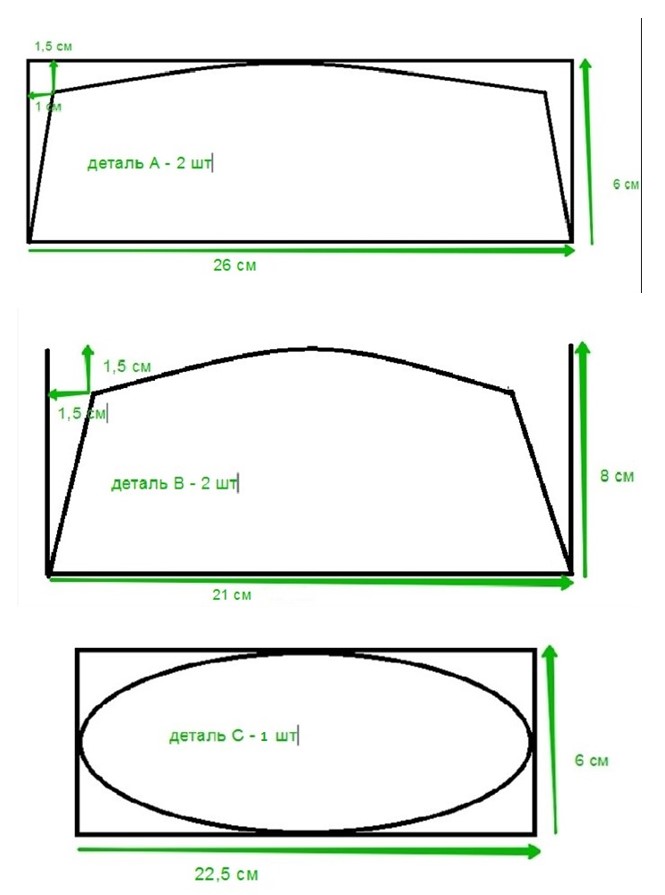
Stewardess headdress
The pattern is given for a head circumference of 52 cm.
 Cutting elements:
- A – 2 pcs.
- B – 2 pcs.
- C – 1 pc.
 Progress:
- We cut out the details.
- We sign the wrong side.
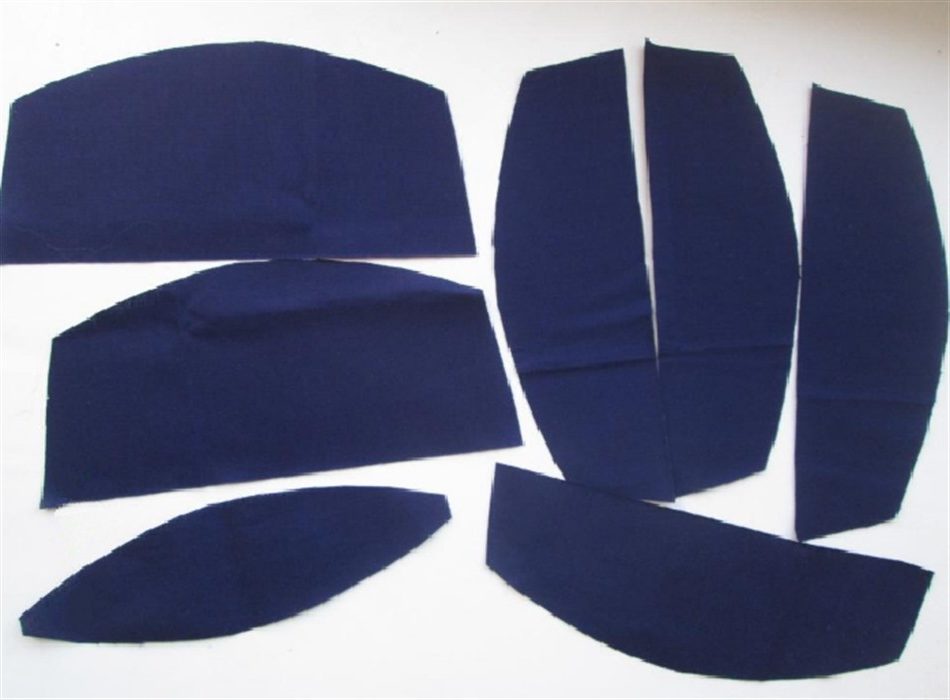
- We sew part C to parts B, having previously secured them in the center with pins.
- Turn it inside out and iron it.
- We sew the A-pieces together in pairs along the rounded upper edge.
- Turn it inside out and iron it.
- We sew parts A to the central part.
- Ironing.
- Sew the side seams.
Turn it inside out and iron it. Ready!
 A cap can be an excellent addition to an image and will help create a laconic and solemn look. It’s quite easy to sew, but if you use other fabrics, such as velvet, you can get an excellent version of an “adult” headdress.
 0
0