 The common cap has an impressive historical past. As many as three states consider it their national headdress: Italy, Great Britain, and, oddly enough, Russia.
Men, women and children wear it with pleasure.
What is a cap?
A cap is a headdress made of textile, sheepskin, leather or suede, the distinctive feature of which is the presence of a visor of various sizes.
The most common types of caps:
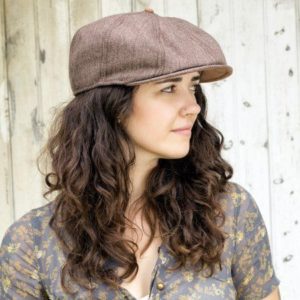
- The eight-blade cap, also known as the “hooligan”, got its name from the number of parts from which the top of the headdress is made. Well, the nickname is because in post-revolutionary Russia such a cap was loved by hooligans of all stripes. Suitable for everyone, has long been considered a classic. A distinctive feature, along with wedges, is considered to be a button - a button made of cap fabric.
- “Duck” is suitable primarily for men. The peculiar name is a tribute to the shape, similar to the beak of a duck. The visor, as a rule, does not stand out.
- “Airdrome” became popular in the USSR after the release of the film “Mimino”; it got its name for its flat top part.
- “German” or “cadet” came to us from the military parade ground. It’s hard to imagine a military style without such an accessory.
- The prototype of the “Cap” is a cap, which was very popular in Russia in the 19th century. Belts and embroidered cockades serve as decoration.
- “Gavroche” differs from other styles in volume and softness of folds. At the peak of fashion for several decades.
How to sew an eight-piece cap?
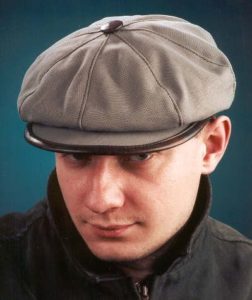
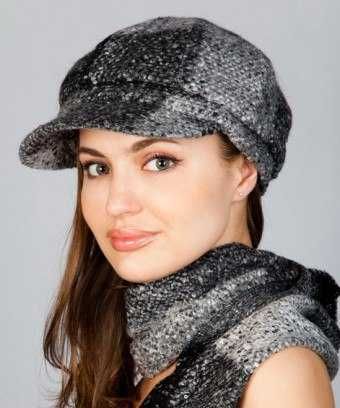
The classic eight-piece is easy to sew, but requires precise cutting and careful work.
Required:
- Drape, cloth, jacquard, wool - 0.4-0.5 meters, with a width of 1.5 meters.
- Fabric for lining - 0.5 meters, with a width of 1.5 meters.
- Non-woven fabric - 1 meter, width 0.8 meters.
- Button with foot.
- Dense material for the visor, for example, thermal cloth, thick oilcloth, cardboard, and so on.
- Threads to match.
- Sewing machine.
- Tailor's chalk and scissors.
Advice! If you choose a checkered fabric, and this is certainly a classic, make sure that the patterns of all the details of the wedges match.
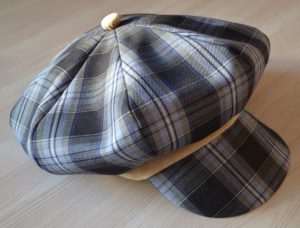
Step-by-step pattern of an eight-piece cap
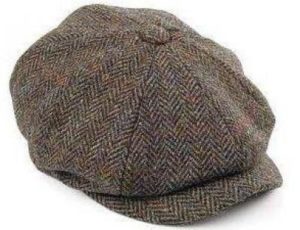
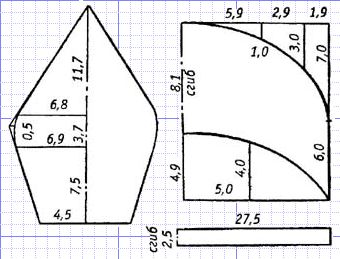
The pattern consists of the following parts:
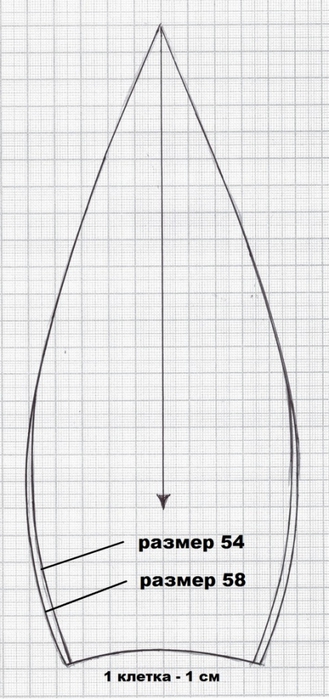
- Wedge – 8 parts.
- Visor – 2 parts. We choose the width of the visor as desired, the length is equal to half the circumference of the head, minus 1-2 centimeters as desired.
- Band - 2 parts. The length of this part is 2 centimeters greater than the circumference of the head.
Advice! You can make the crown wedges not rounded, but with corners from the widest part. On top, in this case, your headdress will be octagonal.
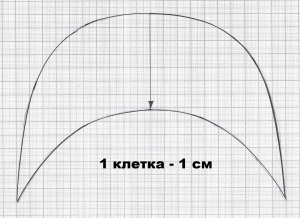 Progress:
- We are creating a pattern for the band.
- We chalk the details of the pattern, pay attention to the direction of the grain and the pattern of the fabric. Seam allowances 0.7-1 cm.
- Cut it out.
- Cut 8 wedges from the lining fabric.
Making the top of the cap
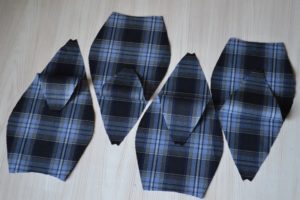
It is customary to sew the upper part in two stages: in the first we get two blanks of four wedges each, in the second we sew these blanks together.
Progress:
- We glue the wedges with interlining or other adhesive pad.
- We sew two wedges in pairs. Make sure that the drawing, if there is one, matches completely!
- We sew two pairs together, we have two blanks with four wedges in each.
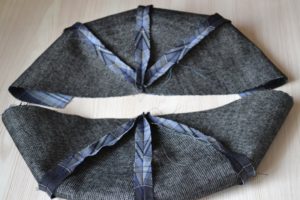
- At the tops of the wedges we cut off the corners of the seam allowances, then the center of our product will not puff up.
- We sew the resulting semicircles in a straight line.
Making a visor
Progress:
- We make the visor part from durable material without allowances.
- We also cut out a part from non-woven fabric.
- Glue the interlining.
- We assemble the “sandwich”: the parts of the visor are glued with non-woven fabric face to face, on top there is a gasket made of dense material.
- We sew along the long side of the visor.
- Cut the seam allowance to 0.3-0.5 cm, depending on the material.
- Turn it inside out.
- We sew along the short part of the visor.
Connecting the visor to the cap band
- We cut out the part of the band, allowances are 0.7-1 cm.
- Sew the short sides together, this seam will mark the middle along the back.
- We put the visor between the parts of the band.
- We adjust the band onto the visor.
- Sew the outer part of the band to the top of the cap.
- We attach the inner part of the band to the crown.
Cap lining
The lining is made of non-staining, wrinkle-resistant, preferably breathable material.
Progress:
- We cut out 8 wedge parts.
- We sew the crown according to the principle described earlier. We leave 10-12 cm unsewn in one seam; we need them to turn the product inside out.
- Turn the cap inside out and place the lining face up.
- We attach the lining to the product.
Advice! If you don't go basting, use pins.
- We turn the product inside out through the hole we left.
- Carefully sew the lining on the arms.
Cap button
Button - a button is necessary to close the junction of all the wedges; in addition, when sewing on a button, we attach the lining with several stitches:
- We wrap a small piece of main fabric around a button with a stem.
- Smooth out the wrinkles.
- Sew it on so that the resulting button is smooth and neat.
- Tighten the fabric and threads on the leg.
- Carefully sew the button onto the middle of the crown.
An eight-piece cap suits even small children, not to mention men and women of any age. Face type, hair color is not important - everyone will find a headdress to their liking.


 Advice! You can make the crown wedges not rounded, but with corners from the widest part. On top, in this case, your headdress will be octagonal.
 1
1




Have you ever tried to do what is described above so easily??? Or just a theorist? “Sew the band to the visor”!!!!! Sew it on, try it!!! If there are not two layers of adhesive, but thick cardboard or plastic.
We tried it. If you are inserting a special plastic visor, then you need to sew very close to it, right next to it, but without getting into it
It's quite difficult to sew something like this.
CAP. It is difficult to sew one layer of cardboard and several layers of fabric, but this is a standard procedure.
The petal pattern is made like this: measure the circumference of the head, divide by 8.
We determine the girth of the finished cap, this is the widest point - divide by 8.
Petal height is the distance from the circumference of the head to the crown.
Regarding the question, if the machine is not powerful enough, then the gasket can be cut 1-3 cm smaller, and all the seams will not reach it.
The crown of the cap in the online store is shifted forward. Most often, such crowns are fixed with two buttons to the visor.
And the pattern is standard.
Zhanna, thank you very much - can you sew with a regular overlocker or do you need a special one?
Good afternoon There are special overlock sewing machines (professional ones for seamstresses), you can try it on a regular one. It all depends on the density of the chosen fabric. Thick fabrics are difficult to sew on a regular machine.
How to make a finished cap smaller at the front? Is it possible to close the front seam? The fastener works well on the back, but the front wrinkles a lot