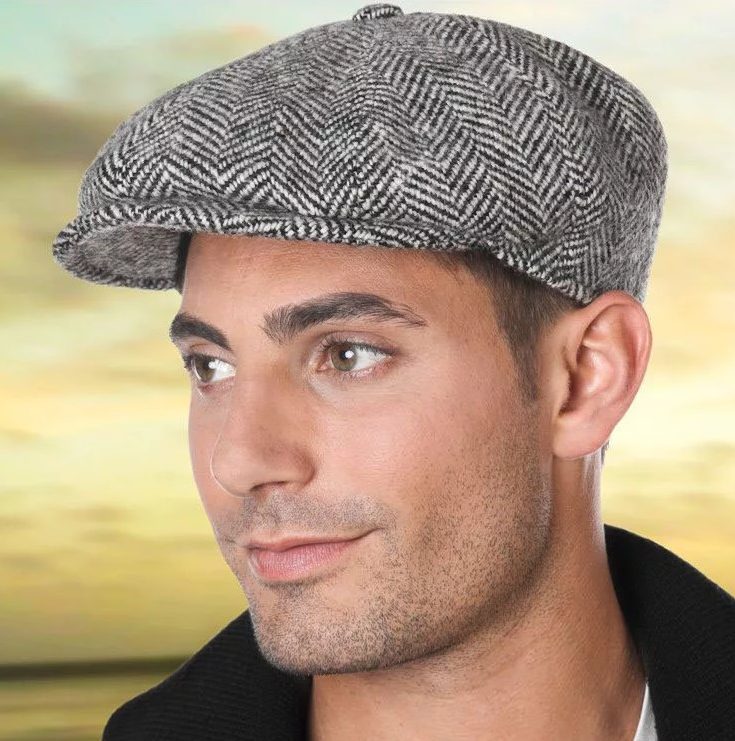
 A cap is one of the favorite and most comfortable headwear. It is worn by men regardless of social status and age. Lovers of exclusive things set themselves the task of making their own caps. However, few dare to do this, because creating a pattern is a rather labor-intensive process. Next, we will consider the features of preparing a drawing and sewing a product with our own hands.
Types of caps
The range of this type of product is varied: some models are known as unisex, others, on the contrary, emphasize gender differences. If desired, it is easy to find any cap: sports, festive or for constant wear.
The accessory can be worn all year round. There are both lightweight options for summer and insulated ones for winter and the off-season.
Types of men's caps: https://textile-en.techinfus.com/golovnye-ubory/kepka/vidy-muzhskih-kepok/
Eight-piece cap pattern: https://textile-en.techinfus.com/golovnye-ubory/kepka/vykrojka-kepki-vosmiklinki/
How to sew a men's six-piece cap?
First you need to prepare the fabric and the necessary equipment. To get a cap that fits perfectly, you need to take measurements of your head and draw a drawing. Sewing a men's cap with your own hands is much easier than it might seem at first glance.
Materials and tools
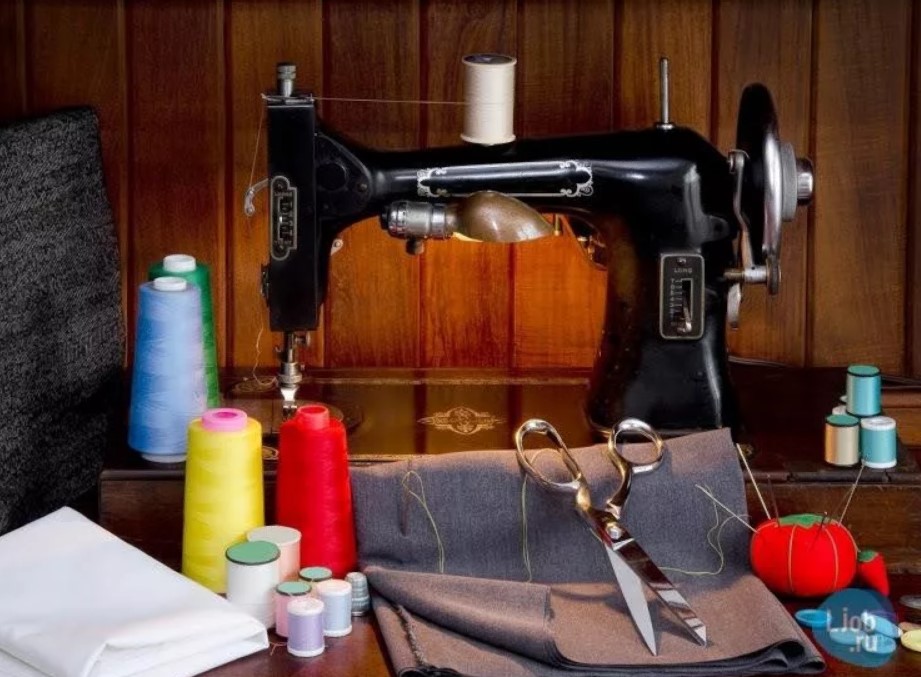 The fabric you can use is natural and artificial leather, cotton and wool materials, corduroy and even fur. Also prepare in advance:
- sewing machine;
- scissors;
- duplicating fabric;
- threads in the color of the main material;
- pins;
- measuring tape;
- sheet of cardboard;
- a simple pencil;
- a piece of soap.
Attention! For summer items, choose natural fabrics such as linen, calico or chintz. For winter options, a denser texture with lining and insulation is suitable.
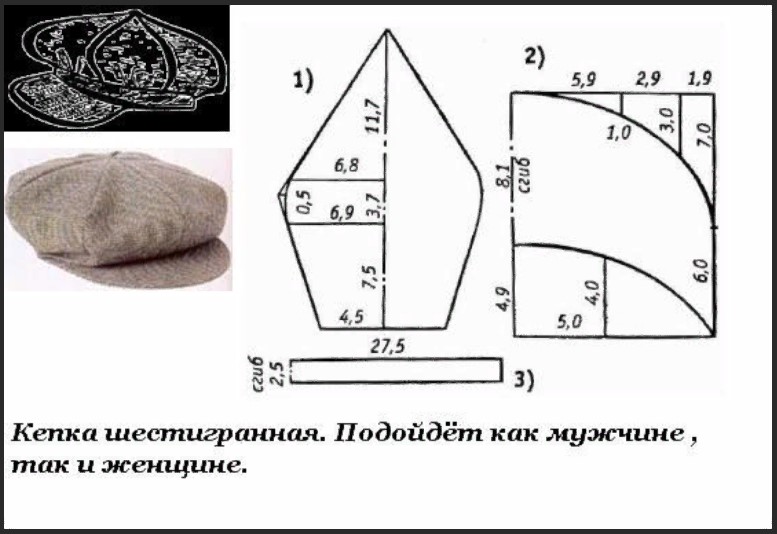
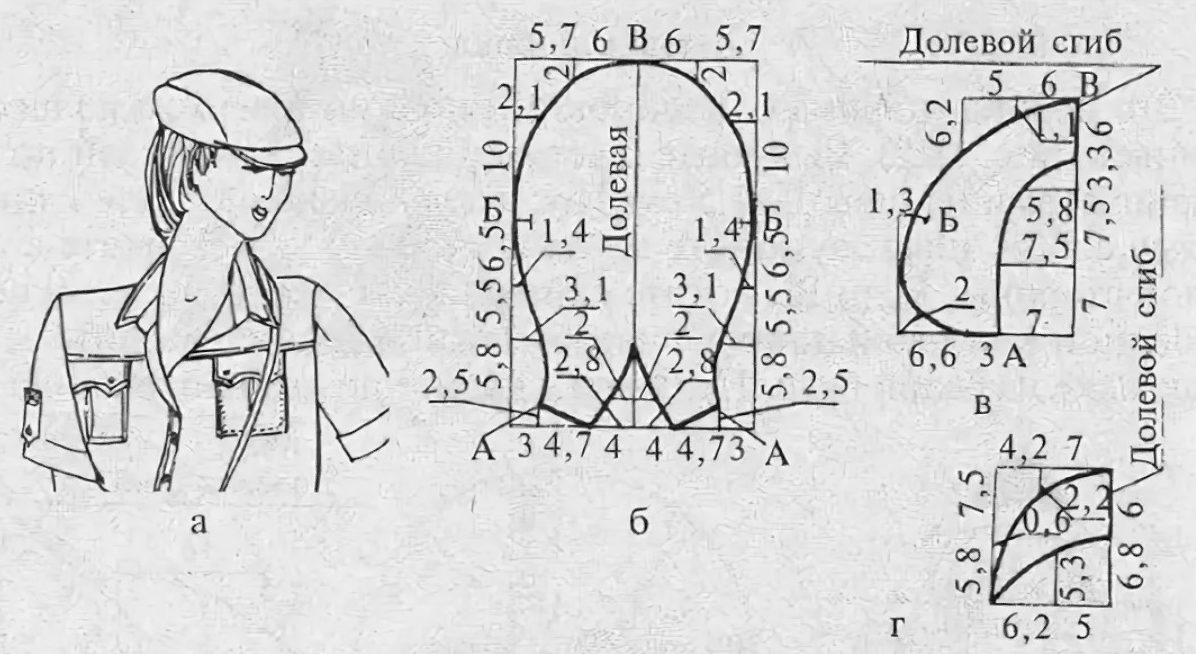
Pattern of a men's cap 6-blades with a visor
One of the popular types of men's caps is the six-piece cap.. To make a pattern, follow the following sequence of actions:
- Measure the girth and length of your head. Then also the width of the forehead from the back of the head to the forehead.
- For the lower segment, take a segment equal to one-sixth of the circumference of the head.
- Find the middle of the segment and lower a perpendicular equal to half the length from the back of the head to the forehead.
- Then draw a round tangent along the 3 points.
- The resulting angle should be 60 degrees.
Using an old unclaimed accessory as a basis for the mono pattern. It is separated into its component parts, which are outlined on whatman paper or cardboard. This is the easiest quick option. If the unnecessary product is not available, then a pattern is created.
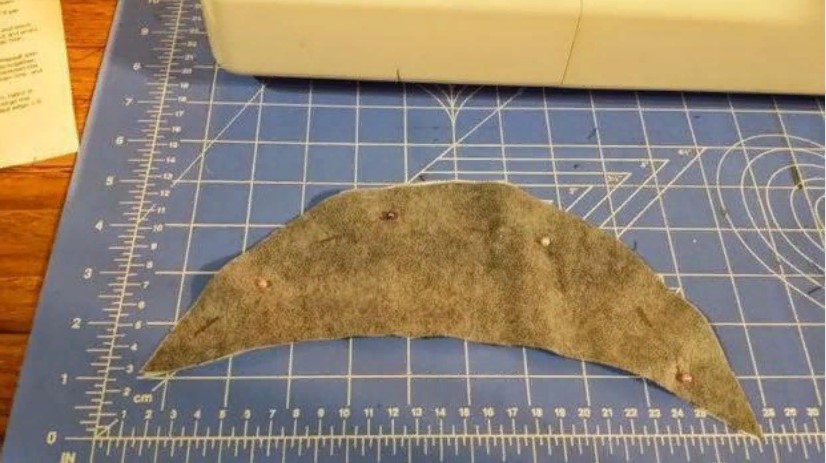
Cut out the visor
To cut out the visor, draw a segment equal to the width of the forehead. The resulting part should be smooth and resemble a crescent.As a basis for the bar, you can take a rectangle, equal in length to the circumference of your head and about 2-3 cm in width.
Reference! There are also special free programs that allow you to make cap patterns of various levels of complexity. You just need to enter the head parameters and print the drawing.
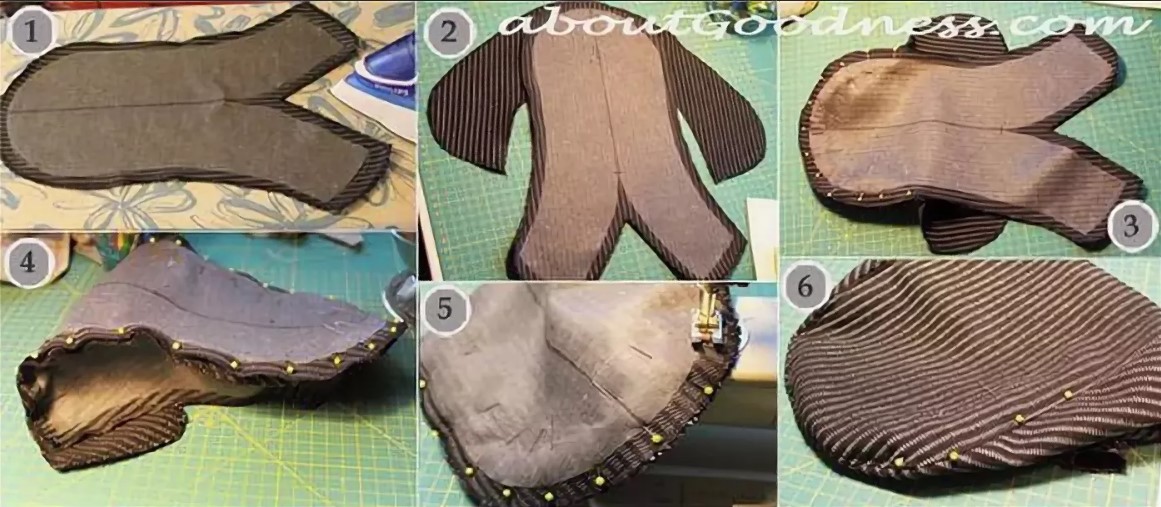
Cut on fabric
The pattern is drawn on a sheet of paper or old wallpaper, and then a layout is made on the material, traced and cut. For sewing the product you need to have two visors, six wedges and pegs at your disposal. Similar elements should cut from duplicating and lining. If the product is made from checkered textiles or fabric with another geometric pattern, then the pattern should be positioned so that the images on the wedges are the same or combined with each other.
Important! Do not forget to allow allowances for sewing parts - one centimeter.
Sew the details
When all the components and tools are ready, you can start sewing in the following sequence:
- To ensure that the item fits perfectly and keeps its shape, we glue the elements with non-woven material on the outside.
- Then we connect the bottom wedges, first by hand, and then by machine.
- We lay a finishing stitch along the face.
- We sew down the lining details. If the product is intended for the cold season, then the lining is quilted with synthetic padding or other insulation.
- A special insert made of cardboard and non-woven fabric gives the visor its hardness.
- The visor elements are stitched together and notches are placed on them.
- The elements are turned inside out and a decorative stitch is applied.
- Next, we attach the visor and band to the crown.
- It is convenient to stitch the lining by hand using a hidden seam.
- From the inside, small rectangles (“ears”) can be sewn to the band, which will protect the ears from strong gusts of wind and cold.
Men's 5-blade cap
Next, we will study in detail the process of sewing a cap from five wedges with a girth of 51 cm. The dimensions of the product can be easily increased by widening or narrowing each wedge. The difference is distributed evenly across all seams. So, if the task is to increase the size to 54 cm, then add 3 mm on each side of the segment. To make sure the size is correct, you need to multiply the lower length of the wedge by five.
Wherein the total amount should match the head circumference. Also, the number of wedges can easily be increased to six by making the necessary changes.
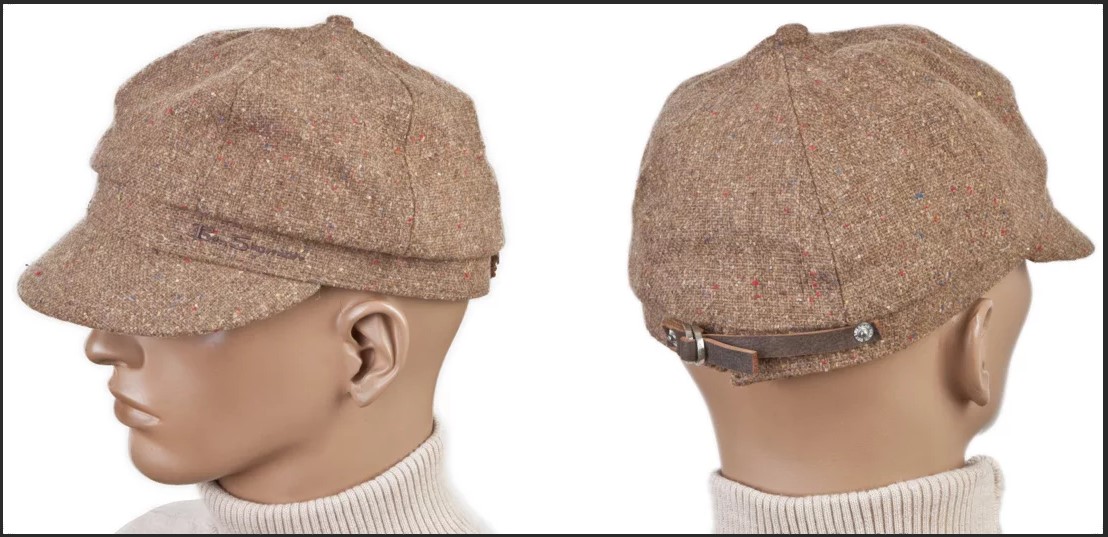
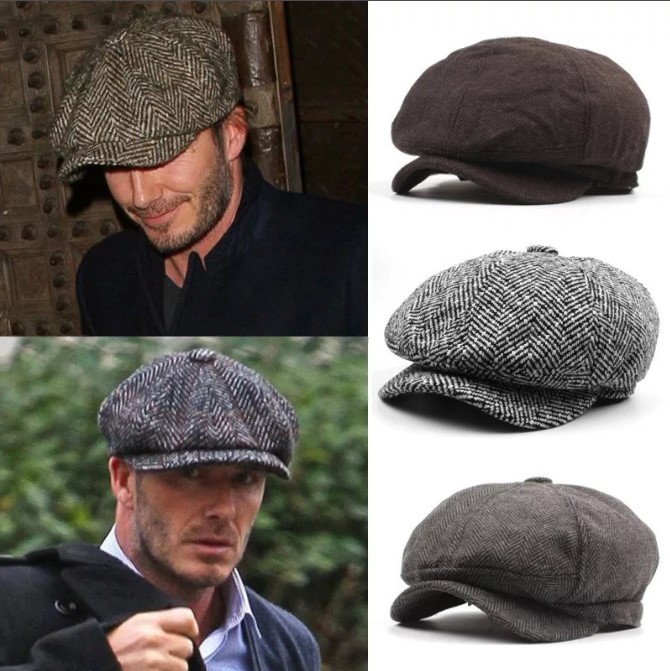
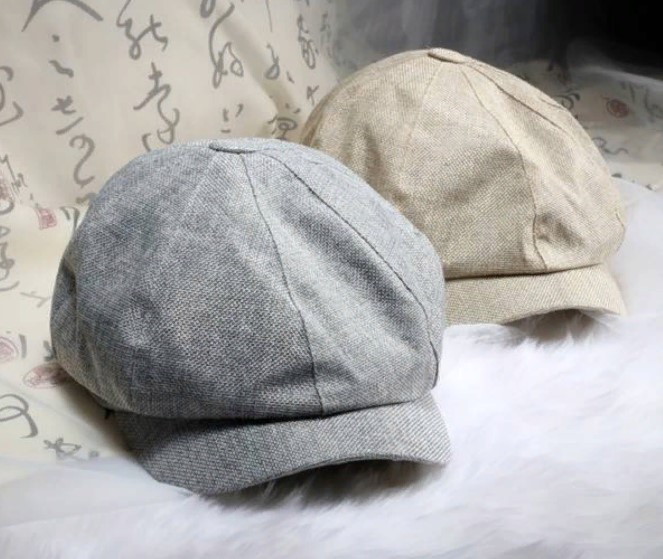
Tweed six-piece cap
For sewing you need to buy 0.3 m of fabric with a width of 1.5 m, padding and interlining. Then follow the instructions:
- Distribute the elements onto the fabric. The length of the drawing should be 53 cm and the width 4 cm. Also allow seam allowances of up to 1.5 cm.
- Sweep the wedges together, strictly following the marking lines. Then machine sew the seams and remove the auxiliary threads.
- Cut seam allowances to 7mm and iron the pieces.
- It is convenient to process the cuts with an overlocker, but if you don’t have one, then use edging or ribbon.
- Stitch the edging along the front side.
- A piece of cardboard or plastic is inserted into the visor as a sealing material. For a quick version, an ordinary soda bottle will do.
- Then hem the parts of the visor and stitch the outer edges.
- The allowances on the visor are cut to 0.4 cm.
- Turn the visor over your face and iron it.
- Decorative trim along the visor is done at a distance of about a centimeter from the edge.
- Markings of the middle line are made on the crown and visor.
- The visor is connected to the bottom of the crown according to the marks.
- The band is sewn into a ring and fixed to the crown.
- Next the visor is attached.
- Seam allowances are removed and ironed towards the band, which has previously been turned inside out
- The inner part is turned over and sewn, and stitching is done on the band parallel to the bottom of the cap or separately.
The product is ready.
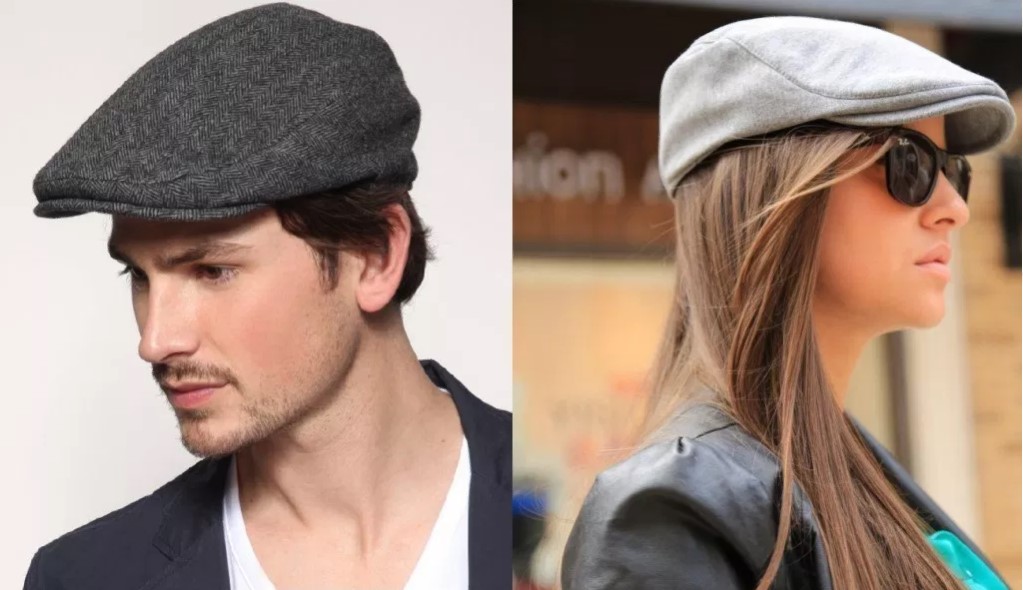
French cap (flat)
There are other men’s caps that are now in trend, for example, the “French” flat cap.
Cutting from corduroy with lining:
It’s possible to create a pattern and make a men’s cap with your own hands. The main thing is to show a little persistence, patience and understand the construction of the drawing. The easiest thing at the initial stage will be to sew a six-piece and five-piece cap.
 1
1


Hello, how can I increase your pattern for a women's cap with a visor with 6 wedges to a girth of 54-55 cm, if my head girth is 60 centimeters?