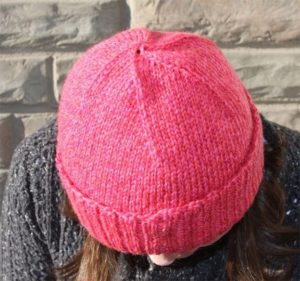
 Without the ability to narrow products, you will have to forget about the hope of creating clothes from yarn with your own hands. It is fundamental in the art of knitting. We'll tell you how to properly decrease stitches if you are knitting a hat.
How to decrease loops
A decrease is a method of adjusting a knitted fabric. When sewing, excess fabric can be easily trimmed. This is not suitable for making knitted items. Therefore, to maintain the integrity of the thread, decreasing is used, that is, knitting several loops together. Thus, in each row after decreasing there are fewer loops than in the previous ones.
Reference. Reduction is usually done on the front side. And the purl side is knitted according to the pattern.
When making a hat, the work is done in several ways.
Along the edges
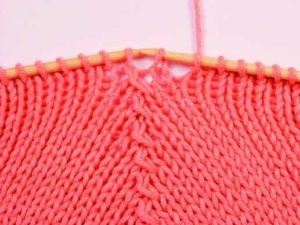
If we take the standard head circumference as 55–57 cm and the height of the product as about 18–20 cm (not taking into account the folds), then you can use the following method. The straight canvas is gradually narrowed starting from the middle. At a knitting height of 12–15 cm, it’s time to start decreasing. The easiest way is to combine several stitches into one at the end of the row.
Centered
A simple, most commonly used technique. He Suitable for beginners too. This can be done on the front side.
REFERENCE. The main thing is not to cut more than two loops so that the headdress does not come out tight and clumsy.
Reduce two at a time
Mark the three central loops. We tie them together with a bright, noticeable “bait”. We reach this border with facial knitting and change the places of the central three so that the third is in the place of the second. We remove all three on the right knitting needle. Don't forget to pick up the third loop. We return the last and right one to the knitting needle on the left. We combine three together into one front one. At the same time, we grab it by the front walls. Next - a row, as usual.
How to make a decrease when knitting different patterns of hats
"Scallop"
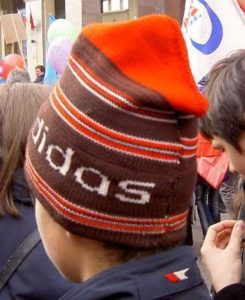
This style is unisex. But children are knitted with “combs” more often than adults. After all, in a children's style, you can fantasize about the length of the comb. Convert it into a cap, for example. Or depict the serrated crest of a dragon.
- We knit the main pattern to the required height. Then we remove the loops onto a thread or knitting needle.
- Fold the product in half, sew it together and make a back seam.
- When we reach the loops, we continue the seam, grabbing the loops in turn from different sides.
Advice. Similarly, you can reduce the volume on a stocking cap.
Hat with elastic band
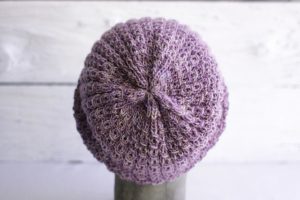
When decreasing on a hat knitted with a 1x1 English elastic band, we will first do the calculations. We calculate how much we need to reduce. And also the number of rows in which we plan to do this. Reductions, as usual, are made evenly. If the hat is knitted in a circle, we decrease it along the entire circumference. To ensure a high-quality knitted product, we divide the fabric into 3 or 4 sectors. We reduce the loops in each of them.
A prerequisite when working with such a hat is not to break the elastic bands. Therefore, you need to make sure that purl loops do not fall into the front columns.
Wedge style
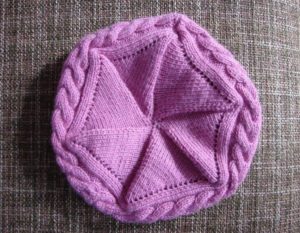
Anyone who already knits well uses circular knitting needles when decreasing such a hat. But at the learning stage it is better to take long straight lines. We divide the canvas into several even sectors (from 4 to 6). You can mark the beginning and end of the wedge, for example, with colored thread.
We decrease one loop on each side of this flag one by one. Threads should be knitted two at a time on one side. Then on the other, repeating the action.
You will get wedges with identical holes. These stripes are reminiscent of the stripes of frills that decorate knitted clothes (sweaters, pullovers, dresses, jackets).
The work ends when there is one loop left in each sector. We put the rest on the needle again. Let's pull it together.
Advice. We crochet the cut thread into the inside of the product and there, on the wrong side, secure it with a knot. This will help avoid dissolution.
Men's hat
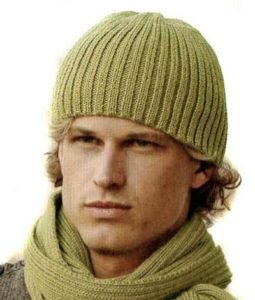
Men most often want a hat that fits their head tightly and does not have a comb.
To make such a deduction, you must first determine the location of the deduction. To do this, it is recommended to take a finished product that is already worn and measure the height using it. Take into account the presence (or absence) of a lapel. The density of the yarn and the type of knitting play a big role.
Let's take some example data. If there is no lapel, the decrease is made in the area of 16–18 cm. This must be repeated every other row.
Useful tips

- Don't forget to try on the item you are making. Otherwise, you will miss the moment when it is time to make a decrease.
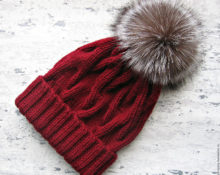
- The top of the head, where the small circular hole is located, does not need to be decorated with a pompom. You can attach a tail made of natural fur (Arctic fox or fox, for example) with a pin.Or crochet thick cords and secure them in place of the hole. Tie them with a bow and decorate the ends with fluffy tassels.
- Another option for decorating the crown is to simply make a small overlap. And at the junction of the top and the canvas, sew a large sparkling rhinestone. It is best if it corresponds to the diameter of a coin of five Russian rubles. You can add similar small rhinestones to the front or side.
- The headdress will turn out much more beautiful if you take bouclé yarn that matches the color scheme. This will add relief, presentability and originality to the product.
It’s not difficult to learn how to create beauty with your own hands. The main thing is to have desire, diligence and patience.


 0
0

