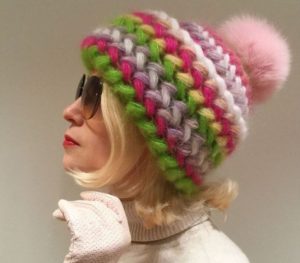
 Oversized hats are not only a suitable headwear for the winter, but also a real trend this year. They are presented in a wide range, differing in style, design, and pattern. Without a doubt, such hats look spectacular, and wearing them is a real pleasure.
We suggest crocheting a voluminous hat with your own hands. The advantage of such a hat is that even those who are just trying their hand at needlework can knit it. And the work won't take much time.
What you need for work
The headdress is knitted with a pattern of lush columns. During operation, they lie in different directions, forming a thick “braid”.
Knitting using this technique does not require additional decorations. Just yarn and hook. A knitted snood or scarf can complement the accessory.
Which yarn to choose
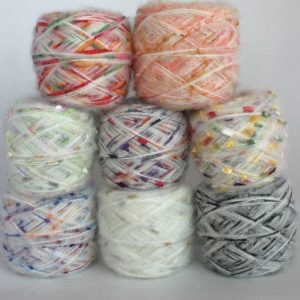
Best to use yarn with mohair in the following combination:
- mohair – 40%;
- acrylic – 60%.
For one product, 100 g is enough (one ball). Knitting in two threads.
A product made from this yarn is very warm, fluffy and holds its shape perfectly.Color is chosen according to personal preference.
Important! It is useful for beginners to know that when working with a dark thread it is more difficult to count the loops and see the pattern. Therefore, it is more convenient to work with light yarn for the first time.
What kind of hook is needed for knitting
The hook size depends on the yarn chosen. Ideal for our two-fold thread hook size 3.5 mm.
Reference. It is best to choose a tool with an aluminum tip and a plastic handle. It is comfortable to hold, and your hand will not get tired while working.
How to knit a women's voluminous hat
Now that everything you need is ready, you can start knitting. But first, let's decide on the size.
How to take measurements
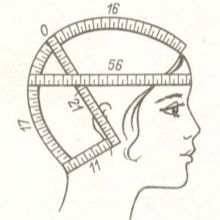
It is difficult to make a beautiful and suitable finished product without taking measurements. Therefore, you should not neglect this stage. We will need two measurements.
- OG (head circumference) - the volume of the product depends on it.
- MV (height from the crown to the bridge of the nose) - determines the desired height of the accessory.
If for some reason it is not possible to take measurements or the product is knitted as a gift, you can use the standard size table.
| Age | OG, cm | MV, cm |
| Breastfed babies | 25 | 11 |
| Small children under 6 years old | 35–40 | 10–15 |
| Children and teenagers | 40 | 19–20 |
| Adults (small and medium sizes) | 52 | 22–25 |
| Adults (large size) | 60 | 21–23 |
After the measurements are ready, you need to decide on the number of loops. The linked sample will help with this.
Cast on 10 stitches and knit 10 rows using the pattern you plan to use for the hat. Measure the sample with a ruler and, based on the OG measurement, calculate the required number of loops.
Attention! For accurate calculations, count how many loops there are in 1 cm of fabric.
For example, if there are 2.5 of them, and the OG is 52 cm, then the number of loops will be: 52*2.5=130.
How to knit a hat with lush columns
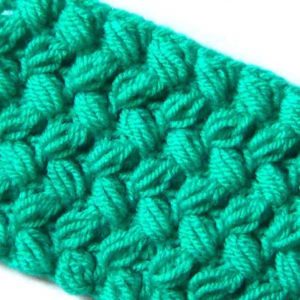
A voluminous hat for women can be knitted in several ways. The most common are knitting from bottom to top and top to bottom. Before you get started, you need to learn how to knit the basic pattern.
Curvy columns
- Cast on a number of stitches that is a multiple of 5 + 3 lifting stitches.
- First row: *three double crochets, two chain stitches*. Continue to the end.
- Second row: four lifting air loops, 2 air loops.
- Next, knit 3 stitches into the arch from the two loops of the previous row, and begin creating a fluffy stitch. *Year over, insert the hook behind the second stitch of the previous row, pull out a long loop*.
- Repeat from * four more times.
- Then knit all the stitches together. Knit a chain loop and three columns from the next arch. So until the end.
- The third and all subsequent rows are similar to the second.
First knitting method: bottom up
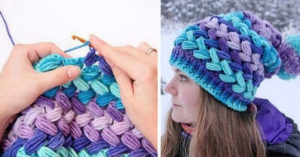
- Cast on 140 stitches, which will make 28 repeats of the pattern. You can dial more or less, the main thing is that the number is a multiple of five. Connect into a ring.
- Knit two rows in the round according to the pattern description.
- Knit the third one in the opposite direction. This is necessary so that the columns face the other way. Do this until the end of the work.
- Having reached the required height, begin cutting the loops.
- In each next row: instead of groups of three columns, knit two; instead of two, knit one. And make up lush columns not from five loops with crochets, but from four.
- Next: conditionally divide the canvas into four equal parts. At the end of each of them, decrease one rapport. Do this for another six rows until there are four repeats left.
- Pull eight single crochets into a ring and secure.
Second way: top to bottom
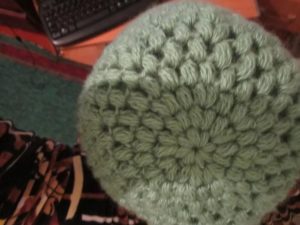
- Cast on a chain of six loops and connect them into a ring.
- Make 6 lush columns like this.* Yarn over the hook, pull the working thread through the ring * five times. Pull the thread through all the loops.
- Knit the remaining rows as follows. Add columns in the third after one, the fourth after two, the fifth after three, and so on.
- When the width of the cap is required, continue knitting without increases.
- After knitting to the required size, break the thread.
The hat is ready, you can decorate it with a pompom.
Reference. In the second option, the lush columns are even, and it is knitted in the round.
How to make a hat with a pompom
The finished product looks very interesting with a fur pompom. To make it, you will need:
- a piece of natural or artificial fur;
- strong thread;
- scissors;
- piece of padding polyester
- ribbon.
The work is performed according to the following algorithm.
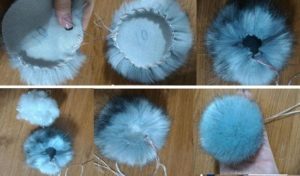
- Cut out a circle from cardboard. The larger it is, the larger the pompom will be.
- Attach the template to the fur from the wrong side, trace it, and carefully cut it out.
- Take a thread with a needle, sew around the circle with large stitches along the edge, without securing the ends.
- Roll the padding polyester into a ball, tie it with ribbon, leaving long ends, so that you can later attach the pompom to the hat.
- Insert the padding polyester inside the pompom, tighten the ends of the thread and tie it into a knot.
- Attach the finished pompom to the headdress using ribbons.
Wear it for your health!


 0
0


