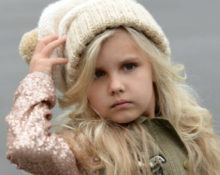
 With the era of grunge style, such interesting beanie hats came to us. They can be worn with different clothing styles. Teenagers quickly grasped all the charms of this product and are ready to dilute their everyday look with just a beanie. They are original in any color, and the entire surface of this product can be strewn with different emblems and other decorations.
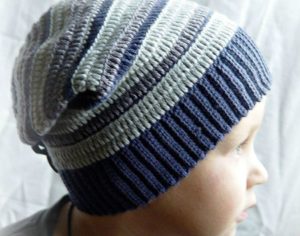
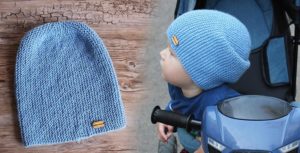
Unique ideas can give rise to interesting beanie models. Crochet beanie for boys is a very popular product. About how to make such a hat, what you will need, what patterns you should use. What a beginner needs to know to create this product, below.
Yarn and hook
The yarn for this hat should not be too thin so that it holds its shape and not too thick. This is not a bulk product. What distinguishes a cap is simply its length, not its volume. It is better to trust natural yarn that will not cause allergies.
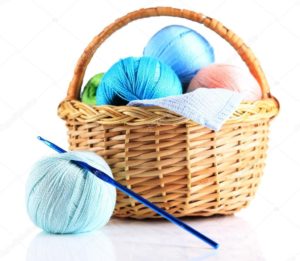 Woolen materials are more suitable for winter, but spring and autumn can be done using silk threads. Pay special attention to the hook.The knitting of the hat should be tight and even. Only a yarn-sized hook can handle these tasks.
Important! The correct hook should be in its thin place half the thickness of the yarn.
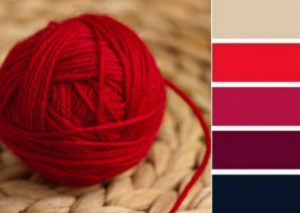
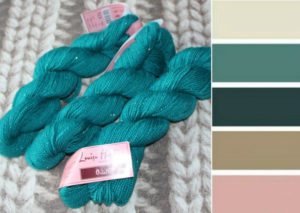
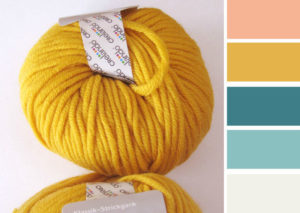
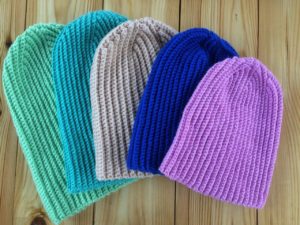
The color of the product may completely match the color in the model, according to which knitting is planned. But you can also make something very suitable for your everyday look. For example, evaluate which colors will go well with a jacket or outerwear that you most often wear.
A small selection of colors that complement each other.
 So, stocked up on yarn and hooks in size, you can make a beanie.
Sample
When knitting, small squares are often knitted - these are samples. They are performed immediately before creating the product. This is a very important step that most beginners simply skip.. Considering this for the most inexperienced and just a waste of time. In this they are very much mistaken.
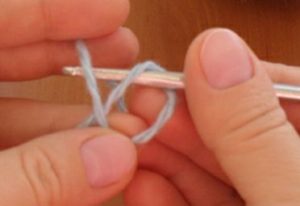
Set of 1st crochet loop
Experienced craftsmen also knit samples. The sample itself helps determine the knitting density and then calculate the number of loops for the product.
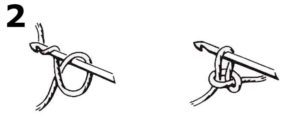
Set of 1st and 2nd loops on hook
To crochet a pattern, you need to cast on a chain with air loops. It should be approximately 30 air loops. Next, knit with a pattern for which you need to calculate the density.
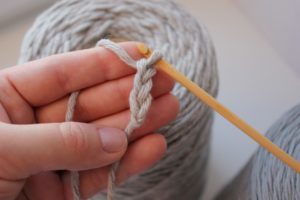
Set of 1 chain for a sample or knitting product
Execute the pattern so that it turns out to be a square product. Then use a ruler to calculate how many rows of the pattern are in 10 cm and the number of horizontal columns.
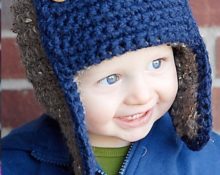
Step by step how to knit a beanie for a boy
Very beautiful crochet beanie model. It is advisable to knit for a boy without any lace or shells.
 The model will be perfectly complemented by single crochets, double crochets and a lovely “tangle” pattern using a hook and its single crochets. How to do this next.
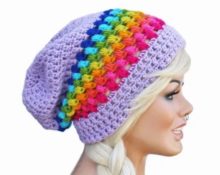
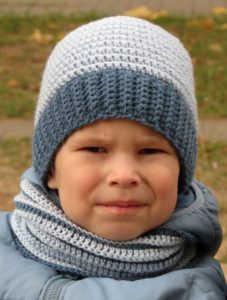
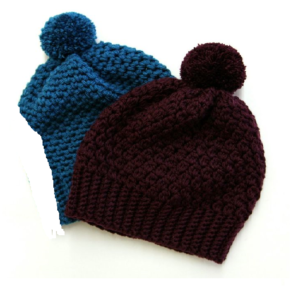
Beanie hat with elastic band using a hook
 A very dense texture and bright colors change the idea of such an interesting product. They are very, very interesting. But decreases along the top of the head can stop a beginner from creating it.
Do not rush to turn away from this beauty, A detailed diagram and a good description will help you make it as in the photo.
To work you will need:
- yarn (suitable color) 120 g;
- hook No. 3;
- emblem for decoration.
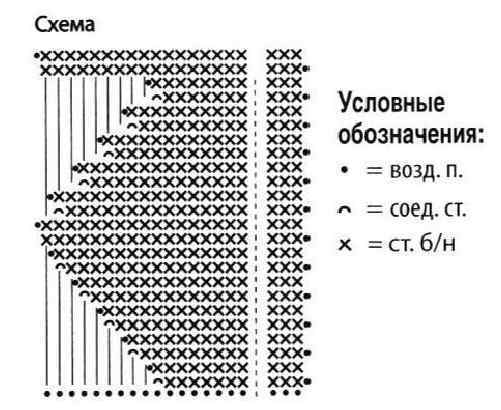
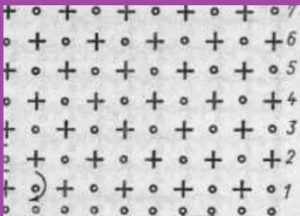
This is the most convenient and understandable scheme that anyone has come up with for creating a beanie. The lines in the diagram are connections. That is, first we crochet air loops; the diagram shows the points. The dotted line means that you need to cast on so many more loops so that the hat is the desired length and size, respectively.
Next, knit single crochets - these are crosses. Leaving only 9 loops unknitted in the chain. Next, the knitting was turned, one air loop is a point in the second horizontal line of crosses. We returned the row with single crochets. Knit with increases in each row and connecting the resulting fabric with an air chain until the loops run out. Then the decreases proceed in the same way.
 The result will be cap wedges. Subsequent wedges will no longer cling to the air loops, but to the columns of the previous wedges. MYou can create as many wedges as the size requires. You can adjust the wedges themselves using the original air chain (you will need to leave as many air loops as needed).
Important! This model regulates the size of the product due to the dotted line - this is the height of the product.The crown can change its size due to the angle of the wedges. But the width directly depends on how many rows there will be single crochets.
As a result, after the last blade is knitted, it is connected to the first and the hat is knitted. All that remains is to sew on the emblem and hide the threads with the same crochet hook.
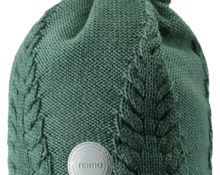
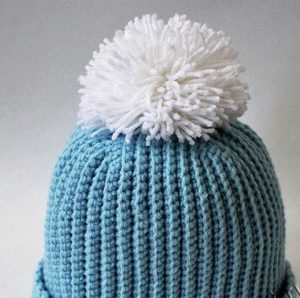
Beanie with pompom
A nice hat for a boy is one with a small pompom. Girls love fluffy pom-poms, but... models for boys are limited to such small, but even and neat pom-poms.
 This particular model is connected by a “tangle”. Not only knitting needles can create confusion. The hook does this no less gracefully.
To work you will need:
- yarn of your favorite color;
- hook according to thickness (it is better to take medium yarn and the thickness of hook No. 3).
Crocheting in the round is very convenient. Many people like to knit hats not with circular knitting needles, but with crochet. And it’s easy to see that a hook is always faster than knitting needles. But this hat is unique in that knitting does not immediately begin in the round.
Initially, you need to tie an elastic band - it is very similar to a belt. To do this, cast on 10 chain stitches and knit with simple single crochets. Knit a length that will be equal to the circumference of the head. It is more convenient to immediately sew this belt with a back seam and start knitting in the round on one of the long sides of the “former rectangle”.
 We start knitting with the pattern of the main pattern, knit the desired height. This height should be the sum of the depth of the cap plus the additional centimeters inherent in the model. More often for these species they add 5 cm. A little less is possible. Knit the pattern of the diagram in a circle. Next, the most difficult thing is to carefully pull the hat off the top of your head. The seam should not be noticeable and the waves on the crown should be the same.
Queue for the pompom, it should be very tight. Therefore, it is worth using some tips for creating it.
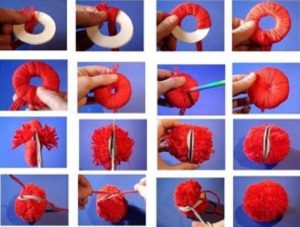
It's definitely worth taking the time to trim the pompom - this will make it even. And using two disks that can be easily cut out of cardboard will help make the pompom very dense. What can never be achieved by simply collecting thread and tying it with your own hands.
All that remains is to sew the pompom to the product and enjoy the new model.
Important! If the top of the head looks like it has some minor flaws, then the pom-pom will skillfully hide this flaw in the hat.
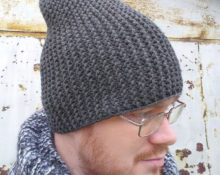
 Beanies are worn by everyone - girls, boys, women and even men. As for teenagers, they can safely fall for any color and pair it with their multi-colored clothes and different prints. But fashion does not allow men to give such gifts. They should take a closer look at more restrained colors: flesh-colored, black, white, gray.
 There are still advantages of these colors - their easy combination with other items of clothing.
Beanie, as the most popular hat among teenage boys, can be made “underground”, that is, at home and maybe even with the hands of the mother. But the owner can decorate it at his own discretion. Crochet and delight your loved ones with cool, trendy things, and yourself with your favorite process.
 0
0