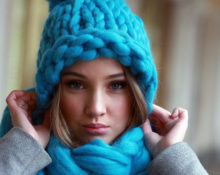
 Many women get upset with the onset of cold weather, they... nThey like to hide their luxurious hair. Yes, and they find excuses that the hat doesn’t fit, etc. And for them there is this model - it suits every face. This is a “Kuban” hat.
There is a lot of interesting things in her story. For example, what it came from the papakha (male headdress of Caucasian men). But the name haunts her homeland - Kuban.
Some ladies remember the 1980s, when the first female models appeared in the USSR and immediately became popular. If previously there were only fur new clothes, now the hat is back in trend. They don’t spare any fabrics for it. In this article you will learn how to make lovely patterns step by step using knitting needles and good yarn.
Selection of yarn and knitting needles
Yarn for kubanka should be dense. Thin threads will not be able to hold the shape of the product well. Therefore, you need to choose medium threads and knit in several threads. This will make a good cylinder.
 The beautiful model fits well on the head and perfectly complements the image.A lady will not refuse to appear on the streets in such a hat. Warm and very beautifulIf such a model appears in a girl’s wardrobe, she will never utter the words “hats don’t suit me.”
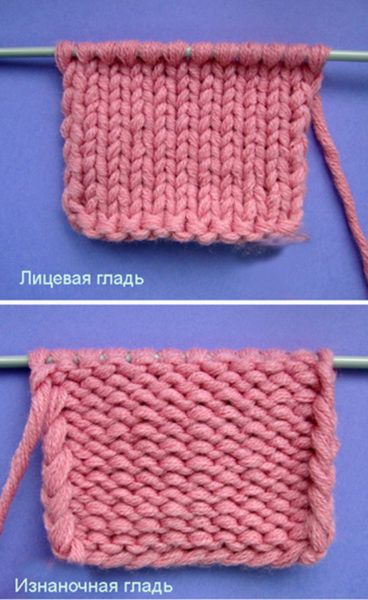
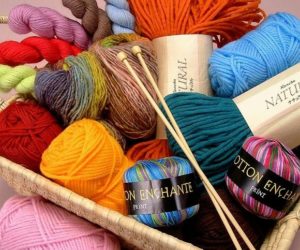 You should always choose the right number for yarn needles. This is the first condition that these tools must fulfill. Next, pay attention to the model. For circular knitting, circular knitting needles and stocking needles are usually used. But the smooth fabric is made using ordinary knitting needles.
Hat size
 It is very important to take measurements for any detail. This distinguishes any thing. But if factory items have standard sizes and even have their own sign, then with these things it’s different. Do-it-yourself things are unique and are always made to specific sizes; it’s rare that anyone grows according to GOST standards. When looking at the hats there may not be a strong deviation, but a centimeter or two can look very ridiculous on some products.
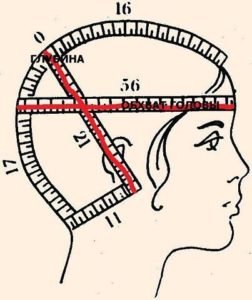
Let's move the sign aside and Let's take two important measurements for the Kubanka hat:
- Head circumference;
- depth.
Head circumference can be determined or measured with a measuring tape. Just wrap it over the occipital protuberances.
Important! A knitted item will stretch in any case, and therefore, if the hat is knitted without a seam (in a circle), then it is advisable to subtract 2 cm from the circumference. This way it will fit well and will not pinch and fly off the head.
 The second dimension is depth. To determine it, you will also need a measuring tape and a few math techniques. Using a tape, measure the distance from earlobe to earlobe (tape along the most distant parts of the crown). Then divide this number by 2 and make increments. Regular models, without a high rise on the top of the head, want an increase of 2-3 cm. But inflated hats that look far away may require an increase of 5 cm.
No more measurements are required for the cube. It remains to determine the set of loops. A sample helps with this.
Sample
Before doing anything, it is better to measure 7 times. Here the sample acts as another measuring tool.
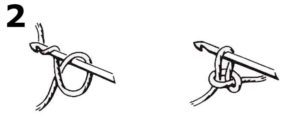
For those who don’t know how to cast on stitches on knitting needles:

Set of first stitches for 2 knitting needles
You need to take a diagram of the planned product. Knit a small square (the sides should be a little more than 10 cm). Hold a ruler in your hands and determine the number of loops in 10 cm (in a row and how many rows it contains).
 This indicator is called knitting density. Then, with its help, you can calculate the number of loops for the first set, and make notes regarding decreases in further knitting.
Stylish lightweight Kubanka hat models step by step
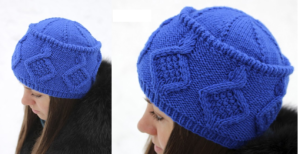
Kubanochka with spikelets across
Lovely model cubes with graceful spikelets. The model does not require circular knitting needles.
 It is tied across. The diagram shows the rows that create wedges for such a product.
To work you will need:
- yarn 160 g;
- knitting needles number 3.
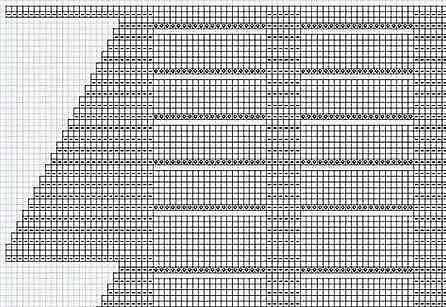
Kubanka wedges scheme
Knit the entire product in two threads. Measure the measurements of the product and cast on stitches with knitting needles. Knit wedges with knitting needles. The hat combines several patterns - for the crown (wedges) a garter stitch pattern. Garter stitch is also used for the elastic band of the product. Spikelets run along the cylinder of the product. The diagram of the spikelets is below.
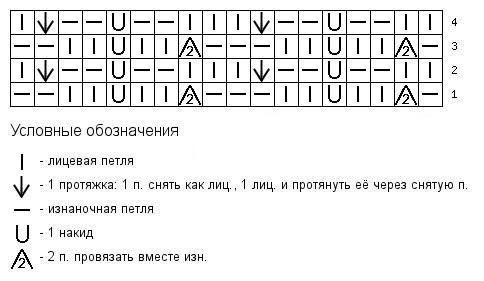
Scheme 1 spikelets
In total, the cap consists of 6 wedges. They are sewn together after knitting the fabric. The crown for all products of this model will be the same. But the depth and circumference can be changed. To change the circumference, add several loops using reverse rows.
Kubanka is a more complex version: spikelet diagram
If you add several loops for the spikelets to the pattern, the hat will turn out taller. This model is designed for a head circumference of 58.
They knitted the fabric, sewed it and the kubanochka can take pride of place in the wardrobe.
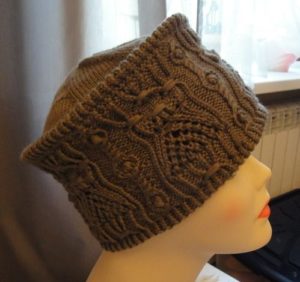
Women's kubanochka with side
 The interesting model of this cuban is suitable only for extraordinary personalities. For those who love experiments and are ready to delight themselves with new models, moving far from the usual situation.
To work you will need:
- gray yarn 200-300 g;
- knitting needles number 3.
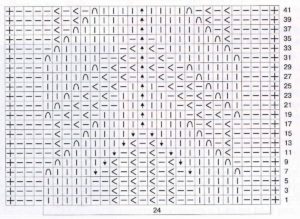
The product is knitted from bottom to top. All descriptions correspond to size 57. Completely made with knitting needles and there is no crayfish step here. The secret of the bead is further in the article, but it is made with ordinary knitting needles. Using knitting needles you need to make a set of 130 loops. After the 4th row, strictly use an elastic band 1*1. Go to the diagram and you need to create 10 rapports. Afterwards, knit 8 rows with an elastic band and this is again 1*1.
The secret of the roller: just knit a loop together with a loop 8 rows below (knit the loops purl).

Diamond pattern
The secret is revealed and then divide all the loops into 7 wedges. It is better to mark the beginning of the first (with a pin, markers). Knit two loops together at the beginning of the wedges. Knitting occurs with facial loops. The marked loop should always be on top. Decrease until 14 stitches remain. They are easy to pull off.
The hat can be made in a circle. If knitting is not done with circular knitting needles, then the last step is stitching the edge of the hat. Here is the next release of the model.
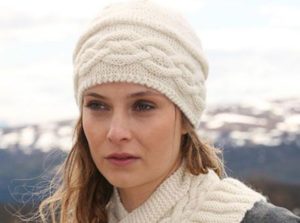
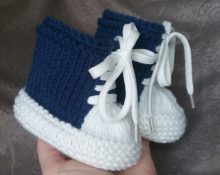
Kubanka for a beginner
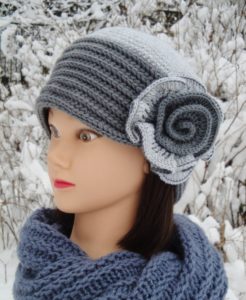 It is very difficult for beginners to break away from the pattern and knit at will. But this model will allow you not only to understand the entire process, but also to easily recreate it. You just need to have some crocheting skills.
Important! The bottom of the hat is crocheted for greater density - single crochets. So, let’s reveal all the cards for creating this newfangled hat, because volume is in trend.
To work you need:
- white and gray pekhorka yarn;
- knitting needles number 2;
- hook number 2.
The cap can be divided into a bottom and a base. So for the bottom you need to crochet a circle with a diameter of 18 cm. The base is made with an English elastic band. Width is the depth of the hat minus 7 cm. You can make your own size.
How to cast on loops on a hook (pic. below):
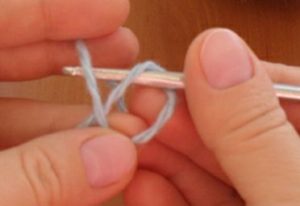
Cast on 1st loop on hook
Set of 1st and 2nd loops on hook
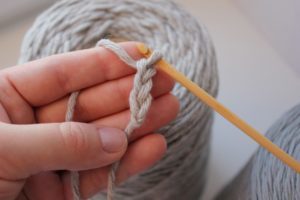
1st chain – beginning of crochet
So, we cast on loops with knitting needles; in this model, the cast was 21 loops. The English elastic fabric is made with gray threads, and the bottom with white threads.
Important! An English elastic band will turn out smooth and with straight edges only if an odd set of loops was used.
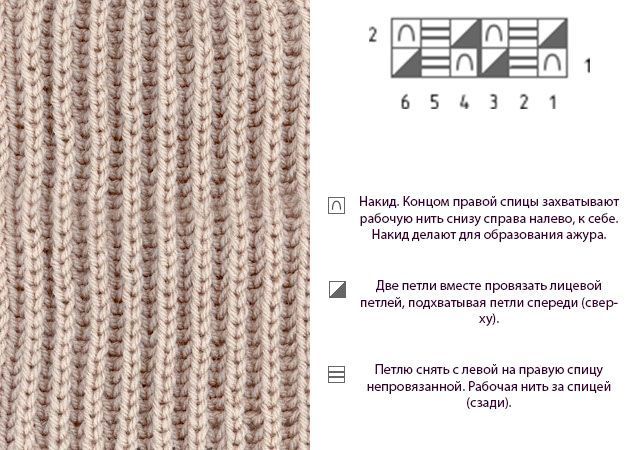
Knitting elastic band.
Knit the base fabric until the size of the head circumference is obtained. Here this is the exact size, without additions or subtractions, since the fabric will be sewn together later. A few centimeters will go into the seam.
Assembly and decoration
It will be necessary sew the bottom of the hat to the fabric of the English elastic band, the seam should remain inside the product. Next, sew the seam from the inside between the short sides of the English elastic fabric. It looks like the hat is ready. The final touch is the flower.
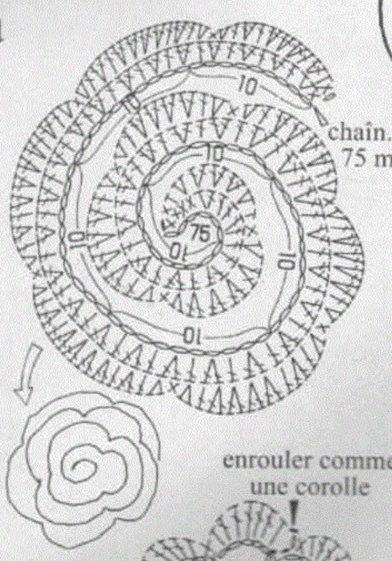
Crochet flower pattern
It can be easily done with a hook. Below is a small diagram of the flower. It is necessary to make two parts, one larger. It is advisable to use contrasting colors.
Both a self-confident master and a beginner can make such models with an explanation. The simpler the explanations, the faster the work gets done. When you are surrounded by such lovely products, nothing will stop you from creating them. Make hats for winter and autumn.Creative inspiration to all masters.
 0
0


A hat with a side, have you yourself counted how many loops you need to cast on???? Rapport-13 loops, another 2 distance between them. For you, we dial 130 and knit 10 rap. , where is the logic