A hat is a necessary part of the wardrobe for the cold season. A wide variety of them are presented in stores, but there are often situations when it is not possible to find what you need among them. For example, you want a pale blue hat with braids, but there is no such color. Or it happens differently: the desired hat is found, but the price for it is too high.
In such cases, it will be easier to choose threads of a suitable color and knit it yourself. Knitted hats add a special twist to the look. If you dilute them with patterns of braids, then the attention of others will be focused on them.
There are a large number of different braid patterns: some will be simpler, while others will take a lot of time to figure out. Even in the finished description of the hat, the pattern with a braid can be replaced with a simpler one or with one that you liked more than the one suggested.
Lilac hat with a side braid
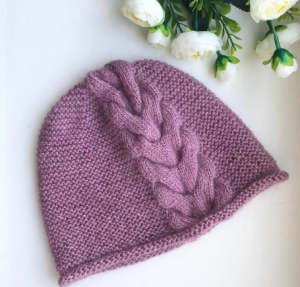
Necessary materials:
- Yarn (300 m/100 g) – 300 g;
- Knitting needles No. 3.5;
- Needle.
Braid pattern
- 1 r – 1 KP, 5 IP, 12 LP, 5 IP, 1 KP.
- Row 2 and all other purl stitches according to the pattern.
- 3 r – 1 KP, 5 IP, 12 LP, 5 IP, 1 KP.
- 5 r – 1 KP, 5 IP, 12 LP, 5 IP, 1 KP.
- 7 r - 1 CP, 5 IP, remove 3 loops onto an additional knitting needle and leave at work, 3 LP, transfer the loops from the additional knitting needle to the working one and knit them with LP, knit the remaining loops of the pattern in the same way, 5 IP, 1 CP.
Then continue alternating rows from 1 to 8 to the desired height.
Progress
Important! Before starting work, make a test sample of 10*10 cm in order to accurately calculate the required number of loops.
Cast on 90 stitches and knit 4 rows with knit stitches. Then divide the loops: 1 CP, 40 LP, 24 loops for the pattern, 24 LP, 1 CP.
Advice: If the fabric begins to curl when knitting, then reduce the number of loops for the pattern to 12 and gradually increase them.
If a larger number of loops were initially cast on, then the loops for the pattern need to be distributed differently. So, for example, if 92 loops were cast on, then they need to be divided as follows: 1 CP, 46 LP, 16 pattern loops (during this interval, gradually add the missing loops to 24), 30 LP, 1 CP.
Knit in this way until the height of the fabric reaches 15 cm. After this, begin forming the bottom. To do this, in each even row, reduce the number of loops, knitting each 7 and 8, 7 and 6, 5 and 6 loops as one. At the same time, leave the number of loops for the pattern unchanged. Finish decreasing when there are 8 to 10 stitches left on the needles. Secure them by pulling a thread through them.
Assemble the hat by sewing a hidden seam at the back.
Cap "Charm"
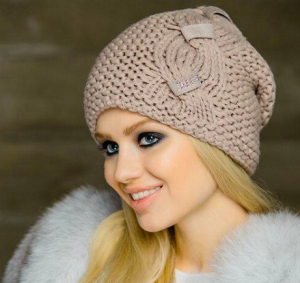
This hat is similar to the one described above. Their difference lies in the voluminous braid pattern.
Necessary materials:
- Yarn (300 m/100 g) – 100 g;
- Knitting needles No. 3.5;
- Needle;
- Decorative elements as desired.
Progress:
- Cast on 90 stitches and knit 4 rows of LP. Next, divide the loops into 3 parts: 1 CP, 40 CP, 24 loops for the braid, 24 CP, 1 CP.
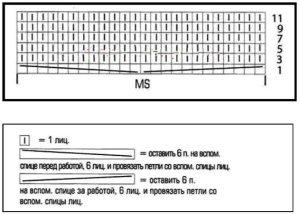
- Knit the pattern with a braid according to the diagram. It contains only the front rows; the purl rows are knitted according to the resulting pattern. Alternate rows 1 to 11 until knitting is completed.
In this way, knit until the total number of rows is 45. After this, begin decreasing to form the bottom, knitting 7 and 8, 6 and 7, 5 and 6 loops together in even rows each time.
Finish the decreases at the moment when there are 10 loops on the knitting needles. Pull a thread through them to secure them.
When the product is completely knitted, you can add decorative details to it. For example, how to fasten elements of suede and beads in place of the braid weave in the sample.


 0
0
