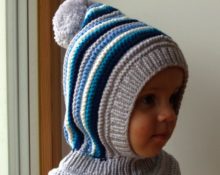
 The crocheted helmet hat is a very common model for children. It comfortably covers the child's head and hides the neck at the same time. No breeze can pass through such a strong barrier. A mother with such a hat can rest assured about her baby.
The helmet can be for a boy, a girl, or even an adult.
Detailed descriptions, interesting models and everything that will help you make cool models with your own hands.
Selection of yarn and hook
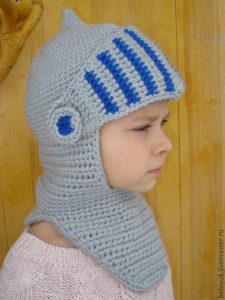 For a children's product, the yarn should be warm and soft.
Additionally, for children's yarn there will be one more criterion - it is a hypoallergenic composition. Yarn depends on its wool content.
The hook that matches the yarn must be comfortable so that all the loops become even.
Sample
A helmet cap will require a little more measurements than a regular hat.
In addition to the head circumference and the depth of the cap, you will need to measure the length of the product from the earlobe to the desired length of the product. Plus you will need to determine the width by shoulder level (if you plan to have a longer length).
 A special sample will help you calculate the loops according to your measurements. It must be made from the same threads and the same pattern as defined for the model. Then determine how many loops are in 10 cm and then count the number of loops along the circumference, height and other measurements.
For those who don’t know how to cast on the first loops on a hook:
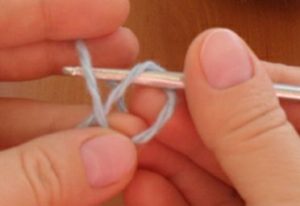
Cast on 1st loop on hook
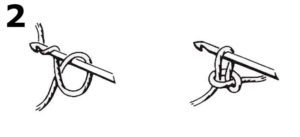
1st and 2nd loops on hook
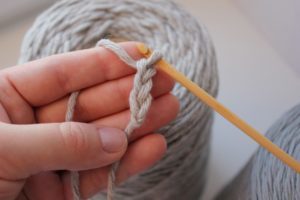
How to crochet the 1st chain
Step-by-step description of helmet cap models
Three models of hats and helmets (for boys, girls and women). Did you think helmet hats could only be for children? A very elegant model for adult ladies. The product is reminiscent of ancient women's headdresses - so voluminous and even baggy. It can replace not only a regular hat, but also a scarf (snood).
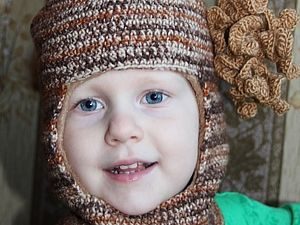 Details about each model, what is required to create it, what it should look like, a diagram for work and, of course, the stages of formation.
Hat-helmet for a boy
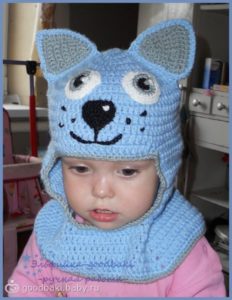 Original model for a boy. This adorable bear helmet will decorate your little one and keep you warm. The model was created using simple single crochet stitches. Before you start knitting, you need to prepare everything that you will need for your work.
To work you need:
- yarn (according to the model, these are two colors that match each other);
- hook (must also match the thickness of the yarn).
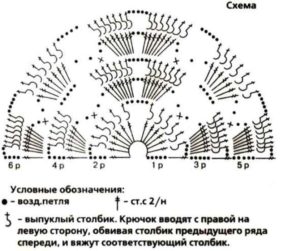
To make knitting easier, you can start with a circle (the top part of the baby’s hat). Circle diagrams below:
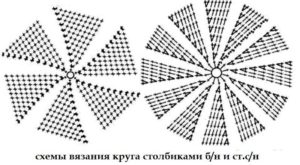
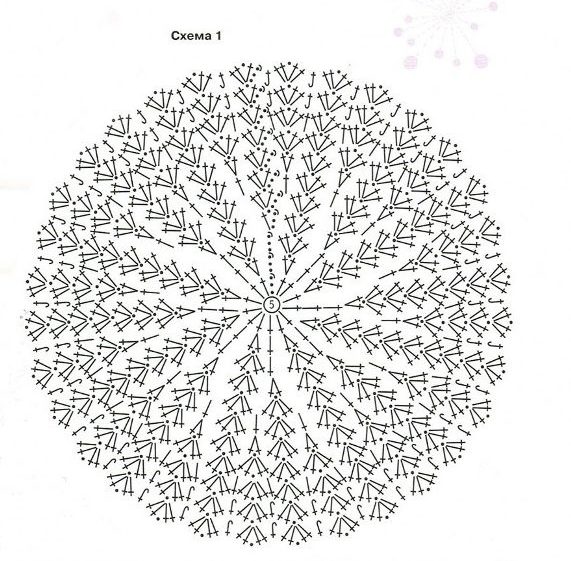 crown
crown
The pattern is crocheted from top to bottom, like most crochet hats. To do this, you need to make a chain of air loops (5 is enough) and close it in a circle. You can use a convenient and beautiful amigurumi loop - a very beautiful start for the crown. Then we knit according to the pattern until the neckline.
Cutout
For a face neckline, you will need to bind off the middle 20 loops, but the size of the neckline can be adjusted. It is better to attach the product so as not to make a mistake with the size. Next, knitting continues with double crochets without additions, strictly according to the pattern. There are 8 rows in total.
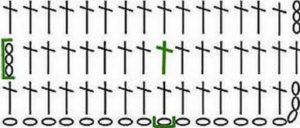 Dickey
This stage was conventionally called “shirt front” since the bottom of the product slightly resembles it. For the next transition to solid circles, you need to cast on 20 loops again and close the knitting into a circle. Continue knitting with additions. It is necessary to add through 15 loops one column at a time. Additions through a row. Knit 3 rows, continue knitting not in a circle, dividing exactly in the middle of the front. Don't forget to make additions. Knit 8 to 10 rows.
Ears
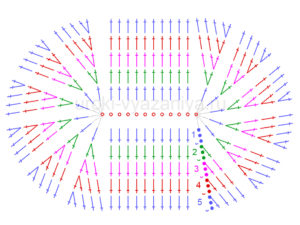
Knit two ears according to the diagram below. Tie the edges with simple stitches, but with contrasting yarn. Knit the fastener piece with contrasting yarn. This is an oval stitch with single crochets. Make a small retreat in the last row; instead of a stitch, you can knit an air loop - this is a cutout for a button.
 Assembly
You need to sew on two ears, a fastener part and a button. Then tie the edges of the cap with a single crochet. Now the work on the helmet is finished.
Hat and helmet for girls
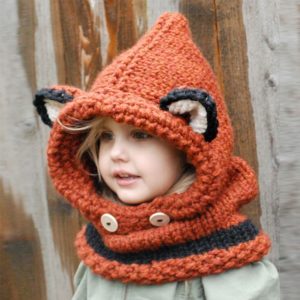
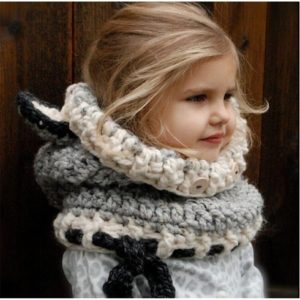
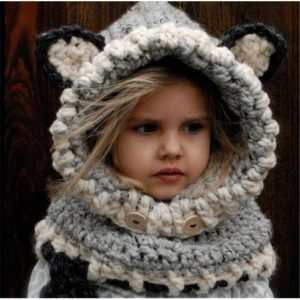 The most popular hat is the helmet. The copyright holder of this product has made several million dollars on such products. It turns out that you can not only live by knitting, but also get decently rich.
This very interesting model features a rather rough-looking yarn, thick thread and dull colors. But all this only touches the child. What does this product need?
To work you will need:
- bulky yarn;
- hook number 6.
Knitting begins from the bottom of the product, which is quite unusual for a crochet hook. Bulky yarn does two important things:
- beautiful product;
- reduces knitting time.
We measured the circumference of the neck and multiplied by 2. We cast on the loops that the sample suggested and begin to knit in the circle with single crochets to a height of 18 cm. Next, knitting is not in the circle. Leave the average 15-17 loops and knit them in single crochet stitches with a height of 20-25 cm. Be sure to take your own measurements. No loop reduction is required.
Separately, we sewed two ears and prepared a large button to match the yarn.
Product assembly:
The only seam needed is to join the ends of the top of the hat and make a middle seam. The result is a product very similar to a hood. Sew on two ears and a button. The button is needed only for beauty.
The model is ready. You can wear it on autumn days, or use it with a thin hat as a snood.
Hat helmet for woman
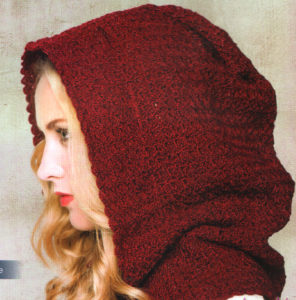
Very rarely do women indulge themselves with such products. But it is so unusual to see such a product on the street - it is definitely unique. The hat looks no worse than the factory one, but hundreds of times better.
To work you will need:
- medium thickness yarn;
- hook No. 2.
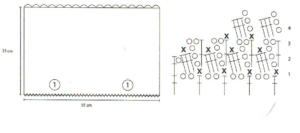 The simplest model of a hat is a helmet hat for women. It is necessary to knit a rectangular fabric according to the provided pattern, without additions or decreases. The dimensions of the canvas are 66 by 95 cm. Then fold it in half and combine the 95 cm sides. Make a seam along the lower third of these sides. This is the future bottom of the helmet. Then make a seam on the opposite side, which will connect the halves of one side 66 cm. The product is ready. Here is such a simple DIY hat and helmet for a woman.
How to crochet the bottom of a children's hat-helmet
For the bottom of the helmet, you can use a crab step pattern, or just single crochets, as in the first model. The border patterns that a hook can make will also not be ignored.They may not be suitable for a boy’s cap, but they will be very useful for girls and women.
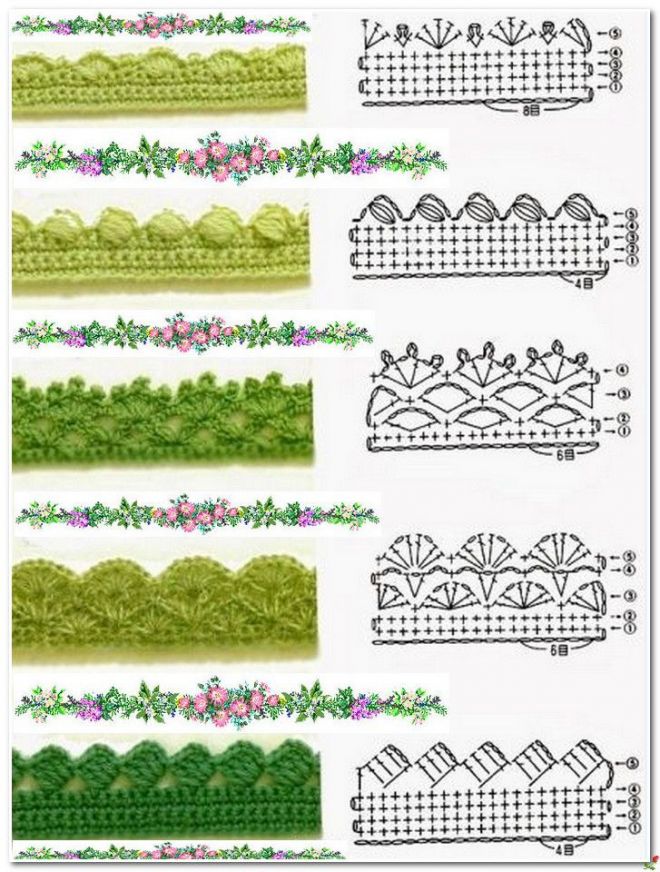
Schemes for the border of the helmet cap
Very sophisticated border models that can make even a simple cap pattern stand out.
Important! When creating a product, take your time, because it is the design that distinguishes handmade work. Just about anyone can knit a hat, but decorating it in style is a real skill.
For the crochet artist, creativity lies in interesting patterns, you can find them in this article and get inspired for creative things for yourself and your children. Maybe you'll enjoy crocheting so much that you'll crochet your own patterns. Then you can not only show off, but also place a small order. Creative inspiration and more beautiful and warm things!


 0
0