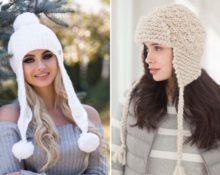
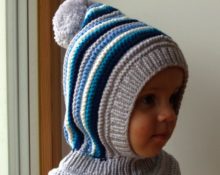
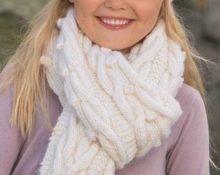
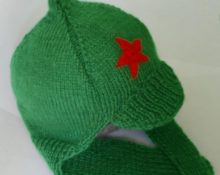
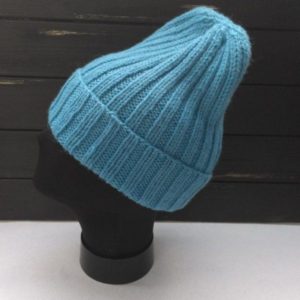
 The pumpkin hat is very popular this season. It is worn by adults and children, women and men. This model is suitable for autumn and winter. Of course, you can go to the store and buy the hat you like. But this model is so easy to implement that even a novice craftswoman can handle it. Discover the world of handicrafts.
Materials and tools
To knit a pumpkin hat, we need to select yarn, knitting needles and allocate one or two evenings. You will also need a hook or gypsy needle to complete the job. The hat knits up very quickly.
Yarn
IMPORTANT! When choosing yarn, immediately decide for yourself whether it will be a warm item made from thick, natural yarn, or whether it will be a hat for the off-season.
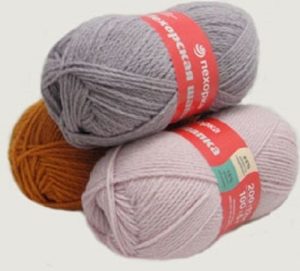 Then you can take thinner wool, it is possible to use synthetic threads.
Let's look at some types of yarn that can be used.
- Alpaca - produced from llama wool. It has good thermoregulating properties, is very dense, and does not fall off over time. Without additives, this wool is very expensive.To reduce cost, it is combined with synthetic threads.
- Angora - produced from the wool of downy rabbits. Down is mixed with acrylic or merino. Angora is soft to the touch, airy and warm. One of the negative qualities is that the fluff is quickly wiped off; it is not advisable to wash things made from this yarn.
- Cashmere - so called mountain goat hair. It is soft to the touch, products made from it have an attractive, smooth appearance. Among the shortcomings, it should be noted that pellets appear on things over time.
- Linen the yarn is quite coarse and cannot be dyed. It is warm, the thread does not shrink or fade. Linen yarn Available only in natural gray and beige tones.
- Natural wool consists of from the wool of various types of animals. The products are very warm, but if washed incorrectly they can shrink or stretch. Depending on the composition, the wool can be soft or it can be prickly.
- Acrylic - This synthetic yarn, warm and easy to care for. Things made from acrylic do not lose their shape and do not fade.
Spokes
Depending on what yarn we chose, we select knitting needles. Ideally, the size of the knitting needles should be greater than the thickness of the yarn: fold the selected thread in half and attach the knitting needle. This is the size of knitting needles needed for knitting.
Sometimes yarn manufacturers indicate on the package the knitting needle size that is most suitable for the thread. Pay attention to this.
The peculiarity of the pumpkin hat
Model features
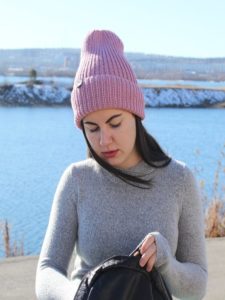
The pumpkin hat is quite simple, but it looks very impressive. Especially if it's right pick a color. He must match outerwear or other accessories, with which the hat will be worn.
Models can be varied. Large pompoms are trendy this season.
Advice. In a hat with a pumpkin crown, a pompom would be appropriate.
If you choose a “pumpkin” for a child, you can choose the version with ties.
Hats can be with or without collars.
You can wear the “pumpkin” pulled down on your forehead, or you can move it to the back of your head, revealing your bangs. You can gather it at the back, or you can leave it upright, which is also very popular this fall.
Knitting methods
This accessory can be connected in several ways.
- If we want to make a hat with seam, two knitting needles are used. The fabric is knitted first, and then it is sewn together with a simple or decorative seam. It all depends on your imagination and experience.
- If we knit a hat seamless, there are two options. Knit in the round on circular needles or on 5 needles, like a sock.
Knitted hat different patterns.
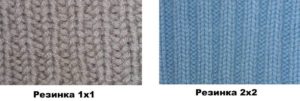
- Elastic band in different versions.
- 1 knit stitch, 1 purl loop.
- 2 knit stitches, 2 purl loops.
- 3 knit stitches, 3 purl loops.
- A “spikelet” pattern made of elongated loops (for experienced knitters).
How to knit a pumpkin hat
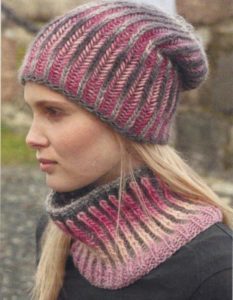
The model should fit your head tightly. Therefore, we will knit a hat for women with a 2*2 elastic band (2 knit stitches, 2 purl stitches).
Description of warp knitting
Let's take merino yarn. It looks beautiful as a finished accessory, is warm and practical to wear. Knitting needles size 3.5 or 3.75. We will knit a hat on five knitting needles.
We cast on 128 loops and distribute them onto four knitting needles of 32 loops each. After the first row is knitted, make a mark so you can tie the thread. This will be needed so as not to lose the beginning of knitting.
Next we knit an elastic band, 2 knit stitches, 2 purl stitches to the end of the row. Depending on whether you want a hat with or without a collar, we knit a 22 or 27 cm pipe with an elastic band.
How to knit the crown
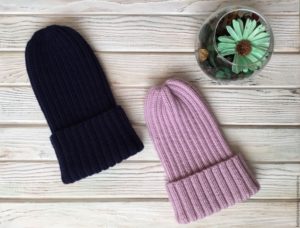
After completing the knitting of the main part of the pumpkin, we begin knitting the crown, gradually decreasing the loops. The knitting pattern looks like this.
- 1st row: knit 2, purl 2 together, knit 2, purl 2; repeat until the end of the row.
- We knit the 2nd row and all even rows up to the 9th according to the pattern.
- 3rd row: 2 knit stitches, 1 purl stitch, 2 knit stitches, 2 purl stitches together, repeat the pattern until the end of the row.
- 5th row: knit 2 together, purl 1, knit 2, purl 1 – to the end of the row.
- 7th row: 1 knit, 1 purl, 2 knit together, 1 purl - we knit the whole circle like this.
- 9th row: we knit all the loops with knit stitches, while decreasing the purl loops as follows. We take the front loop by the front thread, grab the purl loop and knit two loops together with the front one.
- Row 10: Knit 2 stitches together.
- In the next rows we knit 2 stitches together until there are 16 stitches left on the knitting needles. If you want a fuller crown, leave 28-32 loops.
Unwind about 15–20 centimeters from the skein of yarn and cut the thread. Using a gypsy needle or crochet hook, pull the thread through all the loops and bring it inside out. You can pull the thread through the loops twice, the crown will hold tighter.
Fasten the thread in the already knitted rows.
The model is ready. We measure and either leave it as is, or use our imagination by adding a decorative stitch, or a pom-pom, or ties.
Tips for getting the job done
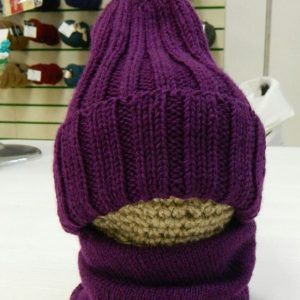
Before you start knitting a hat or any other item, be sure to knit a 10 X 10 cm sample. Steam it and see how the yarn in the product behaves. To determine the knitting density, calculate the number of loops in 1 cm. Be sure to focus on your knitting density.
ATTENTION! The number of loops in the hat is calculated using the following formula. Multiply the head circumference by the number of loops in 1 cm of the sample and subtract 15 (20)% from the resulting number.
15 or 20% is a calculation based on the fact that the item knitted with an elastic band stretches.
Before you start wearing a knitted item, it must be washed and dried flat. If you line dry, the hat may stretch or lose its shape.
If you decide to attach a large fur pom pom, make this part with a rivet. Then it will be possible to remove the fur before washing or thus change the model.


 0
0