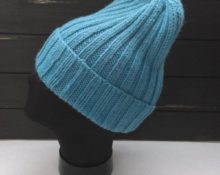
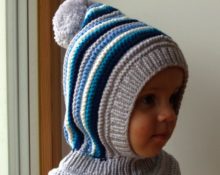
The knitted hat with earflaps is very popular among people of all ages. In the cold winter, it becomes an indispensable item in the wardrobe. When properly made, it can be not only beautiful, but also very warm, wear-resistant and practical.
General recommendations and features of knitting a hat with earflaps
You can knit a spectacular hat yourself with a little curiosity, patience and skill. Beginners are recommended to start knitting with simple and simple patterns. This will not make the product any less attractive. To knit a hat you will need patterns that can be found in specialized books and magazines, as well as on thematic websites and forums.
It can be very difficult to decide on the variety of options and patterns presented. To start, choose something simple with an easy difficulty level. Gradually, from product to product, you can polish your skills by adding new elements and technologies.
Before you start knitting, you need to carefully study the pattern. If the pattern is complex, then make a test element measuring 10x10 cm. You also need to take into account the size of your head. The height of the cap, width and depth will depend on it.
To make the earflap hat truly warm, it is better to knit it double. Otherwise, you will have to additionally make a special lining for greater insulation. Both options have their place.
Particular attention should be paid to the color of the future hat. It should be harmoniously combined with the rest of your wardrobe or complement them effectively. It is better to choose a color in advance and try it on with those things for which you plan to knit a headdress. Very often there are situations when the end result is a beautiful and high-quality product that does not match the color of its owner. The thing remains useless, and in the future it has to be unraveled in order to use the yarn for other purposes.
What you need for work
On average, it takes about one skein of thread to make one hat. Of course, material consumption is determined by many indicators:
- human head size;
- shape and design features of the product;
- knitting technique and presence of patterns;
- knitting density;
- thread quality (composition, density and other indicators);
- personal experience as a knitter;
- size and quality of knitting needles and others.
For convenient work, you have to choose suitable knitting needles. It depends on the personal preferences of the master. Some people find it convenient to work with circular knitting needles. In this case, the product is held on a special flagellum connecting the knitting needles. So, when using knitting needles number 3, the average knitting density is about 20 loops per 10 centimeters.
Reference! You can choose the yarn to your taste. The main thing is that it is pleasant to the body and does not cause irritation. The warming function is also important. One hundred percent high-quality wool or wool combined with acrylic is good for these purposes.
How to knit a hat with earflaps with your own hands
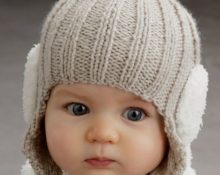
Let's look at one of the simple ways to knit a regular women's hat with earflaps. They begin to knit the product from the ears. To do this, six loops are cast on the knitting needles. It is better to use the usual garter knitting technique. Further, as you work, you need to gradually add an additional loop on each side to all rows on the front side.
You can knit one ear or both at the same time. When about 20 stitches are cast, you should continue knitting only in the forward direction, without adding additional ones. The length of the ears and their craftswoman determines independently based on personal preferences or customer requirements. The average size is approximately 17 cm in length and 10 cm in height.
Next, you can proceed to the main part of the product. It is very important here to correctly distribute the number of stitches cast on on the front and back of the hat. So, on the front you should dial 37 pieces, one of which is to maintain symmetry. 34 pieces are left for the back, including two edge pieces.
So, we string 17 pieces onto the knitting needles, add one ear, string 37 pieces from the front part, add an ear, string the remaining 17 pieces. The final result is 111 loops. In order to be sure not to make a mistake and knit in the future without unforeseen situations, it is better to re-read them carefully.
Next, 4 rows of the already familiar garter stitch are knitted. “Star” is suitable as a pattern for beginners. It is easier to master the first time. Here it is necessary to take into account that the number of loops must be a multiple of 3 units + 1 for symmetry + 2 edge loops. The depth of the hat is usually about 12-15 cm. Next, one of the difficult stages begins - knitting the upper part.
It is recommended to strictly follow this scheme:
- Row 1 – all stitches are knitted;
- Row 2 – 2 pieces are knitted together and 8 knit stitches – until the end of row 98 + 2 edge loops;
- Row 3 – 2 pieces are knitted together and 7 knit stitches – until the end of row 87 + 2 edge loops;
- Row 4 – 2 pieces are knitted together and 6 knit stitches – until the end of row 76 + 2 edge loops;
- Row 5 – 2 pieces are knitted together and 5 knit stitches – until the end of row 65 + 2 edge loops;
- Row 6 – 2 pieces are knitted together and 4 knit stitches – until the end of row 54 + 2 edge loops;
- Row 7 – 2 pieces are knitted together and 3 knit stitches – until the end of row 43 + 2 edge loops;
- Row 8 – 2 pieces are knitted together and 2 knit stitches – until the end of row 32 + 2 edge loops;
- Row 9 – 2 pieces are knitted together and 1 knit stitch – until the end of row 21 + 2 edge loops;
- Row 10 – 2 pieces are knitted together – until the end of row 11 + 2 edge loops
To knit a lapel, cast on 35 stitches on the front of the cap and use the garter technique to cast on the desired length. Usually it is 6-8 cm. To make the edges round, you need to remove 1 loop from both sides four times in a row. Next, they need to be closed.
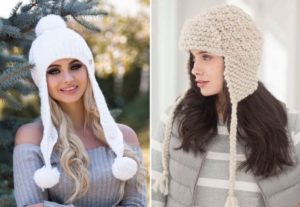
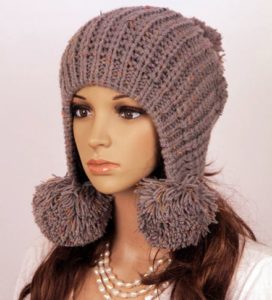
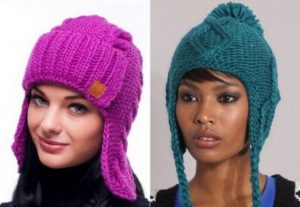
Many people like to decorate products with a variety of decorative elements. For example, these can be flowers and leaves of various shapes. You can also create a fashionable finish using a crochet hook. For example, there are patterns that imitate trimmed fur. They can be used to decorate ears and lapels.
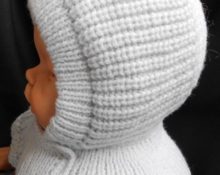
Important! It is better to make a double hat from yarn of different textures (regular and fur). This type of cap will have a good ability to retain heat.
Let's consider the stages of knitting such a hat:
- Let's start knitting, as in the first case, from the ears.For the left one, we cast on 5/3 loops and knit a row using the purl technique, adding one piece on each side. Such additions are needed in rows 3 and 7/5. Then the indicated increase is made to the right edges in the 9th, 13th and 17/19th rows. Here and below, the first number before the line is indicated for the upper part of the product, and the second for the fur or lower part;
- For the lapel, cast on 28/18 stitches and knit according to the following method. First, the first row is made using the purl technique, and then continues, adding 1 piece on each side. Then knit straight 16/10 rows;
- Assembling the received makers in the following order: right ear, lapel, left ear, set of 6/4 loops (64/40 pieces). We continue to knit in satin stitch about 10 cm up. Next, the canvas is divided into four parts and marks are made. In each row, knit two loops in front of the marks. Then, when 8 pieces remain, the thread is pulled;
- To assemble the resulting parts, you need to put one cap into another and connect them with a fur thread using a hook. You should also remember to attach the lapel in several places;
- For beauty, you can make several pompoms and attach them to the ears. You can also make a large pom pom on top of the head or other decorative decorations.
Thus, knitting a hat with earflaps yourself is quite simple. The main thing is not to deviate from the chosen scheme and not to make adjustments if you are not sure of their correctness. Most mating patterns have been tested many times and are passed on from generation to generation. We hope that this article was useful and will help you in this interesting and useful activity.
 0
0