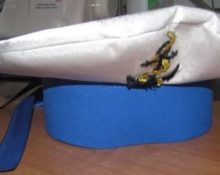
 Every woman wants to look beautiful and impressive even with the onset of autumn cold. In the harsh climate of our country, it is impossible to do without a headdress. Therefore, fashionistas are faced with the question of how to ensure warmth and be stylish.
This year, drape hats are especially popular. They are warm and perfectly complement the look of a girl in a coat or jacket. Now the store offers many options, but they are not original. It is not always possible to choose a hat of the color and style that suits your taste.
Instead of continuing the search, we suggest sewing it yourself, choosing a simple option for drape hats for women - a beret.
What you need for work
For sewing you will need:
- drape;
- pattern paper;
- pencil;
- scissors;
- safety pins;
- needle and thread.
ATTENTION! The material consumption is small, however, it is better to buy it with a reserve. To do this, first make a pattern so that you understand how much fabric you will need.
Beret details and their pattern
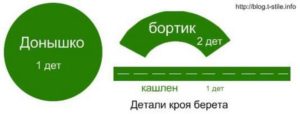
This pattern is suitable even for beginners; its advantage is that the finished product is easy to sew and will hold its shape perfectly. To do this, you need to take measurements, and then start sewing the product.
The main thing to do before cutting fabric is take measurements correctly, otherwise the headdress will have to be constantly adjusted when walking or it will put pressure on the head. To do this, you need to take a measuring tape and measure your head at the widest part.
IMPORTANT! Do not tighten the tape too much or, conversely, loosen it.
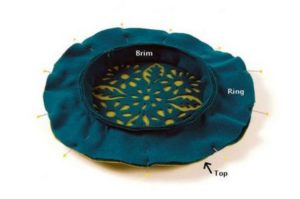
When sewing, we will work with three parts of the future product: the bottom, the sides and the cachepin (ring).
Pattern
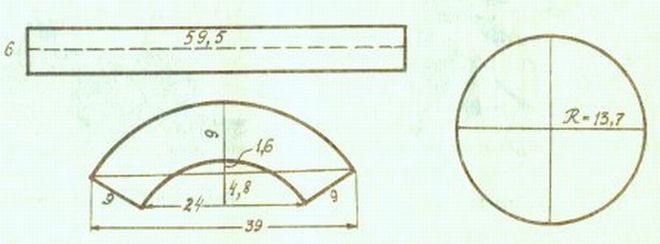
Use a round base with a diameter of 30 cm, and in the center build a circle according to the size of your head.
To calculate the radius of a small circle, you need to use the following formula: r = head circumference / 2, where = 3.14. Next you need to cut out the cache-pin. This is a strip about 6 cm wide and length around the circumference of the head. It will need to be folded in half and sewn to the rest of the parts.
IMPORTANT! Don't forget about small seam allowances.
Instructions for performing the work
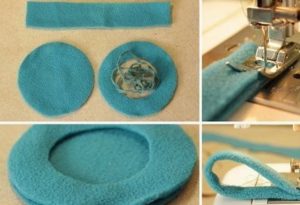
According to the pattern given above, we only need to make a few seams.
- First, two rounded parts are sewn together: the bottom and the side. Baste all pieces before machine stitching. Carefully connect all the parts on the machine so that the finished product looks beautiful on your head. A small error can lead to deformation, distortion of dimensions and misalignment.
- Try on a hat to immediately notice all the flaws and correct them.
- After that, take care of the cache. It is connected into a ring, then folded in half and sewn to the product.
- After this, the seams should be ironed well.The work is done carefully, one centimeter at a time, using a special block or ironing board sleeve. Face seams can only be treated with steam.
- When finishing the work, you can place the beret on the glass jar to give the headdress its shape.
Your product is ready.
ATTENTION! The finished beret can be decorated with beads, homemade flowers, buttons and other details that match the color and shape.
Useful tips
- If you have a ready-made item in your wardrobe that you are tired of, but you like the shape, you can rip it apart at the seams to make a pattern based on the details.
- Usually berets made from this material are sewn without lining, because it is quite heavy and dense. On the one hand, this makes the work simpler and easier. Therefore, even a novice seamstress can take on this job. On the other hand, you should use stronger threads and needles than usual.
- Before work, you can steam the drape a little to make cutting more convenient.
- The edges of the fabric are not hemmed, since the material does not fray, but it is better to make an allowance of about 1 cm.
- The drape also does not stretch, so the beret is usually sewn to exact measurements.


 0
0