 With the arrival of autumn, the cold weather set in, people began to warm themselves up and went shopping in search of new warm and cozy things for their wardrobe. A particularly necessary element is a hat. I would like to choose something bright, expressive and fashionable, but the assortment of stores offers the same type of models, which means it’s time to take up the threads and needle and sew the dream hat for yourself and your child. In this article we will tell you various ways to sew such a model, share our experience and give you the necessary and useful tips for creating a truly amazing thing.
Fashionable models of knitted hats
 Nowadays there are many variants of this headdress model in fashion. You can choose for every taste and color according to everyone’s personal preferences. Among the main models that have been popular recently are the following:
- Classic thin hat.
- Option with a visor, unusual and very attractive.
- Thanks to its shape, the sock hat can take on any shape and shape, which makes it popular.
- Caps with a veil add mystery and charm.
- Double-sided model. You immediately purchase 2 products. Can be worn on both sides.
- Among children's models, there are those decorated with ears or pompoms.
- Options with prints from your favorite children's cartoons are also possible.
 Nowadays there are many variants of this headdress model in fashion. You can choose for every taste and color according to everyone’s personal preferences. Among the main models that have been popular recently are the following:
Exclusive knitted hats
 In addition to the classic versions, there are also exclusive ones that amaze with their bright image and make passers-by look after you. If you want to be the center of attention, then these models are just right:
- Ushanka hat made of knitted fabric. Unusual performance for this type.
- A hat with pigtails is also quite an interesting option, given the huge variety of designs.
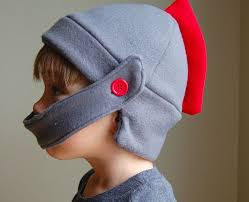
- A hat in the shape of a helmet. Quite a strong choice. It’s not suitable for everyone, but you definitely won’t be left without attention.
How to make a life-size knitted hat pattern
 The main thing you need to do for sewing is creating the correct pattern. All future actions and the final result of the work depend on this. Here's what you need to know to build a pattern and a step-by-step plan for making it.
- Taking measurements correctly.
- Creating a drawing on special graph paper.
- Choice of fabric and number of layers. For cool weather use two layers.
- Transferring drawing lines to the material.
- Cutting fabrics and creating blanks.
IMPORTANT! When using dense fabric, you should slightly increase the width of the workpiece so that it does not cause inconvenience and discomfort.
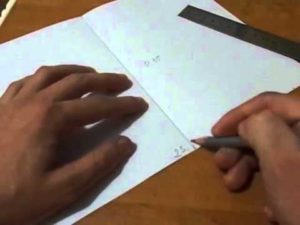
How to take measurements for a hat
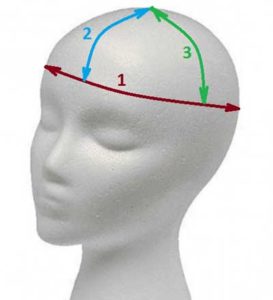 A very important question is to take the correct measurements and construct the drawing. There is nothing complicated, but you still need to be careful.To do this, take a centimeter and measure the circumference of your head. This will be the main size. In order to find out the size of the future hat, you need to subtract 4 cm from the main one (approximate values, depending on the density of the material). To build a workpiece you need to know the width. Just divide the resulting hat size by 2. Further work will be based on these dimensions.
What you will need to create a pattern and sew a knitted hat
 In order to sew a knitted hat yourself, you do not need any special devices or tools. Everything you need can be found at home: threads with needles, knitted fabric for a piece measuring approximately 40x80 cm (it’s better to take extra), a centimeter, chalk for notes. There is no difficulty in acquiring all these things.
IMPORTANT! If you are going to make a lining, then you need to additionally prepare for this material the same dimensions as the main part.
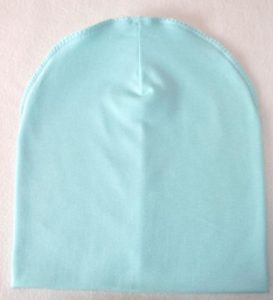
Women's knitted sock hat
 Particular attention is paid to the unique cap-sock model. It is called that because in its appearance and stretchy body it resembles a sock we are used to. In general, initially this model was used by men, however, ladies soon borrowed this image and found it very practical and convenient. This model is mainly suitable for young girls leading an active lifestyle. Thanks to its comfortable shape, it is easy to put on and reshape every time.
Hat-sock pattern for women
A quick sewing method includes creating a pattern, cutting and stitching the parts together. We are sharing an easy way to build a base for cutting fabric.
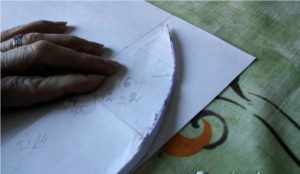
- Draw the future product on paper. The shape is a rectangle with a semicircle at the top.Make a small triangular cutout in the middle of the semicircle. This will serve as the location for the future seam.
- Fold the fabric in half twice.
- Place the drawing on the fabric and cut it according to the silhouette with a margin of about 1-2 cm.
We sew a hat-sock with our own hands
 The step-by-step sewing plan is easy to follow and takes only a couple of hours:
- Cut a triangle at the top of each piece.
- Sew the incision site.
- Place 2 pattern pieces on top of each other.
- Using a sewing machine, sew the pieces in a circle, carefully tucking the fabric.
- Iron the resulting product.
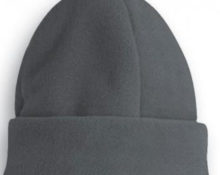
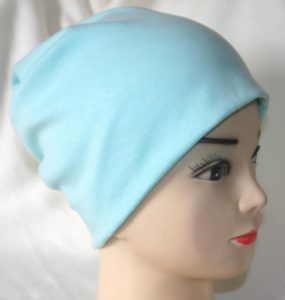
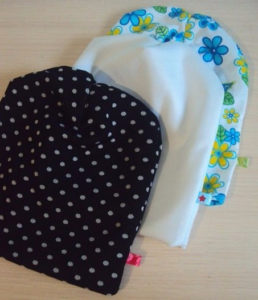
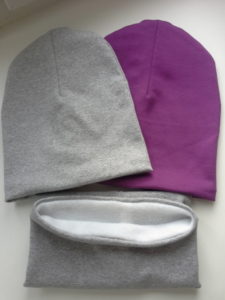
DIY beanie hat
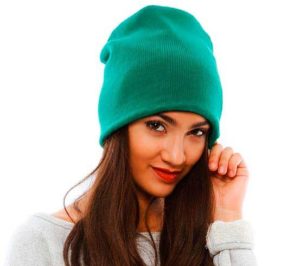 A great option for any age. Comfortable, pleasant to wear, it will ideally replace the previous model. And it’s even easier to make. Such models are especially popular and always please the eye.
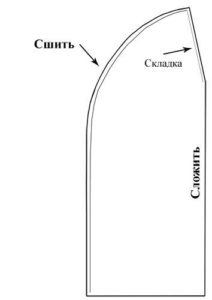
Beanie hat pattern
Build the pattern according to the following diagram
- Draw a blank shaped like a leaf on a sheet of paper folded in four. Rectangular bottom with rounded top. Width 12 cm and height 30 cm.
- Cut out a layout from paper along the outline to create a hat.
- Unfold the paper base and transfer it onto the knitted fabric.
- The resulting shape corresponds to the body of the desired item.
- All that remains is to cut the fabric according to your measurements, leaving a margin for hems in the stitching area.
ON A NOTE! Do not throw away the resulting layout; save it for future work.
How to Sew a Beanie: Step-by-Step Guide
From the resulting part you can make the final version and sew the product.
- Fold the pattern in half and sew the divergence on the sides.
- All that remains is to grind the upper base. To do this, bend the hat in half so that the previous seam is on top.
- Stitch open spaces.
- Press all seams thoroughly.
- Turn the beanie right side out and enjoy the result.
DIY women's knitted beret
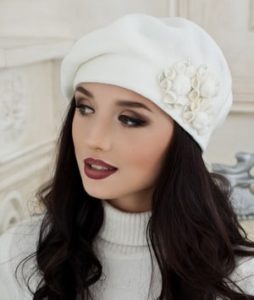 Berets add something unusual and even mysterious to the image. Perfect for cool weather and will complement your look. A good combination would be a coat and a pencil skirt.
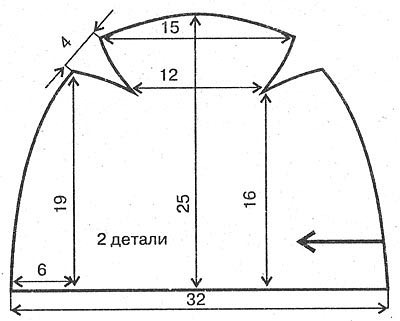
Knitted beret pattern for women
To create a pattern you will need: paper, a ruler and a pencil. To begin, draw a diagram that consists of the bottom, sides and cache. All sizes and shapes are selected individually for each person.
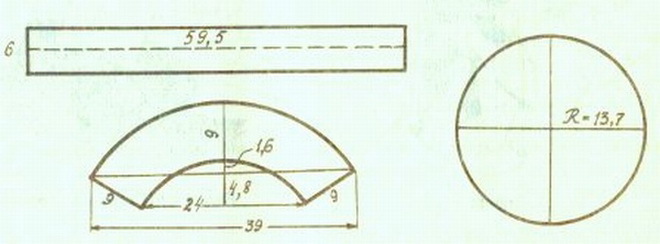
IMPORTANT! The cache-pin is directly adjacent to the head, so its length must exactly match the circumference of the head.
Sew a knitted beret step by step
First of all, sew the sides of the side together (front and back), and then stitch the bottom to the side base. Finally, sew on a cache-pin that will hold on the head and should correspond to its size. In the final stage, go over all seams with an iron. The stylish beret is ready.
A simple knitted hat for a child
 It is not necessary to spend many days and nights on production. There is a way to quickly complete all the steps to please your baby with a new thing.
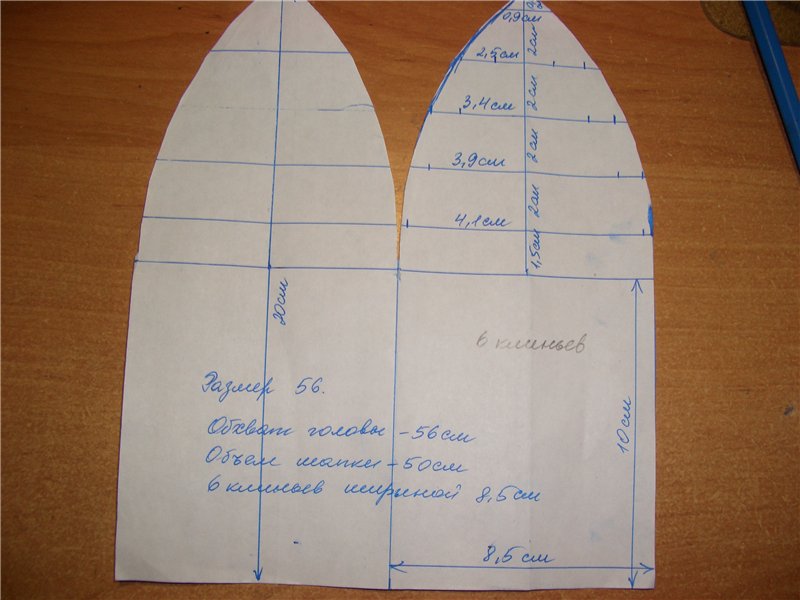
Making a hat pattern
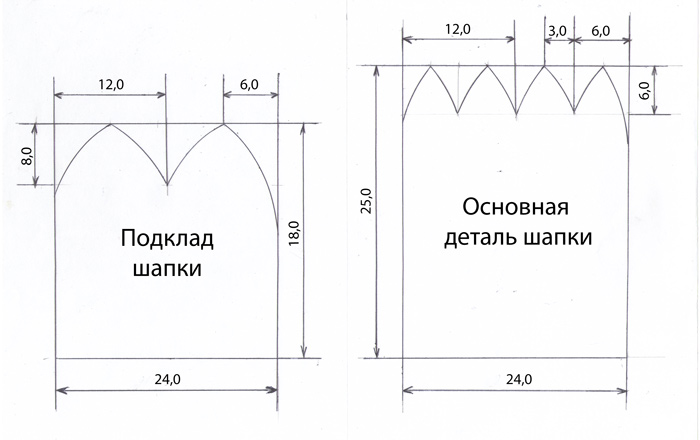
The pattern is built according to the following instructions.
- Draw a diagram of the product on paper. Rectangle measuring 24 by 25 cm.
- At the top you need to draw 4 identical 6x6 wedges.
- To do this, draw a line at the top at a distance of 6 cm and divide it with vertical stripes into 4 equal squares.
- Place dots in the middle of the top of each square and connect them to the edges with smooth, curved lines.
- It turns out to be a kind of “fence”.
How to sew a simple knitted hat for a child
Transfer the diagram to the fabric folded in half and cut along the contours. You can sew the details:
- Turn the material right side up.
- Start stitching the side lines of the wedges.
- After this, connect all the wedges in the center one by one using a seam.
- Stitch the side line and close the piece to give it the final look.
The single-layer simple hat is ready. For other models you can use this type of base pattern.
Children's hat made of jersey with lining
 For lower temperatures, the thin version is no longer suitable. It is necessary to keep warm, and for this you should make a hat with a lining.
Making a pattern for a hat with lining
There are no differences in construction from the previous version. Do everything strictly according to the instructions. Only now this operation will have to be repeated twice: on the knitted material and on the lining fabric (you can choose warmer cotton).
Sew a hat with lining
Now we sew together the details of the outer and inner parts. After preparing both parts, you need to sew them together. To do this, place the pieces next to each other and stitch, leaving a small gap at the top. Bend the product outward with the side that will be on top. Sew the remaining window all the way down.
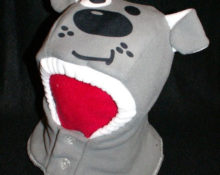
Hat with ears for a child
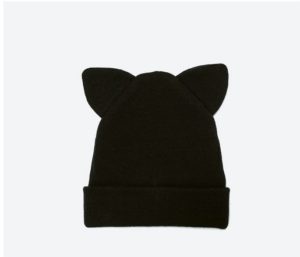 If your baby doesn’t like to wear a hat, but because of the cold weather it has become necessary, you can use a trick and sew ears on the product. A child definitely won’t be able to refuse this!
Pattern of a children's hat with ears
For such a model, a standard pattern is suitable, which we described in detail above. All changes concern only the decoration of the product with ears.
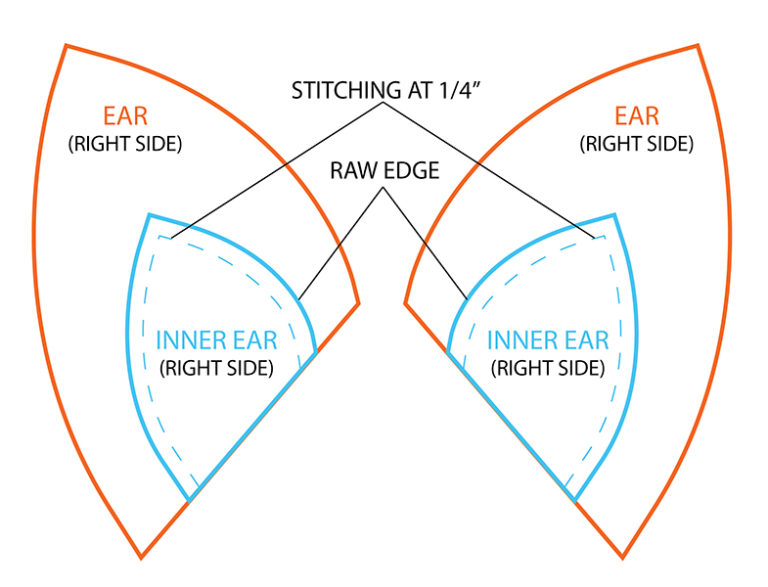
How to sew a hat with ears from knitwear
Cut the fabric according to the pattern and stitch all the parts. For the most convenient and fastest way, simply select a brightly colored fabric and make semicircular or triangular ears out of them.There are two flaps for each ear (anterior and posterior edges). Stitch them together, leaving the bottom edge open. Pull the edges apart a little and sew them to the hat itself symmetrically on both sides.
IMPORTANT! Leaving the bottom edge open is necessary to create a voluminous effect. You can fill them with dense cotton wool for greater believability.
Advice from experienced craftswomen on how to sew a knitted hat
 To make your work easier and save your effort, money and time, we will share some experience and give some useful tips:
- When sewing on machines, use a slow speed to avoid damaging the material.
- An important rule is that the thinner the fabric you take, the narrower the needle should be to avoid the formation of snags and tears.
- Do not use a pencil to make marks; chalk or a sharpened piece of soap is best suited for these purposes.
- If the material crumbles a lot, then make more allowance for the seam than usual. This will keep the item from wearing out quickly.
- There are special needles for knitwear. Ask your nearest sewing store and buy this particular set.
This is not all the advice you will need for your work. Everything comes with experience, don’t be afraid of mistakes, try, and soon you will be able to make masterpieces yourself and give advice to others.
 0
0