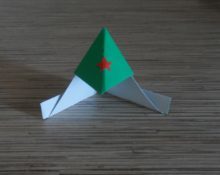
 Hat made by yourself from paper can be an excellent addition to a children's costume for a party at school or just a favorite hobby for teenagers and adults. This craft does not require any special additional materials, and is also easy to implement, accessible even to someone who has never done origami or making other paper things before.
In addition, there is several types of making a hat out of paper, which allows you to choose the shape and instructions, which is ideal for you. A hat can be folded even from an unnecessary newspaper in a matter of minutes, so you can try yourself in this venture immediately after finishing reading the article.
So, how to make a paper hat correctly and what else is needed for this?
Paper hat models
First, let’s look at the option from a newspaper, which absolutely anyone can do and doesn’t take much time.
Newspaper hat
The advantage of newspaper as a material for a hat is that It is quite large in size and also folds easily, unlike other thick papers. More often they make a paper hat for boys; it is needed for fishing or a picnic (see diagram below).
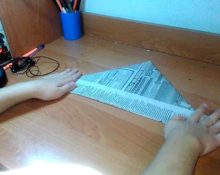
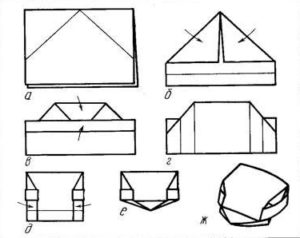
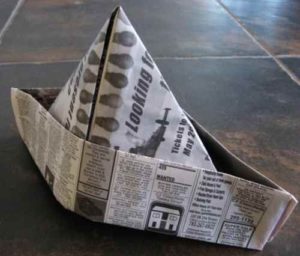 The first thing to do is Lay out a whole sheet of newspaper (two pages) on the table. Then roll it along the existing fold, and then fold it in half so that you get a rectangle. This is necessary so that another even fold appears in the middle of the page.
 It will come in handy later when you need to bend one corner exactly to the middle to form an unfinished triangle. The second upper corner is folded in the same way.
Here are 2 options for how to fold a newspaper:
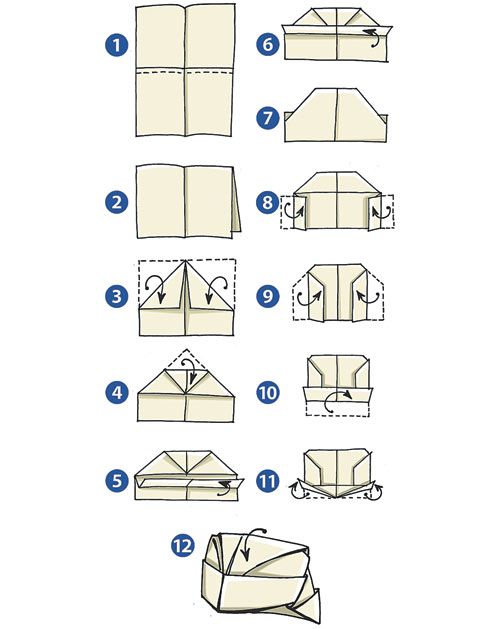 So we have two diagonal cuts. Now you can bend the bottom edge by 5-7 centimeters.
Important! Please note that only one edge is folded at this stage, that is, the end of one of the two folded pages. If you make a mistake at this stage, the whole craft will be ruined and you will have to waste time and a new sheet of newspaper to redo everything from the very beginning.
The second end is bent in the same way, but from the opposite side. It is important to ensure that they are bent at the same distance, otherwise the hat will turn out disproportionate and ugly.
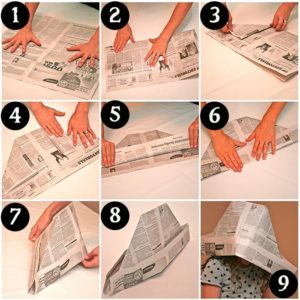 When these manipulations are completed, you can tuck the lower ends from the edges, also by 5-7 centimeters. It is best to secure them with tape so that the hat does not fall apart immediately after you unroll it.
At this point the work is completed, the hat can be unfolded and put on the head. The original thing is ready!
From paper
If you want the craft to be more durable and also more believable, then you can make a hat with a paper brim.Children will surely like it, and they will want to quickly go for a walk in it.
 Despite the fact that the technology here is a little more complex, it does not require additional materials and is quite doable if you strictly follow all the instructions.
 You need to fold a regular square from a sheet of paper. Then it is folded diagonally and in half twice to apply the necessary markings that will be needed for further actions.
 After this, you need to return the paper to the state of a square folded in half. The edges are folded inward without connecting the folds along the edges. After this, the folds are opened and pressed for the most satisfactory result.
 All that remains is to turn the craft over and bend the edges, and then the sides towards you, using the markings that were prepared in advance.
Important! Such a hat can be made from newspaper, the material does not matter. Even cardboard will do, but keep in mind that it is more difficult to fold.
With visor
Surely many will be interested in how to make a hat with a visor, that is, a real cap. It will come in handy on a hot day, when there is nothing else at hand that could protect your eyes and head from the sun, and it will not take much time to complete.
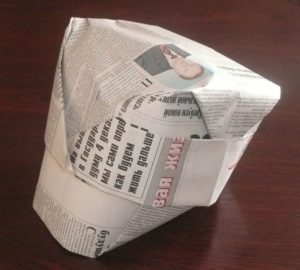 A sheet of paper or newspaper needs to be folded along the “closed” corners, turning the bottom edge out twice. On the other side, special corners are made that will fix the current position of the paper, after which the planes should be bent towards you, taking into account the size of the future cap.
Important! When making any hat, you need to be careful with the dimensions - of course, if it’s just a hobby, then nothing bad will happen if the product is too small or large.When a hat is made for a child to play with, he can be extremely upset by the fact that the cap does not fit on his head. Instead of redoing the thing, you can immediately calculate the parameters, at least by eye.
 The lower end now needs to be bent along the edges, and from it to form peculiar double corners, which are subsequently wrapped inside the craft. Turn the future hat over and fold the larger corner to the bottom edge, tucking it behind the “side”, like the side corners.
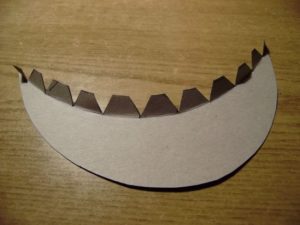 After this, you can straighten the original hat with a visor and put it on your head, forgetting about the harmful sunlight.
From cardboard
Cardboard is a very dense material, so you can make a real top hat out of it, which will not lose its shape and will be an excellent gift for a child.
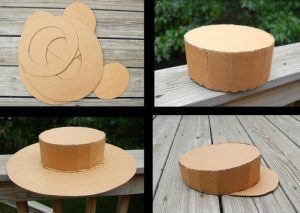 For this model you will need several additional tools: wire, glue, scissors and, if desired, decorative elements - beads, ribbons or something else.
It will be very important to measure your head circumference in advance, because cardboard will not be able to stretch like newspaper.
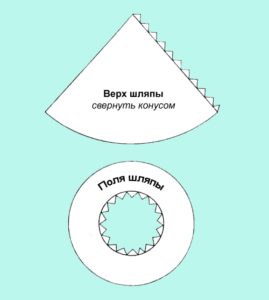
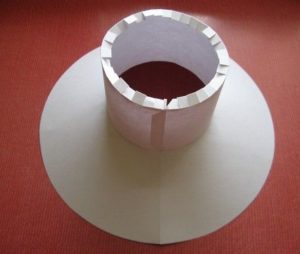
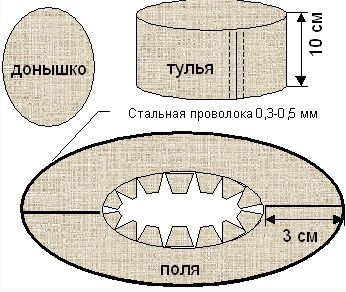 On the cardboard you need to draw a circle equal to the diameter of the head circumference, and also cut the wire of the same size. Stepping back a few centimeters from the circle, draw the brim for the future hat. A rectangle of cardboard is made according to the size of the smaller circle, which is then bent into a circle and secured with glue or a glue gun.
A small circle needs to be glued to the top of this resulting circle.
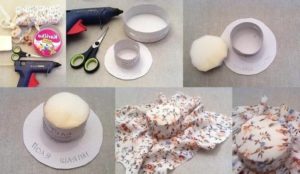
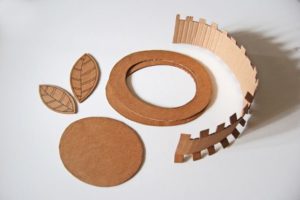 A unique frame for the hat is ready, you can leave it just like that or cover it with fabric and add a few decorative details.
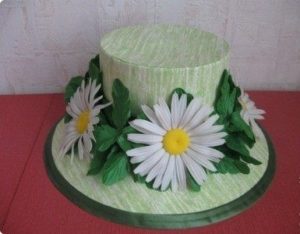 This hat looks believable and beautiful, so it will be useful not only for children's games, but also for various masquerades or even crafts competitions.
Corrugated paper
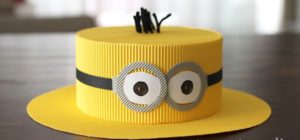
Another fancy option — This is a sports hat made of corrugated paper. First, the sheet of paper is folded in half, and then smoothed out again, after which a strip of non-liquid glue is applied under the fold. Place a strip of cardboard or any thick paper on it so that a little corrugated paper remains at the edges. These edges need to be folded over the sides of the tape and glued to it.
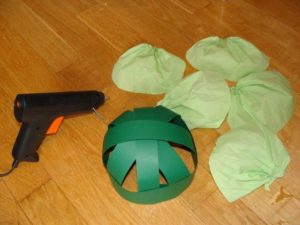 Next, you will need to cut a small strip from another sheet of crepe paper and apply another bead of glue to the edge. It is glued to the first sheet so that the edge of the base coincides with the edge of the tape on which there is no glue. The bottom edge of the first sheet is folded over and another strip of paper is glued to it. Then a kind of fringe is formed with scissors.
 Now A fold is made along the bottom edge of the product - the edge is folded up. In the area of this fold, it is carefully glued or fastened with a stapler. After this, you need to put the hat on your head, and gather the upper part into a bun and secure it - grab it with a cord, and fluff the fringe. Decorating elements can be added upon request. The hat is ready!
Now you know many ways to make a paper hat to suit every taste and skill level.


 Important! When making any hat, you need to be careful with the dimensions - of course, if it’s just a hobby, then nothing bad will happen if the product is too small or large.When a hat is made for a child to play with, he can be extremely upset by the fact that the cap does not fit on his head. Instead of redoing the thing, you can immediately calculate the parameters, at least by eye.
 0
0